Centipede TM-182 1st Printing
Centipede (revision 4) (Atari, 1980) · Technical Manual · 64 pages · 50 sections · original scan
ATARI
| TM-182 1st printing
cay Operation, Maintenance sj / and Service Manual
GAME SERIAL NUMBER LOCATION Your game’s serial number is stamped on a silver identification label. If your ‘.) game is UL-listed, this label is located on the front of the game, underneath the coin door. Otherwise, the label is affixed to the rear panel of the game. The same serial number is also stamped on the chassis of the monitor, Regulator/Audio || PCB, and the Centipede™ Game PCB. Please mention this number whenever calling your distributor for service.
GAME SERIAL NUMBER IDENTIFICATION TAG
REGULATORIAUDIO Il PCB CENTIPEDE GAME PCB
\ 4's UY): peration, Maintenance y A | Erk, and Service Manual U) S \ 4 y i trated Parts Lists Complete with Illust
On.
Copyright © 1981 by Atari, Inc. All rights reserved.
No part of this publication may be reproduced by any mechanical, photographic, or electronic process, or in the form of a phonographic recording, nor may it be stored in a retrieval system, transmitted, or otherwise copied for public or private use, without permission from the publisher.
Published by: ATARI, INC. 1265 Borregas Avenue PO. Box 427 Sunnyvale, California 94086
Lithographed in the U.S.A. 6K
Notice Regarding Non-Atari Parts
WARNING
Use of non-Atari parts or modifications of your Atari game circuitry may adversely affect the safety of your game, and may cause injury to you and your players.
Atari, Inc.’s warranty (printed on the inside back cover of this manual) may be voided, if you do any of the following:
1.) you substitute non-Atari parts in your coin-operated game, or
2.) you modify or alter any circuits in your Atari game by using kits or parts not supplied by Atari.
Not only may the use of any non-Atari parts void your warranty, but any such alteration may also adversely affect the safety of your game, and may cause injury to you and your players. Gentipede™
Table of Contents
Location Setup A. B. c. New Features... 0.6... cece nents Game Inspection . Game Installation. .
- Voltage Plug Selection .
- Interlock and Power On/Oft ‘Switches : Self-Test Procedure .............55 Option Switch Settings .
- Bonus Play Feature.
- Coin Mechanism Multip
- Examples of Game Price Settings Game Play sees
- Attract Mode ...
- Ready-to-Play Mode .
- PlayMode .........
- High Score Initial Mode . OWDDORDRAWWA
Maintenance and Repair A. Cleaning...... - 8 B. Fuse Replacemen » 18 C. TheControl Panel .......... - 18
- LED Start-Switch Replacement . 19
- Leaf-Switch Replacement..... 19
- Mini-Trak Ball™ Maintenance and Repair . .19 D. Monitor Removal ...............065 -21 E. Printed-Circuit Board Removal - 22
- Game PCB Removal ..... . 22
- Regulator/Audio II PCB Removal weese . 22 F. Fluorescent Tube and Speaker Replacement . 23 G. Game Operation... 0.0.0... cece eect eee 24
Illustrated Parts Lists Illustrations and parts lists begin on page 27
List of Illustrations
Figure 1 Overview of Game ... 2 Figure 2 Installation Requirements . . 3 Figure 3 International Voltage Plug Selection . 4 Figure 4 Interlock and Power On/Off Switches ......-.........0.-200 00s - 5
Figure 5 Location of Self-Test Switch, Volume Control and Option Switches ... 6 Figure 6 Self-Test Procedure na ae 7 Figure 7 Game Option Settings . - 10 Figure 8 Game Price Settings . . 11
Figure 9 Coin Counter Option Settings ....... 0.0... c cece eee eee eee Figure 10 Opening the Control Panel and Replacing Switches Figure 11. Mini-Trak Ball™ Maintenance and Repair.......... . Figure 12 Monitor Removal ............ 0. ccc cece eee tenes
Figure 13 Printed-Circuit Board Removal Figure 14 Fluorescent Tube Replacement . Figure 15 Power Distribution ... . Figure 16 Signal Distribution ...
Mlustrated Parts Lists: Figure 17 Cabinet-Mounted Assemblies . . Figure 18 Control Panel Assembly. . Figure 19 = Mini-Trak Ball Assembly .. . . Figure 20 Regulator/Audio Il! PCB Assembly .. .
Figure 21 Centipede™ Game PCR Assembly .. Figure 22 Power Supply Assembly..........-. Figure 23 Fluorescent Light and Speaker Assembly... . Figure 24 American-Made Coin Door... Figure 25 —_British-Made Coin Door ....
WEST and CENTRAL U.S.A. Parts for all Atari customers in the U.S.A. Game sales and service
Atari, Inc. California Customer Service Office 1105 N. Fair Oaks Avenue P. O. Box 427, Sunnyvale, CA 94086 Telex 17-1103 (Monday-Friday, 7:30-4:00 pm Pacific Time) zs From California, Alaska or Hawaii (408) 745-2900 a From anywhere else in this area toll-free (800) 538-1611
EAST US.A. Game sales and service only
Atari, Inc. New Jersey Customer Service Office Cottontail Lane, Somerset, NJ 08873 Telex 37-9347 (Monday-Friday, 7:30-4:00 prr Eastern time) From New Jersey (201) 469-5993 From anywhere else in this area © toll-free (800) 526-3849
EUROPE Parts for all Atari customers in Western Europe. Game sales and service
Atari Ireland Limited European Customer Service Office TIPPERARY TOWN, Tipperary Town, Ireland IRELAND Telex 28165 (Monday-Friday, 9:00-6:00 pm GMT)
@B 062-52155
vi
Location Setup
this assembly are Underwriters Laboratories Listed and Canadian Standards Association Certified. The addition of a foam pad on the rear access panel insures that the safety interlock switch will be completely closed when you lock this panel. Due to environmental factors, these panels can warp slightly, which could cause a switch to remain open. Additional Improvements: The wiring harness has been redesigned so that signal and power wiring are now separated to provide ease of maintenance and troubleshooting. Second, all monitors used are UL-Recognized and CSA-Certified, thus providing the most reliable and highest quality monitors available in the marketplace today. In addition, the power supply chassis has
A. New Features been fitted with a metal bottom plate making it
a totally self-contained unit. The Centipede™ game has several new parts. Fourth, the attraction panel and monitor Even if you are familiar with Atari games, you should shield are now made of tempered glass to
FLUORESCENT LIGHT Mower
ATTRACTION PANEL
MINI-TRAK BALL™™ CONTROL
START: SWITCHES
CONTROL PANEL GAME PCB
REGULATOR/ AUDIO Il PCB COIN DOOR “Ss POWER SUPPLY
POWER ON/OFF Ry SWITCH INTERLOCK SWITCH
Figure 1 Overview of Game
These new parts, as well as all other major parts in the game, are illustrated in Figure 1. Throughout this manual, wherever one of these new parts is mentioned, you will see this symbol:
B. Game Inspection
This new game is ready to play upon removal from the shipping carton. However, your careful inspection is needed to supply the final touch of quality control. Please follow these steps to help us insure that your new game was delivered to you in good condition.
- Examine the exterior of the game cabinet for dents, chips, or broken parts.
- Remove the screws that were used as extra security to seal the rear access panel. Unlock and open this panel, as well as the coin door, inspect the interior of the game as follows: @ Check that all plug-in connectors (on the game harness) are firmly seated. Replug any connectors found unplugged. Don’t force conneciors together. The connectors are keyed so they only go on in the proper orientation. A reversed edge connector will damage a PCB and will void your warranty. @ Check that all plug-in integrated circuits on the game PCB are firmly seated in their sockets. @ Remove the tie-wrap that holds the coiled power cord on the inside cabinet wall. Check the cord for any cuts or dents in the insulation. Place the square black metal strainrelief plate in the wood slot at the bottom of the rear panel opening.
@ Note the location of the game’s serial number--it is printed on the special label on the outside of the game cabinet. Verify that the serial numbers also stamped on the Centipede™ Game PCB, Regulator/Audio || PCB and monitor are all identical. A drawing of the serial-numbered components is on the inside front cover of this manual. Please mention this number whenever you call your distributor for service. @ Check ali major subassemblies such as the power supply, control panel and monitor for secure mounting.
Cc. Game Installation
Figure 2 Installation Requirements Power 130 watts Temperature 0 to 38° C (32 to 100°F) Humidity Not over 95% relative Space Required 64x 82 cm (25% x 32% in.) Game Height 181 cm (71% in.)
- Voltage Selection If you live outside the United States, your Centipede™ game has the “international” power supply with three colored plugs. Before plugging in your game, make sure that the voltage selection plug on the power supply (see Figure 3) is correct for your location’s line voltage. Check the wire color on the plug and see if it is correct per Figure 3.
- Interlock and Power On/Off Switches To minimize the hazard of electrical shock while working on the inside of the game cabinet, an inter- \ock switch has been installed (see Figure 4). One is located behind the rear access panel and one is behind the coin door. These switches remove all AC line power from the game circuitry when a door is opened. Check for proper operation of the interlock switches by performing the following steps: @ Be sure the access panel and the coin door are closed. @ Plug the AC line power cord into an AC outlet. @ Set the power onloff switch to the on position. Within approximately 30 seconds the monitor should display a picture. @ Slowly open the rear access panel. The monitor picture should disappear when the panel is opened approximately 2¥2 cm (1 inch). Close and lock the access panel and repeat this step with the coin door. @ Ifthe results of the preceding step are satisfactory, the interlock switches are operating properly. If the monitor doesn’t go off as described, check to see if the corresponding interlock switch is broken from its mounting or stuck in the on position.
Line Voltage Range Voltage Selection Plug Color 90-110 VAC (100) Violet 105-135 VAC (120)* Yellow* 200-240 VAC (225) Blue 220-260 VAC (240) Brown *This is the only plug provided on the U.S. power supply. The international power supply includes the other three plugs.
a
VOLTAGE © SELECTION
Figure 3
Fuse cover must be in place during game operation.
International Voltage Plug Selection
Centipede
a ‘SWITCH SAFETY COVER
INTERLOCK SWITCH
POWER ON/OFF SWITCH ON
Figure 4 Interlock and Power On/Off Switches ™
D. Self-Test Procedure
Part of the self-test procedure includes a display This game will test itself and provide data to dem- of the operator-selectable game options. Therefore, onstrate that the game’s circuitry and controls are we suggest you run the self-test procedure anytime operating properly. The data is provided on the mon- you need to change the game’s options. itor, the light-emitting diodes in the start switches, and the game speaker; no additional equipment is To run the self-test, follow the instructions outnecessary. lined in Figure 6.
GAME PCB
OPERATOR ION SWITCHES
VOLUME INCREASE: SELF-TEST TURN CLOCKWISE SWITCH nal (U.S) SELF-TEST SWITCH (EURO- PEAN GAMES) VOLUME CONTROL
Figure 5 Location of Self-Test Switch,
Volume Control and Option Switches
Figure 6
Instruction Self-Test Procedure
Results if Test Passes (if results are not as indicated, see list of failures that follows)
1, Begin: Set self-test switch to on position (see Figure 5).
- Trak Ball Test: Roll the Trak Ball control in all directions,
- Switch Test: One after another, activate and release ali 3 controi-panel switches, the slam switch, and coin door switches.*
- Audio 1/0 Chip Test: One after another, press and hold 2 of the conirol-panel switches and at least one of the coin-door switches.
5, Audio 1/0 Channel Test: Press 1-player start button four times.
- Background Color Test: Press 1-player start button at least eight more times.
- Object Color Test: Press 2-player start button at least 16 times.
- Moving Object Test: Watch the screen, and move the Trak Ball around. Place the moving object in an open area of the screen. Press fire button several times.
- Erasing the High Score Table (optional) The current three highest scores are held in permanent memory, even if the game is The monitor displays the picture below. The game produces no sound at all. Tne two LEDs will stay on throughout self-test.
The centipede head moves around on the screen in directions corresponding to Trak Ball control.
As long as you activate (close) each switch, you'll hear a high beep.
Volume increases and pitch decreases with each additional switch that is activated.
You'll hear a high beep for each press of the button.
Background color changes with each press ot the 1-player start button.
Objects on playfield change color.
Each press of the fire button changes the moving object to another moving object. At certain points in the series, the object will disappear. This is not a failure indication.
AD unplugged. If you want to erase these scores, first check that tne number 4 is not dis- Played in the tar upper left corner of the screen. If this number is not displayed, then simultaneously press the start and fire buttons. The 4 FF message in the upper left corner of the screen will then be displayed. The average game time data will also be erased, but still displayed on the screen. If 4 is present, then the scores will be erased when you return to the attract mode.
- End: When satisfied with test, set self-test switch to off position.
- Activate coin switches by inserting at least one coin in each coin slot. You will not trip the coin counters as long as you stay in self-test.
ALL SWITCHES & TRAK-BALL (NPUTS
C, RCOIN MECH MULTIPLIERS (LR if you have a 2mech coin door)
GAME DIFFICULTY SETTING ENTIRE CHARACTER SET
NO. OF LIVES AT START OF GAME
TOTAL NO. OF CREDITS PLAYED
AVG. GAME TIME : (accurate to +3 secs.)
Figure 6 Self-Test Procedure, continued
Results if Test Fails
- Begin: RAM FAILURE is indicaied by one to 10 beeps. Note the number of beeps and determine which RAM may be bad. To restart the test, press the reset pushbutton on the game PCB, or set the selftest switch to off, then again to the on position. Possible Bad Number of Beeps Given RAM Chip Location H2 F2 K7 KS
L5 M7 MS N7 10 NS Any bad RAM must be replaced before the computer can check the other RAMs, as well as continue with the self-test. OND DaRONH
ROMIPROM FAILURE is indicated by two groups of numbers in the upper left corner of the screen. The number at the far left indicates the location of the failing PROM/ROM(s). Identify the bad ROMIPROM with the table below. If the screen displays “garbage," or the logic produces strange audio or randomly activates the coin counters, the chip at location J1 is probably bad. Ignore the hexadecimal numbers just to the right of the chiplocation number. Failing ROM/PROM Displayed Number Chip Location O DI 1 €1 2 FIH1
3 or “garbage” Jt AS
4* Es* 5 BIC/D3 “If you replace or erase this ROM, the number 4 FF wiil be dis- Played throughout the self-test. The next time you enter self-test, the 4 disappears after a game is played. Otherwise the self-test will continue to display the numbers 4 FF.
- Trak Bail Test: The character doesn’t move in same direction as ball, jumps rather than moves smooihly, or doesn't move at all. One of the Coupler PCBs on Trak Ball contro! may be bad, harness wires or connector may be loose, Trak Ball reading circuitry on Game PCB may be bad, or Trak Ball bearings may need oiling.
- Switch Test: Sound is constantly on, even though you are not activating any ‘switch. Or, no beep is given for any switch, or LED is dark, Indicates a bad switch, loose harness wires, bad LED-driving circuitry, volume turned all the way down, or loose connector.
- Audio /O Chip Test: No increase in volume or decrease in pitch indicates bad custom audio WO chip at location B/C/D3.
- Audio /0 Channel Test: On one out of the four activations, no audio is produced. Indicates ‘one channel is bad in the custom I/O audio chip at location B/C/D3 (replace entire chip).
- Background Color Test: Background doesn’t change color, or doesn't display ail 16 colors. Indicates bad color RAM chip. (RAM failure would have been indicated earlier with from 3 through 10 beeps.)
- Object Color Test: Objects don't change color, or don't display all 16 colors. RAM failure.
- Moving Object Test: Object doesn’t change to another object. ROM/RAM failure.
E. Option Switch Settings
- Bonus Play Feature Centipede™ offers a bonus play for certain combinations of coins inserted. This bonus feature is operator-selectable, meaning you may choose to offer it or not.
For example, with your game set at 50¢ per play, players who deposit four successive quarters or a $1.00 coin, then press the start button, will receive a bonus coin. Therefore, players receive 3 plays for $1.00.
This bonus feature encourages players to insert more money than just the minimum 50¢ you could require for one game. Various other bonuses are available (see Figure 8).
- Coin Mechanism Multipliers Available since early in 1980, Atari games have a new coin door which has either two or three mechanisms. All recent Atari game PCBs identify the different mechanisms in a certain pattern.
The right coin mechs are all the same to the game’s logic, regardless of whether you have two or three mechs in your door. In addition, the logic sees the ieft mech in a 2-mech door and the center mech in a 3-mech door as the same. Refer to the diagram below.
[ase [s1 [ese] |[zse! |[s1
This pattern is important for you to know, so you can correctly set the “multipliers” for each mech. The multipliers determine how much each mechanism will be worth to the game's logic. The basic unit of measurement is 25%, which equals a muitiplier of x1. Therefore, if you have a 25¢/25¢/$1 coin door, you will probably want to set the center and right option-switch multipliers at x 1/x 4. (The left mech in a 3-mech door aiways has a value of x 1—you cannot change its value.)
You can set these multipliers with toggles 3 thru5 on the Centipede Game PCB switch assembly at location N8. For exact settings of these toggles, refer to Figure 8.
- Examples of Game
Price Settings
Figure 8 explains the options, giving twelve examples of the most common U.S. situations. The toggles mentioned are all in the switch at location N8; they only relate to game price, coin mechanism multipliers, and bonus play. You should set the toggles relating to other functions as you see fit, although Figure 7, 8, and 9 provide “$” signs indicating Atari’s recommendations.
Figure 7 Game Option Settings To change toggle positions on the switch assemblies, you need not remove the game PCB. The switches, usually Colored blue, are easily accessible when the Centipede Game PCB is mounted in place. When changing the options, verify proper results on the monitor display by performing the self-test. Note that changing an option on any of the following eight toggles will not cause an immediate change on the monitor screen during the attract mode.
Toggle Settings of 8-Toggle Switch on Centipede Game PCB (CENTER switch assembly when PCB is in game) 8 7 6 5 4 3 2 (at N9)
1 Option
On On Off oft
On On On Off Ott On
Off Off
On On On. Off off On
On Off
On Off On English $
Off German
On. French oft Spanish 2 lives per game 3 lives pergame $ 4 ives per game 5 lives pet game Bonus life granted at every: 10,000 points 12,000 points $ 15,000 points 20,000 points S Hard game difficuity* Easy game difficulty* $
1-credit mininum $ 2-credit minimum
$ Manufacturer's suggested settings
- Refer to F. Game Play, for information on game difficulty. For pricing for “credits,” see Figure 8. Changing toggles 3-7 erases the high score table.
Figure 8 Game Price Settings
The white block below contains Atari's suggested settings. All Circled numbers refer to game pricing labels you should use numbers 1 thru 8 are toggle settings on the 8-toggle switch at lo- with each situation (labels are on the following page). Use the cation N8, on the Centipede™ Game PCB (the LEFT switch as- label no. 6 (indicated with 6) only if you set toggle 8 at PCB sembly). switch assembly N9 to off.
50¢ PER CREDIT
Bonus Bonus $.75 = 2 credits No bonus $1.00 = 3 credits $1.00 = 3 credits
Straight 25¢ Door
25¢/$1.00 Door or 250/25¢/$1.00 Door
25¢ PER CREDIT
Bonus Bonus No bonus $.50 = 3 credits 5 credits
| 87 | 6 | 5 | : | - | 7 | 6 | 5 |
Straight @ otf of of oft :
25¢ Door
| ® | 4 | 3 | 2 | 1 |
| Off | Off | On | Off |
25¢/$1.00 Door or 250/25¢/$1.00 Door
ab
Figure 8 Game Price Settings, continued The switch settings below relate to options for game price, coin mechanism multipliers, and bonus play. This information is useful in case you need to temporarily set the Centipede™ game on free play, or if you have German coin mechanisms in your door. To achieve bonus plays, all coins must be inserted before pressing the start button. The label no. 6 shown below should be used only if you set toggle 8 at PCB switch assembly NQ to off.
Toggle Settings of 8:Toggle Switch on Centipede
PCB (at N8). LEFT switch when PCB is in game
| 8 | 7 | 5 | 4 | 3 | 2 |
On On Off Off
On On On Off
Off On
Off Off
On Off
| On | On | On |
| On | On | Off |
On Off On
| on | Off | Off |
Oft On On Off On Off
1 Option
On Free play
Off 1 coin* for 2 credits
On 1 coin* for 1credit $ Off 2coins* for 1 credit
Right coin mech x 1 $ Right coin mech x 4 Right coin mech x 5 Right coin mech x 6 Left coin mech x 1 $ Left coin mech x 2
No bonus coins $
For every 2 coins* inserted, game logic adds 1 more coin*
For every 4 coins* inserted, game logic adds 1 more coin* For every 4 coins* inserted, game togic adds 2 more coins*
For every 5 coins* inserted, game logic adds 1 more coin*
For every 3 coins* inserted, game logic adds 1 more coin*
*In the U.S., @ “coin” is detined as 25¢ In Germany a “coin” is 10M.
$ Manufacturer's suggested settings
Game Pricing Labels
e J, @@ 2 coins =1 play ATARI
e A = 1 play ATARI
@ ee @ 4 coins = 3 plays ne @@ 2c coins ™" @@@ 3 coins 000 @ 4 coins
° ee 2 coins = 1 play AS @ $1 coin =3 plays (Susan B. Anthony coin)
on @ 1 coin = 1 play ame’ 2 play minimum (2 coins = 2 plays)
(For operator use—write in the appropriate phrase. Use @ permanent-ink water-resistant marker.)
Figure 9 Coin Counter Option Settings
[These toggles determine which coin mechanisms activate which counters]
Toggle Settings of 4-Toggle Switch on Game PCB (N11) Two coin acceptors Two coin acceptors and a pushbutton utility coin switch in the game: Three coin acceptors in the coin door:
| 4 | 3 | 2 | 1 | in the coin door: |
| On | On | Both acceptors activate all coin |
counters simultaneously.
| On | Off | Both acceptors activate 2 count- |
ers separately. BoB 3.3
| 3 | Ss | Off | On | Both acceptors activate all coin |
| z= | 2 | counters simultaneously. | ||
| Off | Off | Both acceptors activate 2 count- |
ers separately. $ Do not use this setting.
Do not use this setting.
Utility coin switch will not activate a coin counter, if you do not hook it up. Both acceptors activate all coin counters simultaneously.
Utility coin switch will not activate a coin counter, if you do not hook it up. Left and right acceptors activate 2 coin counters separately. All 3 are same denomination and they activate all coin counters simultaneously.
Left and center acceptor activate ‘one coin counter; right acceptor activates another coin counter.
Left acceptor activates one coin counter; center and right acceptor activate another coin counter. Not for any currently designed 3-mech coin door.
Left, center and right acceptors activate 3 coin counters separately. $
$ Manufacturer's suggested settings
F. Game Play
Atari’s Centipede™ game is a one- or two-player game with a color raster-scan monitor. The fast-moving action includes a variety of creatures dropping down from the top of the screen or flying in from its sides, most of them to attack the player. The player’s shooter is represented on the screen by a somewhat humanoid head.
The player’s goal is to shoot at and destroy as many of these creatures and mushrooms as possible for a high point score, before the player’s lives are used up. Players can maneuver their Trak Ball™ control anywhere within approximately the bottom fifth of the screen. However, they must move around mushrooms, since these are fixed, not “transparent’, objects. A fire button shoots individual shots upwards, or fires a hail of shots if pressed constantly. (Only one shot appears on the screen at a time.)
The game has five possible modes of operation: attract, ready-to-play, play, high score initial, and self-test. Self-test is a special mode for checking the game switches and computer functions. You may enter this mode at any time. When entered, all game credits are cancelled. Wait at least eight seconds after a game has been played before entering selftest or turning off ihe power. Otherwise, you may erase the high score table.
- Attract Mode The attract mode begins when power is applied to the game, after a play or high score initial mode, or after seli-test. This mode is continuous and is only interrupted when a game is paid for and accepted or when in self-test. In this mode, the monitor displays two pictures simultaneously.
One of the pictures is operator-seleciable for one of four languages. Placed in the center of the screen, the picture shows the high score table, game price, and the bonus-life achievement level. If the operator sets the Centipede game for free play, the game will not display a game price message.
The high score table shows the eight highest scores and their matching initials. If you erase the special “permanent” memory (see Figure 6, Self- Test Procedure), then this table will contain fictitious scores and initials. The table is redeveloped from subsequent games with scores of more than 12,102 points. Subsection 4, High Score Initial Mode, explains this table in more detail.
Operators may choose one- or two-credit minimums by selecting one of the option switch settings on the game PCB (see Figure 7, Game Option Settings).
If the game is set for a 2-credit minimum, that message will be displayed on the screen. (No special message appears if Centipede is set to the opposite setting, namely 1-credit minimum.)
The other picture surrounds the high score table, game price and bonus-life achievement level messages. That picture displays a typical game-play sequence, with a field of colorful mushrooms through which a centipede crawls. The spiders bounce in from the sides of the screen, and fleas occasionally drop down from the top. In addition, scorpions will cross the screen at almost any point.
In this mode, the action exactly duplicates a typical game played by a moderately skilled player: the player's shooter moves freely within the limits of motion, shooting at spiders, centipedes, fleas and scorpions. Periodically the player is “destroyed” when a flea, spider or centipede head or body collides with the player's shooter.
All the colors on the screen change with each wave. A new wave occurs when the player shoots all centipede parts remaining on the screen. At this point, a new centipede starts snaking its way down from the top of the screen.
The attract mode differs from real game play in that no head figures are shown at the top of the screen to represent the number of lives remaining, no sounds are produced, no scores are incremented, and none of the four player controls work.
At any time when the game is powered up, if the coin-door slam switch is closed, you will hear a special alarm sound. This sound alerts location personnel that the game has been abused.
- Ready-to-Play Mode This mode begins when sufficient coins are accepted for a one- or two-player game. It ends when the 1-player start or 2-player start pushbutton is pressed. When this mode begins, the message CRE- DITS __ is displayed in the middle of the screen. The pictures are otherwise the same as those shown in the attract mode.
If you select the two-credit minimum and a player inserts enough money for only one credit, the message 2 CREDIT MINIMUM flashes on the screen until enough coins for the second credit are inserted.
In addition, CREDITS 017 is displayed if you have seiected the option of two coins per credit, and the player has inserted only one coin. A “credit” is defined as the cost for each player to play one game. In other words, two credits will pay for: @ one player playing two games, or @ two players playing one game.
- Play Mode The play mode begins when any flashing start pushbutton is pressed. The mode ends when the player’s last life is lost.
A player’s shooter is enabled at the beginning of the play mode, and the audio starts. The appropriate LED start switch will then stay lighted until the end of the game. At this point it will flash if any credit remains.
The game begins with a playfield of randomly placed mushrooms. A centipede starts snaking its way across from the center top of the screen. The centipede changes direction when it runs into a mushroom or either the left or right boundaries of the playfield.
When a centipede is shot, it breaks into two smaller ones, each with a head. Also, the part of the centipede that was shot leaves a mushroom in its place on the screen. When any centipedes reach the bottom of the screen, they start back up, but remain within the area of the player's shooter (the bottom fifth of the screen).
When a large centipede (that hasn't been shot yet) reaches the bottom, it releases its tail, and this part changes into a new head. Also to provide player challenge, if a centipede is still alive when it reaches the bottom, new heads will enter the screen almost at the bottom of the sides. More of these heads will appear as time progresses.
The randomly moving spiders also appear in the first wave. The spiders can desiroy a player, as well as any mushrooms they move over. This eliminates many mushroom targets for a player.
The player's shooter is moved by rotating the Trak Ball™ control. The shooter can be moved in ali directions, but only within the bottom fifth of the screen. Pressing the fire button causes the shooter to fire shots upwards, either singly or in rapid-fire mode, if held down constantly. Mushrooms count 1 point when shot, and a player must fire four shots into a mushroom before it is destroyed and disappears. Centipede body paris count 10 points each, and the elusive heads (represented with small eyes on ther) are worth 100 points each. Spiders are worth 300, 600 or 900 points, depending on how close they are to the player when shot.
A bombardment of fleas starts in the second wave; as the fleas descend, they leave a trail of new mushrooms behind them.
In the second wave, the fleas appear when a certain number of mushrooms remains at the bottom of the screen. This number increases as the game progresses, meaning fleas appear more often later on in the game.
Fleas have a value of 200 points when shot, and players must hit them twice to destroy them (the first shot just speeds them up).
The scorpion enters from either side starting in the fourth wave; it moves at a relatively slow speed. Later it increases its speed. When shot, a scorpion counts 1000 points—the highest-value target of all.
As it travels across the screen, it “poisons” the mushrooms that it moves over and changes their colors. These mushrooms cause any centipedes that would collide with them to head straight towards the bottom of the screen, rather than continue snaking around. Players can stop a poisoned centipede by shooting its head.
In addition, these poisoned mushrooms as well as any partially shot mushrooms add 5 points to the player’s score at the end of each life when the screen is resetting.
If the players are very skilled and earn at least 60,000 points, two things happen to increase player challenge: the fleas descend at a faster speed and the spiders restrict their movement to a smaller area at the bottom of the screen. (oN An important new feature of this game is the operator option for easy/hard game difficulty. In the easy game, the spider moves slowly up to a 5,000-point score, and then bounces at a higher speed. {t also changes direction less often throughout the game than at the hard setting.
In the hard setting, the spider moves slowly only for the first 1,000 points, and then speeds up. It also changes direction more often throughout the game. In either setting, the spider always moves at a 45-degree angle or straight up and down.
Another operator option is the number of lives per game, ranging from 2 to 5 (see Figure 7 for switch settings). This number is displayed as small shooters at the top of the screen. The number is decreased by one each time a player is destroyed. The number is increased by one each time the player scores multiples of 10, 12, 15 or 20 thousand points, depending on the operator selection.
- High Score Initial Mode If a player's score exceeds the minimum on the high score initial list, he or she may put up to three initials on this list at the end of the game. At the beginning of this mode, the characters A ____ appear on the screen. The logic will also display the messages GREAT SCORE and ENTER YOUR INITIALS.
Players enter initials one character at a time, choosing from the characters A thru Z and a blank space. Pressing the fire button selects the letter, and rolling the Trak Ball control changes the letters on the screen.
After the fire button is pressed the third time, the initials and score are transferred to the table. This table contains eight scores and appears during the attract and ready-to-play mode.
All but the highest three scores are erased whenever you enter the self-test, or press the RESET button on the game PCB, or turn off the power. This resetting replaces the lowest five scores with fictitious scores and initiais.
If you erase the special “permanent” memory, the high score table is replaced with eight fictitious scores and initials. In other words, the table will always be displayed on the screen, possibly consisting of one or more realistic scores and players’ initials.
Maintenance and Kepair
All games require certain maintenance to keep them in good working order. Clean, properly maintained garnes will attract players and earn more profits.
The most important maintenance item is running the self-test every time you collect money from the coin box. Just looking at a game will not tell you if Mini-Trak Ball™ control, leaf switch or light-emitting-diode (LED) switches are broken, or if LEDs have burned out. The self-test will inform you of any of these possible problems.
Second, you should regularly clean the outside ot the game and the coin mechanisms. In addition, you will need to regularly lubricate the Mini-Trak Ball control: for details see this chapter.
NORMALLY CLOSED (N.C.) CONTACT
NORMALLY OPEN —~—_ (N.O.) CONTACT
LIGHT-EMITTING-DIODE —" (L.E.D.) CONTACTS To remove LED switch: , 7
@ Remove all wires from the faulty switch. @ Turn the switch counterclockwise while holding the black cone-shaped bushing on the outside of the control panel. @ Install a new switch using the reverse procedure. @ Reconnect the harness wires.
VERT-MOTION PCB: GREEN, RED, BLACK & YELLOW WIRES
HORIZ.-MOTION PCB: BLUE, RED, BLACK & VIOLET WIRES
WHTJBLK. STRIPE
RED
BLACK
Figure 10 Opening the Control Panel and Replacing Switches
A. Cleaning
The exterior of the game cabinet and the metal and glass surfaces may be cleaned with any nonabrasive household cleaner. lf desired, special coin machine cleaners that leave no residue can be obtained from your distributor.
The large monitor shield and the attraction panel are made of tempered glass and should be scratchresistant: if cleaned without abrasive substances, you should hardly ever have to replace them.
B. Fuse Replacement
This game contains six fuses—all on the power “SS
supply assembly (not including the monitor fuses). Replace fuses only with the same type as listed in Figure 22 of this manual. See the color monitor manual for the monitor fuse data.
C. The Control Panel
Prior to repairing or replacing any switch or the Mini-Trak Ball™ on the control panel, unplug the game. Then open the coin door.
Reach through the coin-door opening and open the luggage-style latch, located at each end on the underside of the contro! pane! (see Figure 10). Lift up on the contro! panel at the topmost edge and tilt it towards you.
The edge of the contro! panel next to the monitor shield has foam tape applied to it. This tape acts as a cushion for the glass and prevents spilled liquids from entering the cabinet interior. Always make sure this tape is in good condition.
- LED Switch Replacement The light-emitting diode (LED) switches on the control panel have a very low failure rate. In case a switch should ever be suspect, first test it per the description that follows. To replace the switch, refer to Figure 10.
- Remove the wires from the suspected switch.
- Set multimeter to ohms scale. Set ohms scale to Rx 1, then zero the meter.
- Connect multimeter leads to appropriate LED switch contacts (see Figure 10 for designation of switch contacts).
- Check contacts (push and release the switch button) for closed and open continuity.
- If the contacts do not operate sharply or always remain closed or open, then replace the LED switch as outlined in the figure.
- Leaf-Switch Replacement
The leaf switch on this game operates on 5 volts at a very low current. Therefore, pitting of the switch would be extremely rare. Probably the only reason that pitting would occur is that the game is in very high-humidity locations. Don’t burnish the switch contacts. Burnishing them removes their plating, thus increasing the corrosion of the contacts. The best method of cleaning the switch contacts is to wipe them with a non-abrasive surface. A business card works very well.
To replace the switch, remove both of its screws with a Phillips-head screwdriver.
If the white button itself needs to be replaced, tum the stamped nut with a wrench in a counterclockwise direction, as seen from the inside of the control panel. The white ring on the outside of the control panel should not spin, due to its design.
- Mini-Trak Ball™ Maintenance and Repair
To maintain this control, lubricate the bearings approximately every 3 months or every 6,000 credits. The number of credits can be read off the coin counter, located on the coin door. Use only 2 drops of 3-in-One® oil in each of the ball bearings. (Each Mini-Trak Ball™ control has six bearings.)
For further instructions on how to replace the ball, either coupler PCB or either encoding wheel, see Figure 11. “=
Disassemble in the order indicated. (Circled numbers match the steps described below.)
Ball Replacement a
2. First remove the entire Mini-Trak Ball assembly from the control panel as shown in Figure 11. Now locate the six “twinlead” thread-forming screws in the black frames or plastic pieces; remove these six screws. Lift off the top frame; remove and replace the ball.
Coupler PCB and Encoding Wheel Replacement Lift the PCB out of its slot. Carefully unplug the red connector on the coupler PCB. To replace either encoding wheel, remove the PCB from its slot. Remove the socket-head machine screw, flat washer, and split lock washer that secure the encoding wheel. Remove the wheel. When replacing the coupler PCB, be certain that the black metal encoding wheel has not been bent or damaged. It should turn freely between the two halves of the red photosensor device.
LUBRICATE HERE (6 PLACES)
Figure 11 Mini-Trak Ball™ Maintenance and Repair
D. Monitor Kemoval
The following procedure should only be performed by a qualified service technician.
- Be sure the game is unplugged from its wall outlet! Unlock and open the rear access panel, coin door, and control panel.
- Remove the glass monitor shield. Carefully remove the four staples that secure the blue cardboard bezel. As an extra precaution, we highly recommend you discharge the high voltage from the picture tube.
- Standing at the rear opening of the game, locate the 2-pin and 6-pin harness connectors for the monitor. Unplug both of these.
- At the bottom rear of the monitor chassis is a wood screw that secures rear part of the chassis. Remove this screw.
- From the front of the cabinet, locate the flat washers, and self-locking hex nuts (two sets underneath, and two sets above the monitor screen). This hardware attaches the monitor to the cabinet. Remove this hardware.
- Carefully pull the monitor chassis out of the cabinet towards you.
Disassemble in the order indicated. (Circled numbers match the steps above.)
Figure 12 Monitor Removal
E. Printed-Circuit Board Kemoval
You may wish to remove the Centipede™ game printed circuit board (PCB) or the Regulator/Audio |! PCB for service or inspection. To do this, refer to Figure 13 and proceed as follows:
1. e e Game PCB Removal Unlock and open the rear access panel. Remove the 24-pin and 44-pin edge connectors from the right side of the game PCB. Locate the Phillips-head screw that extends through the PCB and into the two wood blocks. (at the right side of the board). Remove and save this screw, as well as the fiber spacers. Remove the PCB from the cabinet by carefully sliding it straight out of the plastic PCB retainer. Be careful not to twist the board, as this may loosen connections or components. Replace or repair as necessary. After servicing, reinstall the PCB, making sure that the edge connectors are properly plugged in.
Regulator/Audio Il PCB Removal Unlock and open the rear access panel. Remove the five plug-in connectors on the Regulator/Audio Il PCB. Note that all of these connectors are keyed for proper orientation. Locate the two Phillips-head screws that extend through the PCB and into the wood behind the PCB. Remove and save these two screws and the two fiber spacers. Remove the PCB from the interior wall of the cabinet by lifting it up and out of the wood slot.
REGULATOR! AUDIO I PCB
Figure 13 GAME PCB
Printed-Circuit Board Removal
Figure 14 Fluorescent Tube Replacement
F. Fluorescent
To replace speaker or the white fluorescent tube
Tube and behind the front graphics attraction panel, follow
Speaker this procedure (see Figure 14).
- Be sure the game is unplugged from its wall out-
Speaker this procedure (see Figure 14) Replacement let. Remove the three Allen-head screws at the
top of the game (they secure the black metal retainer for the attraction panel). Lift the attraction Panel up and out of its lower retainer.
- If you need to replace the speaker, remove the
WARNING two Phillips screws that secure the light board
If you drop a fluorescent tube and it breaks to the cabinet, and slide out the whole assemit will implode! Shattered glass can fly 6 bly. The fluorescent light and speaker harness feet or more from the implosion. Use care has extra length, so you can pull the assembly when replacing any fluorescent tube. about one foot out of the game. Unplug the harness connector just behind the board.
- Remove the two plug-in connectors on the speaker. Remove the speaker from the wood board and replace it.
- To replace the fluorescent tube, slightly rotate it up or down, and carefully remove it from the {ampholders.
- Replace with a new tube. Never force the tube into the lampholders—you may break it, causing an implosion!
- Also check that the green ground wire is securely attached to the large metal bracket and the oS ballast transformer behind the wood panel. If the lamp is not grounded, it may not start.
- If you removed the light and speaker assembly, reconnect the hamess connecior; then reinstall ihe assembly. Replace the attraction panel on the front of the game.
G. Game Operation
With this manual you received two large sheets that contain the wiring and schematic diagrams for the Centipede™ (upright) game. Sheet 1, Side A, includes a “table of contents” that shows the arrangement of these diagrams. They explain the functions of the circuits; the diagrams also define inputs and outputs.
Atari’s Centipede™ is a microprocessor-controlled game. The microprocessor is mounted on the game PCB. The game PCB receives switch inputs from ihe control panel and coin door. These inputs are processed by the game PCB and output to the monitor, Regulator/Audio Il PCB, loudspeaker, and control panel.
The Regulator/Audio || PCB performs two functions: 1) it regulates the +10 VDC from ihe power supply to +5 VDC, and 2) it amplifies the audio output from the game PCB. The +5 VDC from the Regulator/Audio Il PCB provides most logic power to the game PCB. The audio output from the Regulator/- Audio || PCB directly drives the game speaker and is controlled by the volume control, mounted on the bracket inside the coin door.
The power supply is the source of all voltages in the game. These voltages are protected by three fuses (F3, F4 and F5) on the power supply chassis. The primary winding of the power supply transformer is protected by ihe fuses F1 and F2 on the power-supply chassis.
Figure 15 illustrates the distribution of power in this game. Figure 16 illustrates the distribution of signals.
FLUORESCENT TUBE
COLOR MONITOR
CONTROL PANEL
COIN DOOR
aN
INTERLOCK SWITCHES S44 GAME PCB
-~S POWER SUPPLY 15 vac 6.3 VAC
AC POWER CORD
REGULATOR! AUDIO II PCB
POWER ON/OFF SWITCH
Figure 15 Power Distribution
Figure 16 Signal Distribution Q Q Zz fey Za ‘START LED ‘STARTT START2
TRAK BALL H DIR & CLK
TRAK BALL V DIR & CLK
FIRE
COINL.GR
SELF-TEST
SLAM
COIN COUNTLGR SPEAKER 182 Lf —, \__\ i
Le)
Aupio ouT
CONTROL PANEL
COMP SYNC
a | [7 [7 RED, GREEN, BLUE
[ / | ry | [7 VOLUME CONTROL
zn s8 2 oF ES =5 = 33 3 we o COLOR MONITOR SPEAKER
Illustrated Parts Lists
—<— =P ): —S, Jj >( € —)
This chapter provides you with the necessary information for ordering replacement parts for your Centipede™ game. Please note that, for simplicity, common hardware has been deleted from most of these parts lists. This includes screws, nuts, washers, bolts, etc.
The parts lists are arranged in alphanumeric order. For example, all “A-” prefix numbers come first. Following this are numbers in sequence evaluated up to the hyphen, namely 00- thru 99-, then 000598-thru approximately 190000-.
When ordering parts from your distributor, give the part number, part name, applicable figure number of this manual, and serial number of your game. This will help to avoid confusion and mistakes in your order. We hope the results will be less downtime and more profit from your game.
037411-01 (Attract. Panel)
003053-01 (Lower Retnr.)
037443-01 (Mon, Bezel)
Control Panel Assy.— see Figure 18
178013-001 (Latch)
19-9032 (Vol. Ctr) 69-001 (Selfest Sw.) 030168-01 (Bracket)
Coin Doors— see Figures 24, 25
036686-01 (Game Pricing Labels— not shown for clarity)
78-3201 (Leg) 92-049 or 92-051 (Monitor) mS Fluor. Light & Spkr.— see Figure 23 03649801 (Uppet Retnr.)
036495-01 (Spkr. Grille)
037413-01 (Mon. Shield)
Mini-Trak Ball— see Figure 19
71-2110 (Lock)
037427-01 (Foam Pad)
037419-02 (Rear Panel)
036262-01 (Coin Box Brkt.)
A035943-01, -02 or -03 (Coin Box) 035942.01 (Separator)
Figure 17 Cabinet-Mounted Assemblies A037397-xx A
NOTICE TO ALL PERSONS RECEIVING THIS DRAWING CONFIDENTIAL: Reproduction forbidden without the spe- = abel uals— cilic written permission of Atari, inc., Sunnyvale, CA. This Schematics, Self-Test Label & Manuals drawing is only conditonaly issued, and netiner receipt nor see parts list on following page possession thereof confers or transfers any right in, or li Gense to use, the subject matter of the drawing or any de sign or technical information shown thereon, nor any right to reproduce this drawing or any part thereof. Except for manutacture by vendors of Atari, Inc., and for manufacture under the corporation's written license, no right to repro: duce this drawing is granted or the subject matter thereof unless by written agreement with or written permission from the corporation:
037399-01 (Cab't Assy.)
178034-024 (FMolding)
A037456-01. (Pwr. Harness)
035745-02 037443.02: OB Rett Coin Defictr.) (PCB Retnr.)
034536-03 A037450-01 (Vibra, Damper) (Interl. Sw./Brkt.)
Game PCB— 007882-02 see Figure 21 (Inter, Sw. Cvr)
75-07017 (PCB Spacer)
78-24012 (PCB Tie Wrap)
_ ‘A037433-01 ere (Main Harness)
034536-02 (Vibra, Damper) A037453-01, A037454.01 or Assy-— A037455-01 Eee pine ee (Power Cord) 037243-01 \ (Plate)
4037470-01 Pi \ > (On/Ott Sw./Mtg. Plate) fn 009992-01 vd (On/Off Sw. Cvr.)
Figure 17 Cabinet-Mounted Assemblies A037397-xx A
Figure 17 Cabinet-Mounted Assemblies, continued Parts List
Part No. Description A035943-01 Deep-Well Coin Box Assembly (for ail the same coins) A035943-02 Deep-Well Coin Box Assembly (for two different coin denominations—has one separator) A035943-03 Deep-Well Coin Box Assembly (for three different coin denominations—has two separators) A037433-01 Main Harness Assembly A037450-01 Interlock Switch/Bracket Assembly (modified for safety) A037453-01 Strain-Relief Power Cord U.S.) A037454-01 Strain-Relief Power Cord (Austria, Belgium, Chile, Denmark, Finland, France, Germany, Greece, Indonesia, Italy, Netherlands, Norway, Spain, Sweden, and Uruguay) A037455-01 Strain-Relief Power Cord (Australia and New Zealand) A037456-01 Power Harness Assembly 4037470-01 Power On/Oif Switch/Mounting Plate Assembly The following six items are the technical information supplements to this game: DP-182-01 Centipede™ (Upright) Schematic Drawings (Sheet 1) DP-182-02 Centipede Schematic Drawings (Sheet 2) ST-182 Centipede Label with Self-Test Procedure and Option Switch Settings TM-160 Instruction and Service Manual for 19-Inch Electrohome Color Monitor, or TM-168 Instruction and Service Manual for 19-Inch Wells-Gardner Coior Monitor TM-182 Centipede Operation, Maintenance and Service Manual 19-9032 Volume Control 69-001 OPOT SeltTest Switch (for British-made coin doors) 71-2110 Panel Cartridge Lock Mechanism (for rear access panel) 75-07017 Spacer for Mounting Printed Circuit Boards 78-24012 5-Inch Beaded Nylon Tie Wrap (for game PCB edge connectors) 78-3201 Cabinet-Leveling Leg 78-6900402 Vinyl Foam Single-Coated-Adhesive Tape, %-Inch Thick x V4-Inch Wide (2 x 24 in. req’d.) 92.049 19-Inch Electrohome Color Raster-Scan Monitor, or 92-051 19-Inch Wells-Gardner Color Raster-Scan Monitor 003053-01 Lower Attraction-Panel Retainer 007882-02 interlock Switch Cover 009992-01 On/Off Switch Cover 030168-01 Volume Control Mounting Bracket (a/so holds self-test switch in games with British-made coin doors) 034536-02 Foam Vibration Damper (for Regulator/Audio Il PCB) 0345236-03 Foam Vibration Damper (for Centipede game PCB) 035745-02 18-Inch Plastic PCB Retainer 035942-01 Deep-Well Coin Box Separator 036262-01 Coin Box Bracket 036495-01 Speaker Grille 036498-01 Upper Attraction-Panel Retainer 036686-01 Card of Game Pricing Labels 037243-01 Metal Base Plate (located underneath power supply) 037399-01 Cabinet Assembly (includes legs and PCB retainers, but not the rear access panel) 037411-01 Attraction Panel with Graphics 037413-01 Monitor Shield with Graphics 037419-02 Rear Access Panel (does not include lock) 037427-01 Rear Access Panel Foam Pad 037443-01 Biue Cardboard Monitor Bezel i *.)) 037443.02 Cardboard Coin Deflector 178013-001 Spring Oraw Latch 178034-024 %-Inch Black Plastic TMolding
oN MiniTrak Ball Assy.— 786900402 see Figure 19 (Foam Tape} 75-9910NO (Stamped Nut)
A037408.01 NP Grey 033127-01 (Sw. Bushing)
A037435-01 (Harness)
75-9910W0 NOTICE TO ALL PERSONS RECEIVING THIS DRAWING (Stamped: Nut) CONFIDENTIAL; Reproduction foaisden without the spe Gific written permission of Atari, Inc.. Sunnyvale, CA. This Grawing is onvv conditionally issue3, and neither receipt nor Bossession thereo! conters or transters any right try oF fk Gense to use, the subject matter of the crawing or any de. Sign or technical information shown thereon, Nor any right 62-039 toMeoraguce this crawing or any fart tote. except for (LED Switch) manutacture by vendors of Atarl nc, and for manulacture : Under the corporation's written license, no right is granted NOTE: Graphics decal is to teproduce tnis crawing or the subject matter thereat Un not tield-replaceable. tess by written agreement with or written permission from the corporation.
Figure 18 Control Panel Assembly A037409-01 A
Parts List
Part No. Description
A037408-01 Control Panel with Graphics A037435-01 Control-Panel Harness 62-039 SPDT Momentary-Contact Pushbutton Stari Switch with Red Light-Emitting Diode 75-9910NO #5,11 Steel Stamped Nut 75-9910W0 #'4,-32 Steel Stamped Nut
78-6900402 Vinyl Foam Singie-Coated-Adhesive Tape, Y-Inch wide x %-Inch thick (24 in. required) 033127-01 Biack Molded Switch Bushing 1600 13-001 Leaf Switch and Button Holder (leaf switch only is part no. 160012-001) 178030-001 Pushbutton Assembly
NOTICE TO ALL PERSONS RECEIVING THIS DRAWING CONFIDENTIAL: Reproduction forbidden without the spe- Citic weitten petmission of Atan, Inc., Sunnyvale, CA. This drawing is only conditionally issued, and neither receipt nor Possession thereof conters or transfers any right in, or li Cense 10 use, the subject matter of the drawing or any de- Sign oF technical information shown thereon, nor any right to reproduce this drawing or any part thereo!. Except for marutacture by vendors of Atari, Inc., and for manutacture Under the corporation's written license, no ight 's granted to reproduce this drawing or the subject matter thereof, unless b' written agreement with or written permission from the corporation. 176010-106 YF (6 PLACES) ' Screw) \
|~<__———— 03619101 (Upper Frame)
'035936-01 (ail)
036193-01 \ < 035937.01 (idler on eo * Bearing) x 035931-01 (Roter Shaft)
035938-01 i (Whee!) LS 75-0148, (2 PLACES) ' (Washer)
75-044S (2 PLACES) - (Washer)
A036096-01 72-8406 ! (Harness) (2 PLACES) (Screw)
03619201 (Lower Frame)
034168-01 (Labe\—not shown for clarity) (PCB)
Figure 19 Mini-Trak Ball™ Assembly A036190-01 A
Figure 19 Mini-Trak Ball™ Assembly Parts List aS
Part No. Description A035220-01 Coupler PCB Assembly A036096-01 Harness Assembly 72-8406 #4-40 x %Inch Hex Socket-Head Cap Alloy Steel Machine Screw 75-0148 #4 Flat Plain SAE-Standard Zinc-Plated Steel Washer 75-0448 #4 Zinc-Piated Steel Split Lock Washer 034168-01 Label with Lubrication Instructions
| 035931-01 | Roller Shaft | (2 per assembly) |
035936-01 Mini-Trak Ball™
| 036937-01 | Ball Bearing | (6 per assembly) |
035938-01 Etched Encoding Wheel 036191-01 Upper Black Plastic Frame 03619201 Lower Biack Plastic Frame
| 036193-01 | Idler Shaft | (1 per assembly) |
176010-106 #8 x Inch Cross-Recessed Pan-Head Thread-Forming Twin-Lead Zinc-Plated Steel Screw
A035435-02 Figure 20 Regulator/Audio Il PCB Assembly D
NOTICE TO ALL PERSONS RECEIVING THIS DRAWING
idden without the spe- , Sunnyvale, CA. This
ess by written agreement with or written permission from
the corporation.
“7 C5com C4 Rizo" TSK] RI4 ° mS Sis} R21 I/ew Ps cl4 Cie<aep! CIS@D NS is) =1 88 arr TOAZ002A TDA2ZOO2ZA TIP32 Cc
+
R32 a7 5.6 C225
7812 {FieF} C24
—R24,10,7WP— E22} RS! 229,10W
O9 es 7905
o
Figure 20 Regulator/Audio Ii PCB Assembly Parts List
Part No. Description (Reference Designations and Locations in Bold)
| 12-52P7 | 2.7 Ohm, +5%, 1W Resistor | (R5)} |
| 16-54PO | 4 Ohm, +5%, 5W Wirewound Resistor | (R25) |
| 19-100P1015 | Ohm, +3%, 7W Wirewound Resistor | (R24) |
19-315102 1K Ohm Vertical PCB-Mounting Cermet Trimpot (R8) 24-250108 1000 uf Aluminum Electrolytic Fixed Axial-Lead 25V Capacitor (C13)
| 24-250477 | 470 uf Aluminum Electrolytic Fixed Axial-Lead 25V Capacitor | (C1, 4, 12) |
| 24-350226 | 22 uf Aluminum Electrolytic Fixed Axial-Lead 35V Capacitor | (C24, 31) |
24-350338 3300 uf Aluminum Electrolytic Fixed Axial-Lead 35V Capacitor (C9, 10, 18, 19) 24-500105, 1 uf Aluminum Electrolytic Fixed Axial-Lead 50V Capacitor (C22, 23) 29-088 .1 uf Ceramic-Disc 25V Radial-Lead Capacitor (C3, 11, 20, 21) 31-1N4002 100V 1-Amp. Silicon Rectifier Type 1N4002 Diode (CR1, 4-8) 31-5401 100V 3-Amp. Silicon Rectifier Type 1N5401 Diode (CR 5-8)
| 33-TIP32 | PNP Power Transistor, Type TIP32 | (Q2) |
34-2N3055, NPN Silicon Transistor, Type 2N3055 (Q3) 37-LM305 5V Linear Voltage Regulator (Q1)
| 37-7812 | +12V Voltage Regulator, Type 7812 | (Q8) |
37-7905 -5V Voltage Regulator, Type 7905 (Q9) 72-1608C #6-32 x ¥2-Inch Cross-Recessed Pan-Head Corrosion-Resistant Steel Machine Screw 75-F60405 #6-32 x %4-Inch Binder-Head Nylon Screw 75-99516 #6-32 Nut/Washer Assembly
| 78-16008 | Thermally Conductive Compound | (Q3) |
| 78-16014 | Thermally Conductive Silicon Insulator | (Q2, 9) |
| 79-58306 | 6-Position Connector Receptacle | (J6, 9) |
| 79-58308 | QPosition Connector Receptacle | (J7) |
| 79-58346 | 12-Position Connector Receptacle | (J10) |
| 79-58354 | 4-Position Connector Receptacle | (J8) |
020670-01 Test Point 034531-01 Heat Sink 400015-103 .01 uf Ceramic-Disc 25V Radial-Lead Capacitor (C5, C14) 110000-010 1 Ohm, +5%, YW Resistor (R10, 19) 110000-100 10 Ohm, +5%, %W Resistor (R11, 20, 29, 30)
| 110000-101 | 100 Ohm, +5%, %4W Resistor | (R4, 12, 22) |
| 110000-102 | 1K Ohm, +5%, YW Resistor | (R27, 28) |
| 110000-103 | 10K Ohm, + 5%, %4W Resistor | (R13, 14) |
| 110000-271 | 270 Ohm, +5%, YW Resistor | (R1) |
110000-330 33 Ohm, +5%, %W Resistor (R3) 110000-392 3.9K Ohm, +5%, Y4W Resistor (R6) 110000-562 5.6K Ohm, +5%, YW Resistor (R32, 33)
| 110000-752 | 7.5K Ohm, +5%, %4W Resistor | (R7) |
| 110001-221 | 220 Ohm, +5%, %2W Resistor | (R9, 21) |
116000-220 22 Ohm, +5%, 10W Wirewound Resistor (R31) 122002-102 .001 uf Ceramic-Disc Minimum 25V Radial-Lead Capacitor (C2, 7, 16) 122004-224 .22 uf Ceramic-Disc 25V Capacitor (C6, 8, 15, 17)
| 137151-002 | Type TDA2002A 8W Linear Audio Amplifier Integrated Circuit | (Q5, 7) |
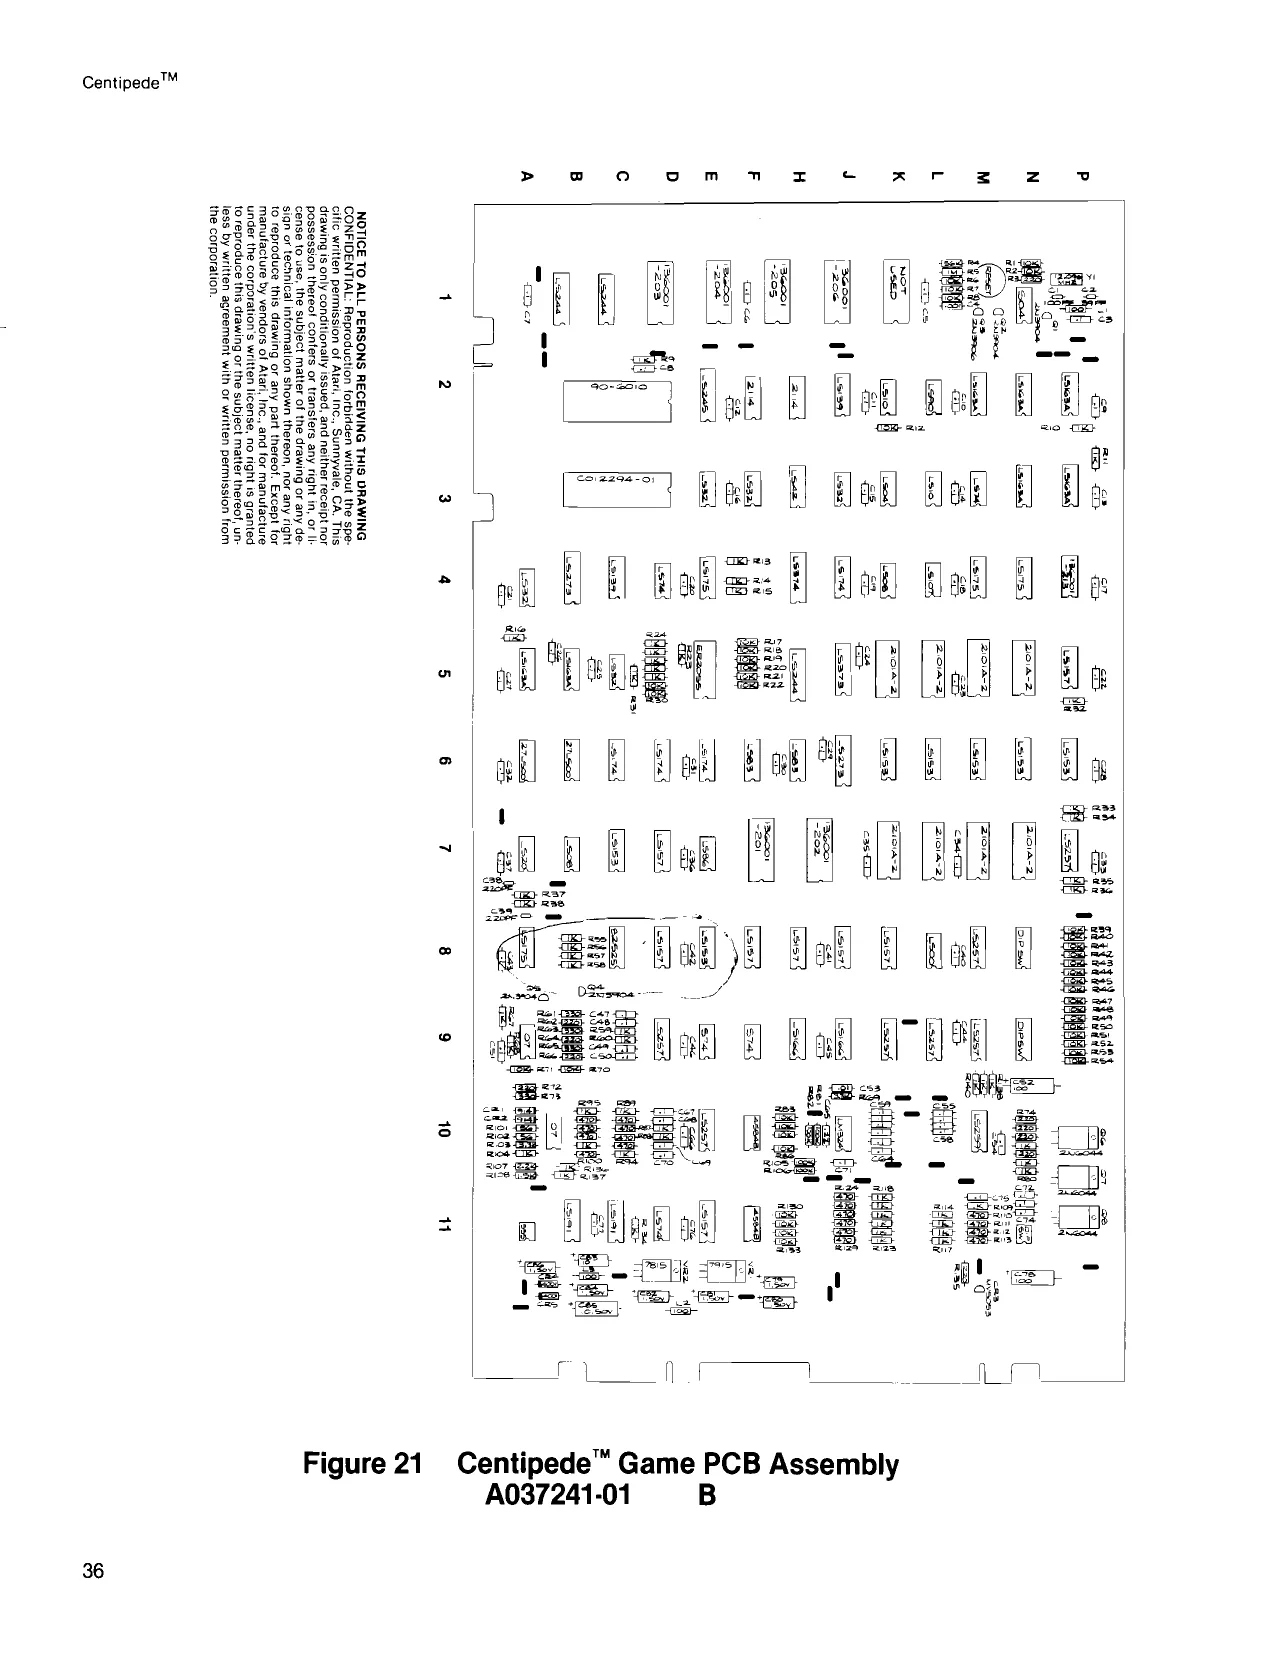
This page is a drawing, shown as the original scan.
. . ™ . Figure 21 Centipede™ Game PCB Assembly, continued Parts List
Part No. Description (Reference Designations and Locations in Bold) 012294-01 Audio I/O N-Channel MOSILSI Custom Chip (C3)
| 24-250106 | 10 uf Aluminum Electrolytic Fixed Axial-Lead 25V Capacitor | (C83) |
| 24-250107 | 100 uf Aluminum Electrolytic Fixed Axial-Lead 25V Capacitor | (C52, 78) |
| 24-500105. | 1 mf Aluminum Electrolytic Fixed Axial-Lead 50V Capacitor | (C79-82, 84, 86) |
| 24-500106 | 10 uf Aluminum Electrolytic Fixed Axial-Lead 50V Capacitor | (C85) |
29-088 .1 uf Ceramic-Disc 25V Radial-Lead Capacitor (C3, 5-37, 40-51, 54-64, 66-77)
| 31-1N914 | 75V Type-1N914 Switching Diode | (CR1, 2) |
31-1N4001 75V Type-1N4001 Switching Diode (CR4, 5) 33-2N3906 Type-2N3906 PNP Switching and Amplifying Transistor (Q3) 34-2N3904 Type-2N3904 NPN Silicon Transistor (Q1, 2, 4, 5) 34-2N6044 Type-2N6044 Darlington NPN Transistor (Q6-8)
| 37-LM324 | Type-LM324 Integrated Circuit | (J10) |
| 37-4584B | Type-4584B Integrated Circuit | (F10, F11) |
| 37-555 | Type-555 Timer Integrated Circuit | (A141) |
| 37-74LS00 | Type-74LS00 Integrated Circuit | (L8) |
| 37-74LS04 | Type-74LS04 Integrated Circuit | (K3) |
| 37-74LS08 | Type-74LS08 Integrated Circuit | (B7, K4) |
| 37-74LS10 | Type-74LS10 Integrated Circuit | (L3, K2) |
| 37-74LS20 | Type-74LS20 Integrated Circuit | (A7) |
| 37-74LS32 | Type-74LS32 Integrated Circuit | (A4, C5, E3, F3, J3) |
| 37-74LS42 | Type-74LS42 Integrated Circuit | (H3) |
| 37-74LS74 | Type-74LS74 Integrated Circuit | (D4, D11, M3) |
| 37-74LS83 | Type-74LS83 Integrated Circuit | (F6, H6) |
| 37-74LS86 | Type-74LS86 Integrated Circuit | (E7) |
| 37-74LS90 | Type-74LS90 Integrated Circuit | (L2) |
| 37-74LS139 | Type-74LS139 Integrated Circuit | (C4, J2) |
| 37-74LS153 | Type-74LS153 Integrated Circuit | (C7, £8, K6, L6, M6, N6, P6) |
| 37-74LS157 | Type-74LS157 Integrated Circuit | (D7, D8, E11, F8, H8, J8, K8, P5) |
37-74LS163A Type-74LS163A Integrated Circuit (A5, B5, M2, N2, N3, P2, P3)
| 37-74LS166 | Type-74LS166 Integrated Circuit | (H9, J9) |
| 37-74LS174 | Type-74LS174 Integrated Circuit | (C6, D6, E6, J4) |
| 37-74LS175 | Type-74LS175 Integrated Circuit | (A8, E4, M4, N4) |
37-74LS191 Type-74LS191 Integrated Circuit (B11, C11)
| 37-74LS244 | Type-74LS244 Integrated Circuit | (B1, C1, H5) |
| 37-74LS245 | Type-74LS245 Integrated Circuit | (E2) |
| 37-74LS257 | Type-74LS257 Integrated Circuit | (D9, E10, K9, L9, P7, M8, M9) |
37-74LS259 Type-74LS259 Integrated Circuit (M10) 37-74LS273 Type-74LS273 Integrated Circuit (B4, J6)
| 37-74LS373 | Type-74LS373 Integrated Circuit | (J5) |
| 37-74LS374 | Type-741.S374 Integrated Circuit | (H4) |
| 37-74S04 | Type-74S04 Integrated Circuit | (N1) |
| 37-74874 | Type-74S74 Integrated Circuit | (E9, F9) |
| 37-7407 | Type-7407 Integrated Circuit | (A9, A/B10) |
37-7815 +15V Voltage Regulator (VR2) 37-7915 -15V Voltage Regulator (VR1)
| 38-MV5053 | Type-MV5053 Light-Emitting Diode | (CR3) |
{Continued on next page]
Figure 21 Centipede™ Game PCB Assembly, continued Parts List
Part No. Description (Reference Designations and Locations in Bold)
| 41-3003 | 100 uH, +5%, Hot-Molded Plastic Fixed R.F. Choke | (L1-3) |
| 62-001 | SPST Momentary Pushbutton Switch | (Reset) |
| 66-114P1T | 4-Station, Single-Throw, Dual-Inline-Package Bit Switch | (N11) |
| 66-118P1T | 8-Station, Single-Throw, Dual-Inline-Package Bit Switch | (N8, N9) |
| 79-42C16 | 16-Contact Medium-Insertion-Force integrated Circuit Socket | (P4) |
| 79-42C22 | 22-Contact Medium-Insertion-Force Integrated Circuit Socket | (E5) |
| 79-42C24 | 24-Contact Medium-Insertion-Force Integrated Circuit Socket | (F7, H/J7, D1, E1, F/H1, J1) |
| 79-42C40 | 40-Contact Medium-Insertion-Force Integrated Circuit Socket | (C2, C3) |
81-4302 Nylon Snap-In Fastener
| 90-102 | 12.096, + .005%, Crystal | (¥1) |
90-6010 Microprocessor (C2)
| 90-7005 | Random-Access Memory | (C8) |
| 90-7018 | Random-Access Memory | (K5, K7, L5, L7, M5, M7, N5, N7) |
| 90-7033 | Random-Access Memory | (F2, H2) |
020670-01 Test Point 110000-102 1K Ohm, +5%, VW Resistor (R9-11, 13-16, 23-28, 31-38, 55-60, 67, 68, 77, 79, 80, 87-89, 94, 95, 99, 104, 109, 114-123, 134, 136-140) 110000-103 10K Ohm, +5%, %W Resistor (R1, 2, 6-8, 12, 17-22, 29, 30, 39-54, 70, 71, 83-86, 130-133)
| 110000-104 | 110K Ohm, +5%, %4W Resistor | (R81, 82, 105, 106) |
| 110000-105 | 100 MegOhm, +5%, %W Resistor | (R5) |
110000-152 1.5K Ohm, +5%, %W Resistor (R108) 110000-221 220 Ohm, +5%, %4W Resistor (R3, 62, 64, 66, 72, 74-76, 78, 135) 110000-222 2.2K Ohm, +5%, YW Resistor (R107) 110000-331 330 Ohm, +5%, %4W Resistor (R61, 63, 65, 73) 110000-332 3.3K Ohm, +5%, %4W Resistor (R69, 103) 110000-471 470 Ohm, +5%, %W Resistor (R90-93, 96-98, 100, 110-113, 124-129) 110000-560 §6 Ohm, +5%, %4W Resistor (R101, 102)
| 110000-563 | 56K Ohm, +5%, %4W Resistor | (R4) |
122002-102 .001 uf Ceramic-Disc 50V Radial-Lead Capacitor (C4) 122004-224 .22 uf Ceramic-Disc 25V Radial-Lead Capacitor (C65) 122005-103 .01 uf Ceramic-Disc 25V Radial-Lead Capacitor (C53)
| 128002-101 | 100 pf Radial-Lead Epoxy-Dipped 100V Mica Capacitor | (C1) |
| 128002-221 | 220 pf Radial-Lead Epoxy-Dipped 100V Mica Capacitor | (C38, 39) |
128002-390 136001-201 or -211 136001-202 or -212 136001-203 or -207
136001-204 or -208 136001-205 or -209 136001-206 or -210 136001-213
137161-001
137169-001 137170-001 39 pf Radial-Lead Epoxy-Dipped 100V Mica Capacitor (C2) Read-Only Memory (F7) Read-Only Memory (H/J7) Read-Only Memory (D1)
Read-Only Memory (E1) Read-Only Memory (F/H1) Read-Only Memory (J1) Programmable Read-Only Memory (P4)
| Type-ER2055 Integrated Circuit | (E5) | Note: If you replace this part, you must erase this ROM |
before locking up the game. See Figure 6, Self-Test Procedure, in this manual for instructions. Type-74LS107 Integrated Circuit (L4) Random-Access Memory (A6, B6) Acceptable substitute is part no. 90-7008 or 90-7035.
This page carries no recoverable text. It is a drawing or a photograph. See the original scan.
79-4411001 4037479-01 (Fuse Post) one only)
| 03448202 | 037639-01 | 46-2017002 | Vlage | Plugs) |
| QR | (Chassis) | (Label) | (Fuse) |
03454401 46-2014002 037641-01 (Cover) (Fuses) (Label)
79-3206 (Fuse Block)
if A035891-01 A021084-02: f Fa U.S. only) ¢. (Fuse Harness) (120V Plug)
78-2708 TOP VIEW (Hole Bushing)
NOTICE TO ALL PERSONS RECEIVING THIS DRAWING CONFIDENTIAL: Reproduction forbidden without the spe Eihe wntten permission of Atari inc, Sunnyvale, CA. This Grawing fs only conditionally issved, and neliner receipt nor 29.053 possession tnereot conters or transfers any right In ori c Cense to vse, the subject matter of the drawing or any de (Capacitor) sign or technical information shown thereon, nor any right forreproduce this drawing or any part thereot, Except for manutacture by vendors ot Atarr ic. and for manufacture Under tne corporation's written license, no rights granted ‘A036888-01 or -02 toreproduce ths crawing or the subject matter thereot unloss by writen agreement with or writen permission from (Transformer) the corporation: 78-70501SC (Capac. Bracket)
BOTTOM VIEW
3A-MDA3501 (Rectifier)
| A034630-01 | A035890-01 | A034629-01 | 79-15021001 |
| (RFI Filter) | (Pwr. Harness) | (A.C. Harness) | (Term’| Block) |
Figure 22 Power Supply Assembly A037671-01 (U.S.) A | A037671-02 (International) A
Figure 22 Power Supply Assembly Parts List AS
Part No. Description (Reference Designations in Bold) A021084-02 Voltage Plug (120V p/ug—tor U.S. power supply only) A034629-01 AC. Harness Assembly
| A034630-01 | RFI Filter Assembly | (FL1) |
| A035888-01 or -02 | Transformer Assembly | (1) |
A035890-01 Power Harness Assembly A035891-01 Fuse Harness Assembly A037479-01 Voltage Plug Assembly (100V, 220V and 240V plugs—international only) 29-053 27,000 uf 15 VDC Electrolytic Capacitor (C1) 3A-MDA3501 Bridge Rectifier, Type MDA 3501 (CR)
| 46-2014002 | 4-Amp. 250 V 3AG Slow-Blow Glass Cartridge-Type Fuse | (F2, F4-F6) |
| 46-2017002 | 7-Amp. 250 V 3AG Slow-Blow Glass Cartridge-Type Fuse | (F1) |
| 46-301203 | 20-Amp. 32 V 3AG Slow-Blow Glass Cartridge-Type Fuse | (F3) |
78-2708 Nylon Type 6/6 Hole Bushing with %-Inch Inside Diameter x *%-Inch Outside Diameter x ¥a-Inch Thick 78-70501SC_ 2-Inch Diameter Capacitor Mounting Bracket 79-15021001 2-Circuit Single-Row Terminal Block 79-3206 5-Position 3AG Fuse Block with 14-Inch Quick-Disconnect Terminals 79-4411001 Panel-Mounting Non-Indicating 3AG Cartridge-Type Fuse Post 034482-02 Power Supply Chassis 034544-01 Fuse Block Cover
| 037639-01 | Label for Fuse Value | (F1) |
| 037641-01 | Label for Fuse Values | (F2-F6) |
&
03745701 (Harness)
479035-001 (Lampholder) 142028-001 or -002 Cransformer)
70-304 (Tube)
NOTICE TO ALL PERSONS RECEIVING THIS DRAWING CONFIDENTIAL: Reproduction forbidden without the specific written permission of Atari, Inc., Sunnyvale, CA, This drawing is only conditionally issued, and neither receipt nor possession thereot confers or transters any right in, or license to use, the subject matter of the drawing or any de- ‘A037540-01 manutacture by vendors of Atarinc. and for manufacture 037469-01 (Grd. Wire) {voprodues his drawing o the subject molto IneGor Ur (Bracket) loss by written agreement with or written permission from the corporation.
Figure 23 Fluorescent Light and Speaker Assembly A037417-01 and -02 B
Parts List
Part No. Description
A037457-01 Light and Speaker Harness A037540-01 Ground Wire with Ring Lug 48-009 8-Inch High-Fidelity Speaker 70-304 18-Inch 15-Watt Cool White Fluorescent Tube 79-561816P. Spring-Connector Wire Nut for 16- to 18-Guage Wires 99-11003 Fluorescent Lamp Starter 99-11009 Starter Socket 037469-01 Steel Lamp Bracket 142028-001 60-Hz 118-Volt Ballast Transformer (used on A037417-01 assembly) 142028-002 §0-Hz 118-Volt Ballast Transformer (used on A037417-02 assembly) 179035-001 2-Pin Fluorescent Lamphoider
This page carries no recoverable text. It is a drawing or a photograph. See the original scan.
NOTICE TO ALL PERSONS RECEIVING THIS DRAWING 99-10103 CONFIDENTIAL: Reproduction forbidden without the inner Pri
| Specific written permission of Atari, inc., Sunnyvale, CA | (loner | Pri |
This drawing is’ only conditionally’ issued, and neither wiLevers) 75.9488 receipt nor possession thereof confers or transfers any fight in, of license to use, the subject matter of the drawing 99-10096 (Hex Nut) 99-10095 oF any design or technical information shown thereon, nor (Fastener) Z any right to reproduce this drawing or any part thereat. Ex (Self-Test Sw.) cept Tor manufacture by vendors of Atari, Inc, and for manufacture under the corporation's written license, 0 99-10052 right to reproduce this drawing is granted or the subject matter thereof unless by written agreement with or written (Lever) permission from the corporation. ° a p e ZZ 99:10073 (Decal)
(Screw) Part of 99-10095
75-9448, 99-10096 (Hex Nut) (Fastener)
99-10063 (Coin Chute) ad 99-10097 (Insul.) }0040 99-1 Coin Inlet Chute) ) 9910101 (Coin Inlet Chute) Vin Chute)
70-11-47 (Lamp),
99-10080 (Lamp Socket)
72-9406S (Screw)
99-10104 (Bar Retnr)
99-10041 (Coin Counter}
99-10105
| (Bar) | - OO | ny | 99-1081 |
| Piston | Bey $ | (Key Holden) | |
| (Coin Mech.) | ~f | & |
Xp 6 75.9448 9.10102 75.944 (Brkt, Assy.) 65-441C rsees.
| 99-1065 | (Coin Sw) | . | |
| COIN RETURN | Pie oa | ‘ | (Screw) |
| CHUTE | 99-10068 | 99-10047 |
00 99-10075 thru ‘|
| (Coin Chute) | oe-10078 | (Lockt, Coil |
(Sw. Wire) 31-1N4002—Part 99-10042 thru of 99-1047
| Ss-100%5 | Rourey | 7518128 | 99.10082 | (Giage) |
etainer (Coin Sw. Assy.) (Screw) (Cover) Figure 24 American-Made Coin Door 71-10xxxx D
99-10055 thru 99-10059 (Button Cover) 99-1012 thru 99-1022, 99-1074 0070, 99-10083 and 06-10107 bahay (Vock) 724814058 (Button Assy.) and 99-10108 (Screw) (Price Piate) 99-10054 (Btn. Housing) 99-10062 72-HA1404C (Button) (Screw) 99-10009 or 99-10010 (Door) ™ 99-10094 (nsul.) \,
Part of 99-10074
98-10049° (Locking Arm)
75-5520B (Belt) 99-10061 (Bezel)
75-915S (Hex Nut) NOTICE TO ALL PERSONS RECEIVING THIS DRAWING CONFIDENTIAL: Reproduction jorbidden without me spe- Gific written permission of Atari, inc., Sunnyvale, CA. This ‘drawing is only conditionatly issued, and neither receipt nor Possession therec! confers or translers any right in, oF li ‘eense 0 use, the subject matter of the drawing or any de ‘sigh or technical information shown thereon, nor any right 72-JA1405B fo reproduce this drawing or any part thereof. Except for, (Screw) nor teeorporation’s wetton license” no Nght to reve baled He i no duce this drawing is granted or the subject ‘matter thereot (Frame) 99-10048 unless by written agreement with or written permission (Harness—not fram the corporation shown for clarity)
| 71-102201 — U.S. 25¢/25¢ Coin Door | 71-102208 — German 1 DM/S DM Coin Door | 71-102211 — Austratian 20¢/20¢ Coin Door |
| 74103202 -- U.S. 25%/25¢/25¢ Coin Door | 71102207 — Belgian 5 Fri5 Fr Coin Door | 71-102212 — italian 100 L100 L Coin Door |
| 71-493203 ~— U.S. 25¢/25¢/$1 Coin Door | 71-102208 — Swiss 1 Fri1 Fr Coin Door | 71-102213 — U.S. 50¢/50t (2 x 25%) Coin Door |
| 71-102204 — German 2 DM/1 DM Coin Door | 71-102209 — Japanese 100Y/100Y Coin Door | 71-103214 — U.S, 50¢/50¢/50¢ Coin Door |
| 71-103205 — German 1/2/5 DM Coin Door | 71-102210 — British 10 P/10 P Coin Door | 71-103215 — U.S. 50¢/50¢/$1 Coin Door |
Figure 24 American-Made Coin Door 71-10xxxx D
Figure 24 American-Made Coin Door, continued Parts List
Part No. Description 31-1N4002 100V Silicon Rectifier 1N4002 Diode 65-441C General-Usage Low-Force Miniature Switch 70-11-47 Miniature Bayonet-Base Incandescent Lamp, Type #47 71-1201ADU U.S. $1.00 Coin Mechanism 71-1201FCH Swiss 1 Fr Coin Mechanism 71-1201MG German 1 DM Coin Mechanism 71-1202MG German 2 DM Coin Mechanism 71-1205FB Belgian 5 Fr Coin Mechanism 71-1205MG German 5 DM Coin Mechanism 71-1210PE U.K. 10 P Coin Mechanism 71-4220CA Australian 20¢ Coin Mechanism 71-1225CU U.S, 25¢ Coin Mechanism 71-12100LI Italian 100 Lire Coin Mechanism 71-12100YJ Japanese Y100 Coin Mechanism 72-HA1404C #4 x %-Inch Slotted Pan-Head Thread-Rolling Tri-Fluted “Taptite” Cadmium-Plated Screw 72-JA1405B #4 x %<Inch Slotted Pan-Head Thread-Rolling Tri-Fluted “Plastite” Black Screw 72-9406S #4-40 x %-Inch Slotted Truss-Head Steel Machine Screw 72-9603S #6-32 x ¥,Inch Slotted Truss-Head Steel Machine Screw 75-915S #%4-20 Standard-Pattern Cadmium-Plated Steel Hex Nut 75-918S #8-32 Standard-Pattern Cadmium-Plated Steel Hex Nut 75-944S #4-40 Polymer Self-Locking Steel Hex Nut 75-948S #8-32 Polymer Self-Locking Steel Hex Nut 75-1408S #4-40 x Y2-Inch Slotted Pan-Head Steel Machine Screw 75-1412S #4-40 x %4-Inch Slotted Pan-Head Steel Machine Screw 75-5520B #1%-20 x 1%-Inch Round-Head Square-Neck Steel Bolt with Black Finish 99-10008 Switch Wire Retainer 99-10009 2-Mech Coin Door Only 99-10010 3Mech Coin Door Only 99-10012 U.S. 25¢ Coin Return Button Assembly 99-10013 U.S. $1.00 Coin Return Button Assembly 99-10014 German 1 DM Coin Return Button Assembly 99-10015 German 2 DM Coin Return Button Assembly 99-10016 German 5 DM Coin Return Button Assembly 99-10017 Belgian 5 Fr Coin Return Button Assembly 99-10018 Swiss 1 Fr Coin Return Button Assembly 99-10019 Japanese Y100 Coin Return Button Assembly 99-10020 U.K. 10 P Coin Return Button Assembly 99-10021 Australian 20¢ Coin Return Button Assembly 99-10022 Italian 100 Lire Coin Return Button Assembly 99-10040 Coin Inlet Chute Assembly 99-10041 Coin Counter Assembly 99-10042 Coin Switch Assembly for U.S. 25¢ and Belgian 5 Fr Coins (silver wire) 99-10043 Coin Switch Assembly for German 1 DM, Swiss 1 Fr, and Japanese Y100 Coins (black wire) 99-10044 Coin Switch Assembly for U.S. $1.00, German 2 DM, and Italian 100 Lire Coins (gold wire) 99-10045 Coin Switch Assembly for German 5 DM, U.K. 10 P, and Australian 20¢ Coins (green wire) 99-10047 Lockout Coin Assembly 99-10048 Coin Door Hamess Assembly
Figure 24 American-Made Coin Door, continued Parts List
Part No. Description 99-10049 Locking Arm Assembly 99-10051 Goin Door Frame 99-0052 Coin Return Lever 99-10054 Coin Button Housing 99-10055 Coin Return Button Cover for Japanese 100Y Coin 99-10056 Coin Return Button Cover for German 1 DM and Swiss 1 Fr Coins 99-10057 Coin Return Button Cover for U.S. 25¢ and Belgian 5 Fr Coins 99-10058 Coin Return Button Cover for U.S. $1.00, German 2 DM, and Italian 100 Lire Coins 99-10059 Coin Return Button Cover for German 5 DM, U.K. 10 P, and Australian 20¢ Coins 99-10061 Coin Return Bezel 99-10062 Coin Return Button 99-10063 Right Half of Coin Inlet Chute 99-10065 Coin Return Box 99-10066 Coin Return Cover 99-10068 Coin Chute 99-10070 U.S. 25¢ Price Plate 99-10071 Slam Switch Assembly 99-10073 Test Switch Decal 99-10074 Lock Assembly 99-10075 Black Switch Wire for German 1 DM, Swiss 1 Fr and Japanese 100Y Coins 99-10076 Silver Switch Wire for U.S. 25¢ and Belgian 5 Fr Coins 99-10077 Gold Switch Wire for U.S. $1.00, German 2 DM and Italian 100 Lire Coins 99-10078 Green Switch Wire for German 5 DM, U.K. 10 P and Australian 20¢ Coins 99-10080 Miniature Bayonet-Base Lamp Socket 99-10081 Wire Key Holder 99-10082 Switch Cover 99-10083 US. $1.00 Price Plate 99-10084 German 1 OM Price Plate 99-10085 German 2 DM Price Plate 99-10086 German 5 DM Price Plate 99-10087 Belgian 5 Fr Price Plate 99-10088 Swiss 1 Fr Price Plate 99-10089 Japanese Y100 Price Plate 99-10090 U.K. 10 P Price Plate 99-10091 Australian 20¢ Price Plate 99-10092 Italian 100 Lire Price Plate 99-10094 Fish Paper Insulation 99-10095 Toggle Switch 99-10096 “U"-Type Fastener 99-10097 Fish Paper Insulation 99-10101 Left Half of Coin Inlet Chute 99-0102 Switch and Lockout Coil Bracket Sub-Assembly 99-10103 Inner Panel with Levers Sub-Assembly 99-10104 Anti-Penny-Flip Bar Retainer 99-10105, Anti-Penny-Flip Bar 99-10107 U.S. 50¢ Coin Return Button Assembly (for two quarters) 99-10108 U.S. 50¢ Price Plate (for two quarters)
99-15038 (Bezel for Button)
99-15001 thru 99-15012 (Ret, Button)
99-15052 (Spring for Button)
a
99-15051 (Lamp Holder)
a 99-15026 a 99-15056 (Coin Inlet) < (Screw for Bezel)
Oe 99-15039 “7 \ (Bezel for Cover) 99-15036 o (Cover) 99-15055 p ‘Piet ta (Retng. Screw) Ol for Lever) (Lockout Coil) | 99-15053 (Lockt. Coil Spring) <
+—— 99.15028 (Coin Ret. Box)
(Sw. Adjuster) 99-1505 (Screw for Bezel) 99-15029 99-15060 (Bracket) a (Sw. Cover) se-sos2-——~¢ (Switch)
Figure 25 British-Made Coin Door 171001-xxx A
99-15061 (Dual Entry Frame)
99-15067 (Lock Assy.)
99-15083 (Screw)
99-15087 (Lock Assy )
47-1002 (Counter)
NOTICE TO ALL PERSONS RECEIVING THIS DRAWING CONFIDENTIAL: Reproduction forbidden without the specific written permission of Atari, Inc. Sunnyvale, CA. This drawing is only conditionally issued, and neither receipt nor 99-15082 ‘possession thereot confers or transfers any right in, OF li- (Hinge) cense to use, the subjeci matter of the rawing or any de f ral sign or technical information shown thereon, nor any right to reproduce this drawing oc any part thereof. Except for . manutacture bj vendors of Alar, Inc., and for manufacture under the corporation's written license, no right to reproduce this drawing is granted or the subject matter thereot LEE tuniess by written agreement with or written permission > from the corporation:
99-15066 99-15064' (Screw) (Frame) 99-15065 (Clamp)
| 171001-001 — British 19 P/10 P Coin Door | 171000006 — German 2 DM/5 DM Coin Door | 171000011 — Hong Kong $1/$1 Coin Door |
| 171001-002 — British 10 P/50 P Coin Door | 171001-007 — Belgian 5 Fr/5 Fr Coin Door | 171001-012 — Canadian 25¢/25¢ Coin Door |
| 171001-003 — British 20 P50 P Coin Door | 171001-008 — French 1 Fri Fr Coin Door | 171001013 — U.S, 25¢/25¢ Coin Door |
| 471001204 — German 1 DM!1 DM Coin Door | —_171001.009 — French 2 Frit Fr Coin Door | 171001.014 — Spanish 25 Pts/25 Pts Coin Door |
| 171001-005 — German 2 DM/1 DM Coin Door | 171001010 — Swedish 1 Krit Kr Coin Door | 471001-015 — Swiss 1 Frit Fr Coin Door |
Figure 25 _British-Made Coin Door 171001-xxx A
Figure 25 British-Made Coin Door, continued 171001-xxx A
Part No. Description 47-1002 Coin Counter 99-15001 Coin Return Button with U.S. 25¢ Price Plate 99-15002 Coin Return Button with U.S. $1 Price Plate 99-15003 Coin Return Button with German 1 DM Price Plate 99-15004 Coin Return Button with German 2 DM Price Plate 99-15005 Coin Return Button with German 5 DM Price Plate 99-15006 Coin Return Button with Belgian 5 Fr Price Plate 99-15007 Coin Return Button with French 1 Fr Price Plate 99-15008 Coin Return Button with Japanese 100 Yen Price Plate 99-15009 Coin Return Button with British 10 Pence Price Plate 99-15010 Coin Return Button with Australian 20¢ Price Plate 99-15011 Coin Return Button with Italian 100 Lire Price Plate 99-15012 Coin Return Button with U.S. 50¢ (2 x 25¢) Price Plate 99-15025 Left Half of Coin Inlet 99-15026 Right Half of Coin Inlet 99-15027 Side Plate of Coin Return Box 99-15028 Base Plate of Coin Return Box 99-15029 Switch Bracket 99-15030 Flap for Lockout Coil (U.S. 25¢) 99-15036 Coin Return Cover 99-15037 Switch Adjuster 99-15038 Bezel for Coin Return Button 99-15039 Bezel for Coin Return Cover 99-15040 Coin Return Lever 99-15041 Lockout Coil 99-15042 Coin Switch for U.S, 25¢ 99-15051 Lamp Holder 99-15052 Spring for Coin Return Button 99-15053 Spring for Lockout Coil 99-15054 Pivot for Coin Return Lever 99-15055 Retaining Screw 99-15056 Screw for Both Bezels 99-15060 Switch Cover 99-15061 Dual Entry Frame 99-15062 Hinge 99-15063 Screw for Hinge 99-15064 Coin Door Frame 99-15065 Clamp for Frame 99-15066 Screw for Frame 99-15067 Lock Assembly
YOUR COMMENTS, PLEASE! a pining
Your comments will assist Atari in improving the usefulness of our publications. They are an important part of preparing for revisions of manuals and parts catalogs. No postage stamp is necessary if mailed in the U.S.A.
If you have any technical questions about certain Atari or Kee Games products, or are requesting additional publications, we will immediately forward your note to the appropriate person.
Page: Comments:
Fill in if you wish a reply.
Name.
Firm © Distributor
Address. O Operator
City State Zip U Other.
Area Code Phone
First fold
BUSINESS REPLY MAIL
FIRSTCLASS PERMIT NO. 1004 SUNNYVALE, CA POSTAGE WILL BE PAID BY ADDRESSEE
Atari, Inc. Attn.: Field Service/Coin-Op Division P. O. Box 427 Sunnyvale, California 94086
Second fold No Postage Necessary if mailed in the United States
“W014
This page carries no recoverable text. It is a drawing or a photograph. See the original scan.
This page carries no recoverable text. It is a drawing or a photograph. See the original scan.
See awe CEES
Warranty
Seller warrants that its printed circuit boards and parts thereon are free from defects in material and workmanship under normal use and service for a period of ninety (90) days from date of shipment. Seller warrants that its television monitors (in games supplied with monitors) are free from defects in material and workmanship under normal use and service for a period of thirty
- days from date of shipment. None of the Seller's other products or parts thereof are warranted.
If the products described in this manual fail to conform to this warranty, Sellers’ sole liability shall be, at its aption, to repair, replace, or credit Buyer's account for such products which are returned to Seller during said warranty period, provided:
- Seller is promptly notified in writing upon discovery by Buyer that said products are defective:
- Such products are returned prepaid to Sellers’ plant; and
- Seller's examination of said products discloses to Seller's satisfaction that such alleged detects existed and were not caused by accident, misuse, neglect, alteration, improper repair, installation or improper testing.
In no event shall Seller be liable for loss of profits, loss of use, incidental or consequential damages.
Except for any express warranty set forth in a written contract between Seller and Buyer which contract supersedes the terms of this order, this warranty is expressed in lieu of all other warranties expressed or implied, including the implied warranties of merchantability and fitness for a particular purpose, and of all other obligations or liabilities on the Seller's part, and it neither assumes nor authorizes any other person to assume for the Seller any other liabilities in connection with the sale of products under this order.
The use of any non-Atari parts may void your warranty, according to the terms of the warranty. The use of any non-Atari parts may also adversely affect the safety of your game and cause injury to yourself and others. Be very cautious in using non-Atari-supplied components with our games, in order to insure your safety.
Atari distributors are independent, being privately owned and operated. In their judgment they may seil parts or accessories other than Atari parts or accessories. Atari cannot be responsible for the quality, suitability or safety of any non-Atari part or any modification including labor which is performed by such distributor.
This document is and contains confidential trade secret information of Atari, Inc.
This document is loaned under confidential custody for the sole purpose of operation, maintenance or repair of Atari equipment and may not be used by or disclosed to any person for any other purpose whatever, and remains the property of Atari, Inc.
Neither it nor the information it contains may be reproduced, used, or disclosed to persons not having a need to know consistent with the purpose of the loan, without written consent of Atari, Inc.
A
ATARI
ATARI INC ; 1265 BORREGAS AVENUE P.O. BOX 427 SUNNYVALE, CALIFORNIA 94086 408/745-2000 ¢ TELEX 35-7488