Centipede DP-182-4th-01A
Centipede (revision 4) (Atari, 1980) · Drawing Package · 1 pages · original scan
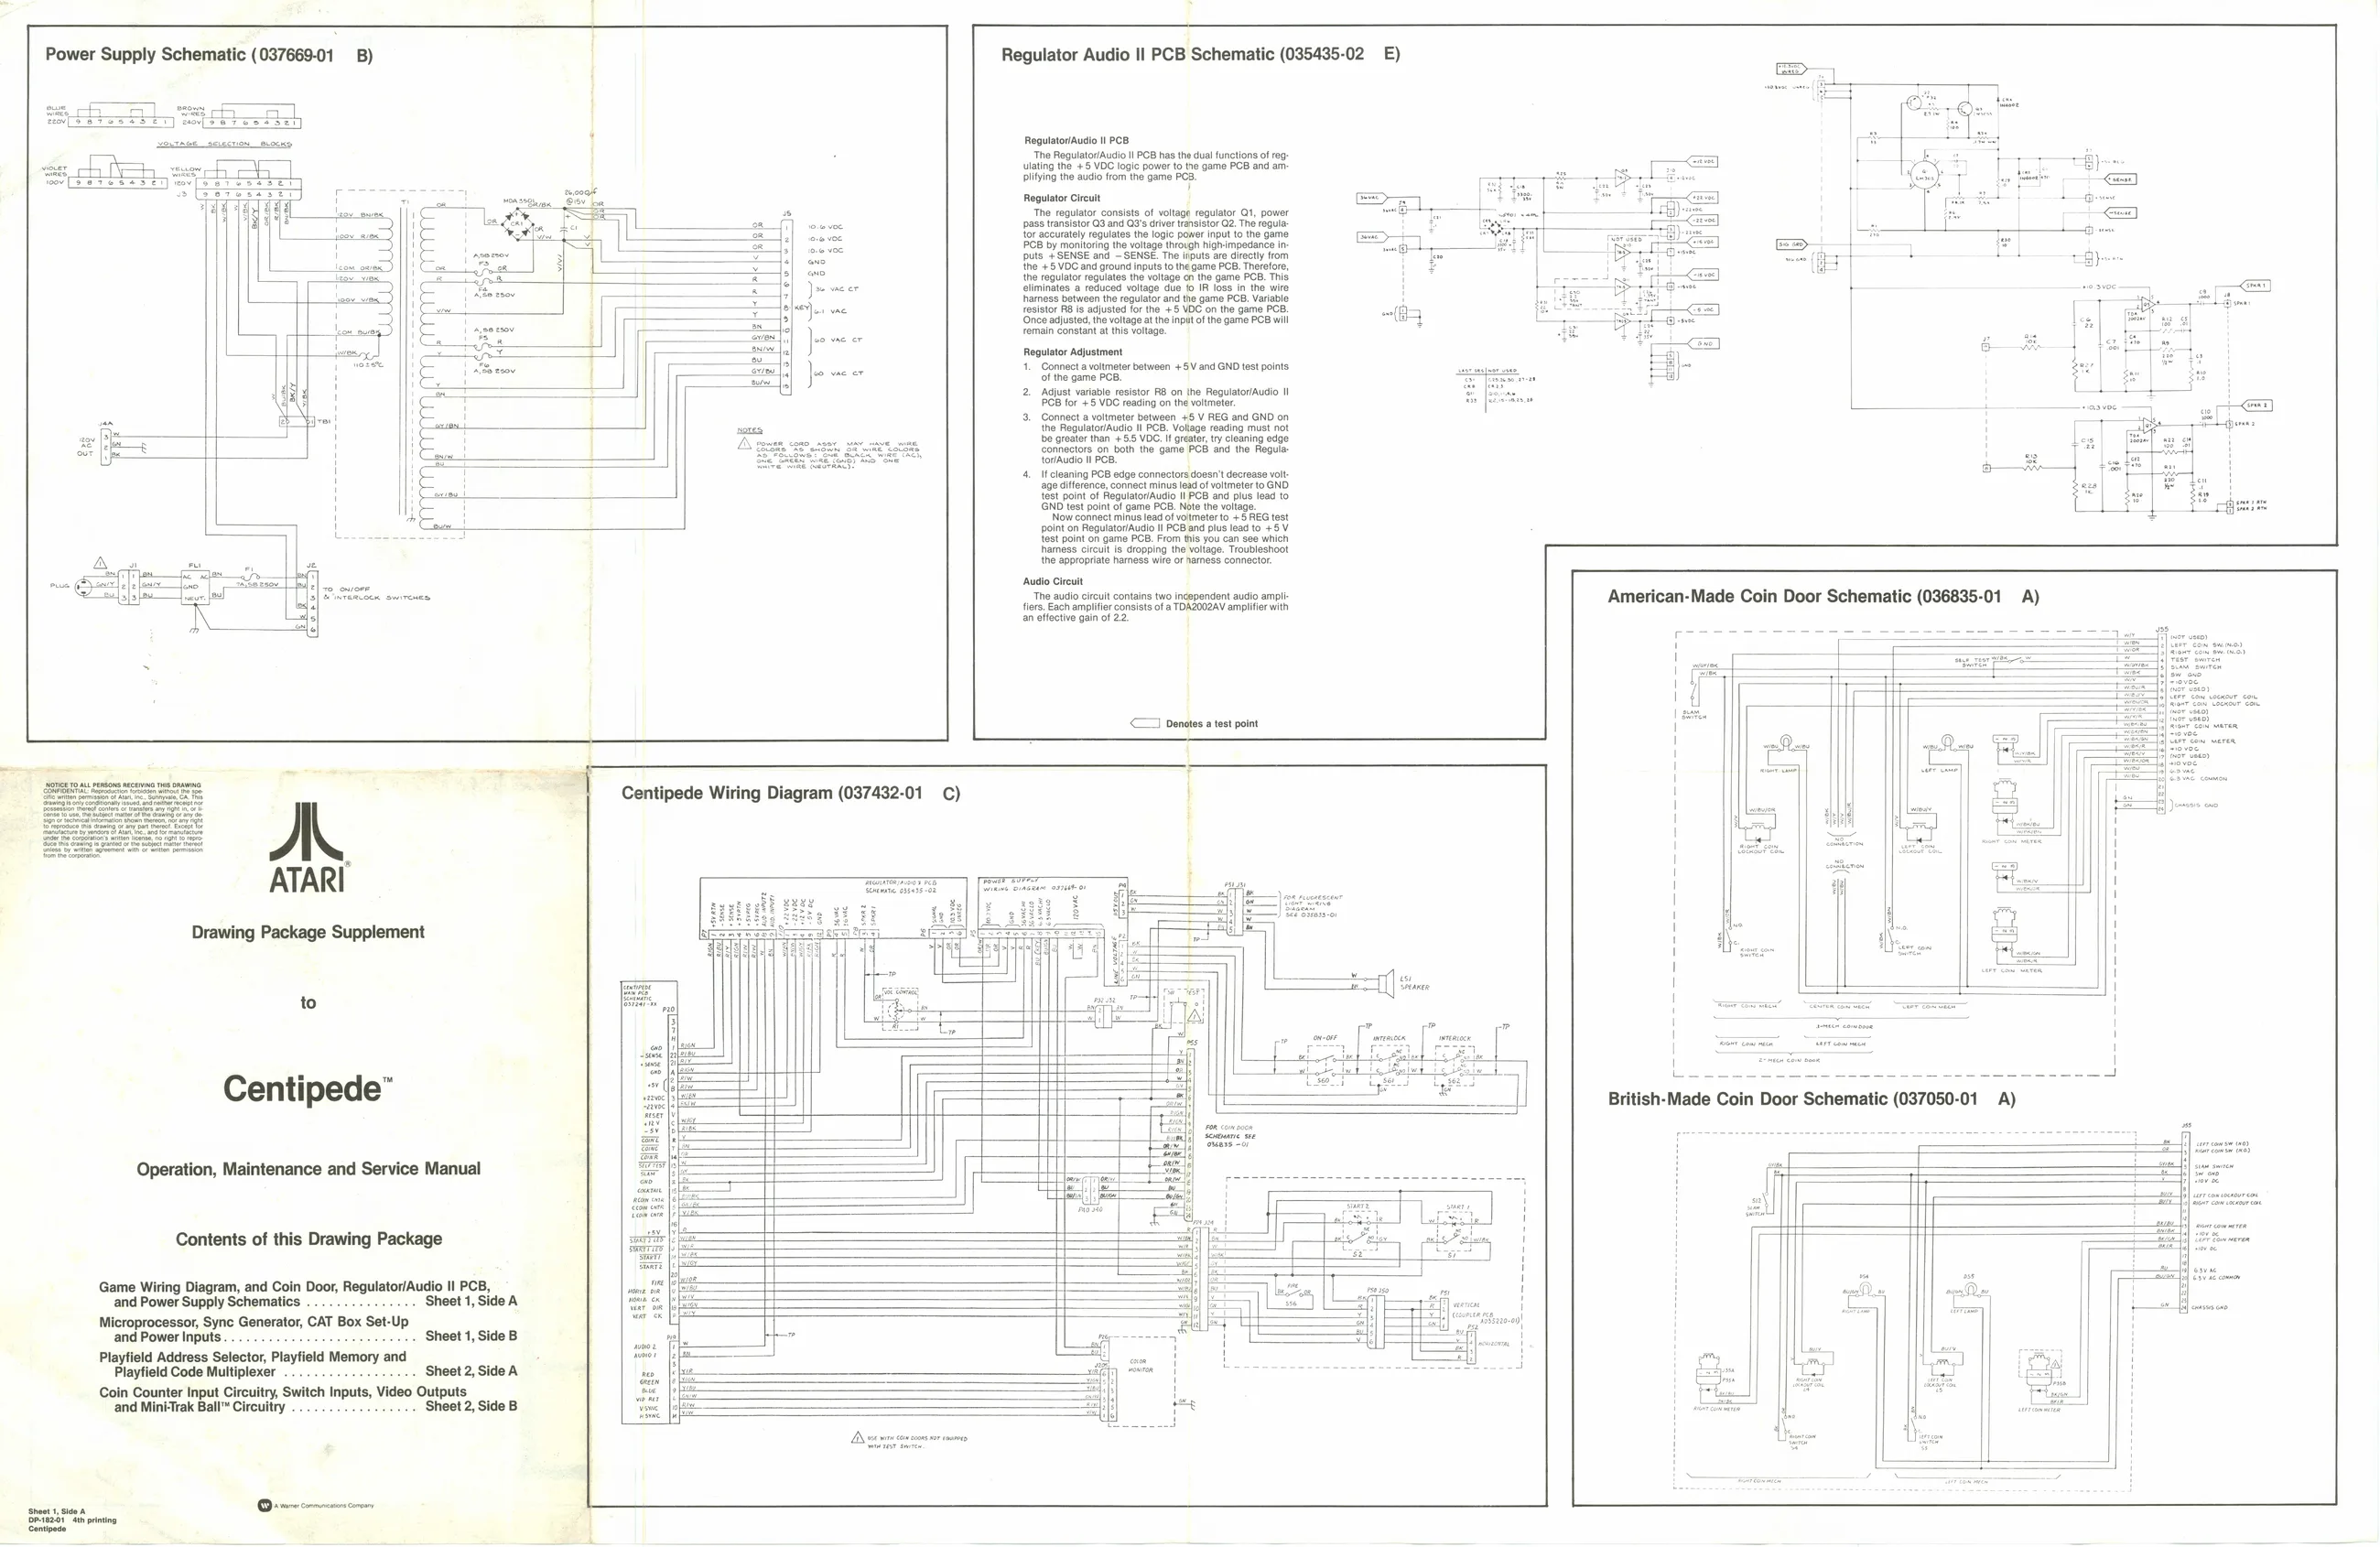
Power Supply Schematic (037669-01 B)
Detea.t Atm printing Ccetipade
ATARI
Drawing Package Supplement
Centipede”
Operation, Maintenance and Service Manual
Contents of this Drawing Package
Game Wiring Diagram, and Coin Door, Regulator/Audio Il PCB, and Power Supply Schematics ............+++ Sheet 1, Side A Microprocessor, Syne Generator, CAT Box Set-Up and Power InputS.......00.0eeceseeeeeeeeee Sheet 1, Side B Playfield Address Selector, Playfield Memory and Playfield Code Multiplexer . . Sheet 2, Side A Coin Counter Input Circuitry, Switch Inputs, Video Outputs ‘and MiniTrak Ball™ Circuitry ................. Sheet 2, Side B
- So et Centipede Wiring Diagram (037432-01 Regulator Audio Il PCB Schematic (035435-02
Rogulator/Audio Il PCB The Regulator/Audio ll PCB has the dual functions of reglating the +5 VDC logic power to the game PCB and am plifying the audio from the game PCB.
Regulator Circuit The regulator consists of voltage regulator Q1, power pass transistor Q3 and Q3's driver transistor Q2. The regulator accurately regulates the logic power input to the game PCB by monitoring the voltage through high-impedance inputs +SENSE and SENSE. The inputs are directly from the +5 VDC and ground inputs to the game PCB. Therefore, the regulator regulates the voltage on the game PCB. This climinates a reduced voltage due to IR loss in the wire hharness between the regulator and the game PCB. Variable resistor RB is adjusted for the +5 VOC on the game PCB. ‘Once adjusted, the voltage atthe input of the game PCB will remain constant at this voltage.
Regulator Adjustment
- Connect a voltmeter between +5V and GND test points of the game PCB.
- Adjust variable resistor RB on the Regulator/Audio II PCB for +5 VDC reading on the voltmeter.
- Connect a voltmeter between +5 V REG and GND on the Regulator/Audio Il PCB. Voltage reading must not ’be greater than +55 VDG. it greater, try cleaning edge connectors on both the game PCB and the Regula. tor/Audio ll PCB. l If cleaning PCB edge connectors doesn't decrease volt ge diference, connect minus lead of voltmeter to GND_ test point of Regulator/Audio I PCB and plus lead 10 GND test point of game PCB. Note the voltage. Now connect minus lead of volmeterto +5 REG test point on Regulator/Audio ll PCB and plus lead to +5 V test point on game PCB. From this you can see which hhamess circuit is dropping the voltage. Troubleshoot the appropriate harness wire or names connector.
‘Audio Circuit ‘The audio circuit contains two independent audio ampli fiers, Each amplifier consists of a TDAZOO2AV amplifier wth an eifective gain of 22.
c) <1 Denotes a test point E)
Dy ex nce coes rr sates