Satans Hollow (General Instructions) (Bad Scan)
Satan's Hollow (set 1) (Bally Midway, 1981) · Manual · 70 pages · 44 sections · original scan
SATAN’S HOLLOW
General Instructions
rally MIDWAY MFG. CO.
GENERAL _ INSTRUCTIONS
FOR
SATANS HOLLOW
INSTALLATION
- Unlock and open the coin box door.
- Remove four (4) "CABINET LEVELING LEGS" from inside the coin box.
- Tip the cabinet to the side and remove the shipping cleats from its bottom.
° Locate the threaded holes - one in each corner - and install the "CABINET LEVELING LFGS" in them.
° Level the cabinet.
° When finished, the cabinet should be stable in the upright position.
4, Plug the game into a standard A.C. wall outlet ONLY!
Game MUST be properly grounded.
- The power ON/OFF switch is located:
° UPRIGHT MODEL: On top of the cabinet toward the back.
° MINI MODEL: In the center of the cabinet back just below the rear access door.
° COCKTAIL TABLE MODEL: Underneath the cabinet on Player No. 2's side.
LINE VOLTAGE SAFETY INTERLOCK SWITCHES
Line voltage SAFETY INTERLOCK SWITCHES have been provided for your protection. The locations of these SAFETY INTERLOCK SWITCHES are:
- UPRIGHT MODEL: Inside the rear of the cabinet on the right side of the rear access door.
PART NO. M051-00941-A013
- MINI MODEL: Inside the rear of the cabinet on the right side of the rear access door.
- COCKTAIL TABEL: Inside the cabinet on the hinge side of the coin door.
When the cabinet access door(s) are secured in place, the SAFETY INTERLOCK SWITCH plunger(s) are in a fully depressed condition. The game circuit can function normally.
When any cabinet access door(s) are opened, the SAFETY INTERLOCK SWITCH plunger(s) are in a partially extended condition. This isolates the. game circuit from the line voltage.
To restore power to the game circuit with the access door(s) open, gently pull the SAFETY INTERLOCK SWITCH plunger(s) out to the fully extended condition. THIS JS TO BE USED FOR SERVICING THE GAME ONLY!
SELF-TEST
A slide switch is provided to make the game run a "Self-Test" on itself. The SELF-TEST SWITCH is located just inside the cabinet on the right side of the coin door frame as you face it.
To put the game into the Self-Test mode; turn the game ON and let it warm up for a few minutes. Then slide the SELF-TEST SWITCH to the ON position and actuate the "TILT" switch on the back side of the coin door just below the door lock to obtain the Self-Test-Menue display on the monitor screen.
When in the Self-Test mode, the monitor screen will display the results of certain test functions the game has run on itself. (These will be discussed in more detail later.)
TO SERVICE THE CONTROL PANEL (S)
- UPRIGHT MODEL:
° The control panel is held in place by two latches, one on the left side and one on the right side of the cabinet.
They are spring loaded to provide constant positive pressure on their latch plates.
They can be reached through the coin door AFTER turning power to the game off.
To release the latches, lift up and toward the center of the control panel.
Once they are released, unhook them from their latch plates.
To remove the control panel:
Raise it up and tilt it toward you until you can see the cable behind it.
-~3-
Cradling the control panel between yourself and the cabinet, disconnect it from its cabling.
The control panel is now free and can be removed.
° To reinstall the control panel, reverse this procedure.
- MINI MODEL:
° The control panel is held in place by two latches, one on the left side and one on the right side of the cabinet.
They are spring loaded to provide constant positive pressure on their latch plates.
They can be reached through the coin door AFTER turning power to the game off.
To release the latches, Lift up and toward the center of the control panel.
Once they are released, unhook them from their latch plates.
To remove the control panel:
Raise it up and tilt it toward you until you can see the cable behind it.
Cradling the control panel between yourself and the cabinet, disconnect it from its cabling.
The control panel is now free and can be removed.
To reinstall the control panel, reverse this procedure.
- COCKTAIL TABLE MODEL:
° Each control panel is held in place by several screws, two on the inside of the cabinet and three along the bottom edge of the control panel.
Turn the power off to the game.
Open the coin box door and release the two latches on the inside of the cabinet up next to the table top.
Once they're released, unhook them from their latch plates.
Grasp the table top in the center above the coin door lifting up and tq the side to tilt it open.
Remove the screws which secure the control panel in place.
° To remove the control panel(s):
Disconnect it from its cabling.
The control panel is now free and can be removed.
° To reinstall the control panel(s), reverse this procedure.
REMOVAL OF THE MAIN-DISPLAY-GLASS AND/OR THE 1.V. BEZEL ASSEMBLY
1, UPRIGHT MODEL:
Turn the power to the game off and remove the control panel. This frees the main-display-glass so it can be lifted up.
By putting your finger in the hole in the middle of the main-display-glass support, you can Lift it up and out.
Remove the screws which secure the T.V. bezel assembly in place (front and back).
The T.V. bezel assembly is now free and can be slid out of the cabinet.
To reinstall the T.V. bezel asssembly and the main-display-glass, reverse this procedure.
2, MINI MODEL:
Turn the power to the game off and remove the control panel.
Remove the screws which secure the glass clamping plate.
Lift out the glass clamping plate. This frees the main-display-glass so in can be lifted up.
By putting your finger in the hole in the middle of the main-display-glass support, you can lift it up and out.
Remove the screws which secure the T.V. bezel assembly and Lift it out.
° Reverse this procedure to reinstall the T.V. bezel assembly and the main-display-glass.
- COCKTAIL TABLE MODEL:
° Remove the screws which secure the table top glass clamps in place.
Remove the table top glass.
Loosen the screws which secure the T.V. bezel-glass-clamps in place.
Move the clamps to the side and the bezel glass may be removed.
Remove the screws which secure the bezel assembly to the table top and the bezel with four bezel-glass-clamps may be removed.
To reinstall the T.V. bezel assembly and the table top glass, reverse this procedure.
VOLUME CONTROL POT
The volume control pot is located just inside the cabinet on the RIGHT side of the coin door frame. For adjustment, it may be reached through the coin door on ALL models.
To make the sounds louder, turn the pot clockwise (>) as you face it.
To make the sounds less loud, turn the pot counterclockwise (4&7) as you face it.
VOLTAGE CONTROL POTS
The voltage control pots are located on the Linear Power Supply P. C. Board. They are preset at the factory and SHOULD NOT be tampered with at all unless the distributors service department is contacted first.
SELF-TEST
The Self-Test mode is a special mode for checking game play statistics as well as game switches and computer functions. It is the easiest and best way to check for proper operation of the entire game.
You may begin a Self-Test at any time by sliding the Self-Test switch to the "ON" position after the power to the game is on (Self-Test switch located just inside cabinet on right side of coin door frame). When this is done, the game will react as follows:
- If the qame is in the Attract mode when the Self-Test switch is moved to the "ON"
position, it will finish the sequence and then go into the Self-Test mode. This is illustrated by the display of the Self-Test Mode Menue on the monitor screen.
- If the game is in the Ready-To-Play mode or the Play mode when the Self-Test switch is slid to the "ON" position, it WILL NOT go into the Self-Test mode until AFTER the players last Missile Launcher has been lost (the game MUST be over). At this point, the game will go into the Self-Test mode. Again, this is illustrated by the display of the Self- Test Mode Menue on the monitor screen.
- The fastest way to enter the Self-Test mode is to slide the Self-Test switch to the "ON" position and then activate the "TILT" switch located on the back side of the coin door just below the lock mechanism. The game will then IMMEDIATELY go into the Self-Test mode.
The Self-Test mode has eight (8) major catagories as illustrated by the following Figure of the Self-Test Mode Menue as it should appear on the monitor screen.
- It is easy to select what catagory you want to enter. By moving the Control Stick left or right, the Cursor at the left of the screen can be moved UP and DOWN, (left=UP) and (right=DOWN), until it is in front of the catagory you want to test. Release the Control Stick at this time.
Nn After the Cursor has been positioned, depress either "SHIELD" button on the console and the monitor screen will display the test catagory you have selected.
° Once you are EN one of the Self-Test mode catagories, FOLLOW THE ON-SCREEN INSTRUCTIONS TO COMPLETE THE TEST.
w The next group of Figures show the CORRECT screen presentation for EACH catagory of the Self-Test mode.
The first display of the Self-Test mode is the Self-Test-Mode-Menue. It should look like this: SELECT DESIRED TEST
1 SELF DIAGNOSTICS
2 SOUNDS
3 PLAYER INPUT
4 BOOKKEEPING
5 MACHINE SETUP
6 CHANNEL TEST
7 PRESET
8 GRID DISPLAY
(MENUE - CONTINUED)
POSITION CURSOR BY MOVING CONTROL HANDLE
HIT SHIELD BUTTON FOR TEST
During the SELF DIAGNOSTICS section of the Self-Test mode, you will first see a cross hatch pattern on the screen for about 1/2 second. Second, you will see a lot of different colored bars shown on the monitor screen. These bars will be UNpainted one at a time from the top down. Third, you will see the screen painted Red, Blue, and Green in bars from the top down. Fourth, all the different colored bars you saw "Second" are displayed again. And fifth, the different colored bars are replaced by this message: "HIT SHIELD BUTTON TO EXIT".
If the SELF DIAGNOSTICS find one or more bad ROM or RAM chips: instead of going through what is described above, the game will give you a written message as to which parts are bad.
During the SOUNDS section of the Self-Test mode, the game will give a display which looks like the following:
SELECT A SOUND
ALL SOUNDS EXIT FLAME SOUND SHIELD SOUND BASE EXPLOSION MISSILE RELEASE BOMB DIVER RELEASE STEAL BASE 10 FIRE BALL 11 MUSIC 1 12 MUSIC 2 WOYAUFWH=
13 MIKE HIT 14 TARGET HIT 15 COIN 16 EXTRA BASE 7 BRIDGE BEGIN 18 BRIDGE COMPLETE 19 TILT 20 10000 BONUS FLAG 21 BRIDGE PICK UP 22 1000 BONUS FLAG 23 FLY BONUS FLAG
POSITION CURSOR BY MOVING CONTROL HANDLE
HIT SHIELD BUTTON FOR TEST
During the PLAYER INPUT section of the Self-Test mode, the game will give a display which looks like the following:
As the Player Input Switches and Devices are activated, the Switch or Device activated is spelled out in the blank space indicated at right. 1 COIN METER
ACTIVATE ALL PLAYER INPUT SWITCHES AND DEVICES
HIT TILT TO EXIT
During the BOOKKEEPING section of the Self-Test mode, the game will give a display which looks like the following:
SELECT A REPORT OR EXIT
CHUTE 1 COINS
CHUTE 2 COINS
LONGEST GAME
SHORTEST GAME
HIGHEST SCORE
LOWEST SCORE
TIME REPORT
SCORE REPORT
EXIT
POSITION CURSOR BY MOVING CONTROL HANDLE
HIT SHIELD BUTTON FOR TEST
In the TIME REPORT and SCORE REPORT sections of the BOOKKEEPING mode, the game will give displays which look like the following:
TIME REPORT SCORE REPORT
| ie) | TO | 30 SEC | 0 | TO 5000 PTS |
| 30 | TO | 60 SEC | 5000 | TO 10,000 PTS |
| 60 | TO | 90 SEC | 10,000 | TO 20,000 PTS |
(TIME REPORT AND SCORE REPORT - CONTINUED)
- 10 120 SEC 20,000 TO 40,000 PTS _
| 120. | «10 150 SEC | 40,000 TO 70,000 PTS _ | |
| 150 | TO 180 SEC | 70,000 TO 100,000:PTS | |
| 3 | «TO | 4 MIN | 100,000 TO 150,000 PTS _ |
| 4 | 10 | 5 MIN | 150,000 TO 200,000 PTS |
| 5 | 10 | 6 MIN | 200,000 TO 250,000 PTS |
OVER 6 MIN OVER 250,000 PTS
HIT SHIELD BUTTON TO EXIT HIT SHIELD BUTTON TO EXIT
During the SETUP OPTIONS section of the Self-Test mode, the game will give a display whicl looks like the following:
SETUP OPTIONS
COIN CHUTE 1
- = Factory recommended settings. *1 COINS FOR *1 CREDITS
COIN CHUTE 2 *1 COINS FOR *1 CREDITS
*1 CREDITS FOR *3 BASES
*2 CREDITS FOR *7 BASES
EXTRA BASE AT *30,000 PTS
*3 DIFFICULTY LEVEL
EXIT
USE SHIELD BUTTON TO POSITION CURSOR USE 1 AND 2 PLAYER BUTTONS TO ALTER OPTIONS
The Difficulty Level setting has a range of 1 to 9. With 1 being the easiest level of play and 9 being the most difficult level of play. We recommend that a setting of 3 be used as a beginning point.
Game play can then be made MORE difficult or LESS difficult, according to the skill levels attained by the players in your area.
During the CHANNEL TEST section of the Self-Test mode, the game will give a display which looks like the following:
CHANNEL TEST
CHANNEL CHANNEL CHANNEL CHANNEL CHANNEL CHANNEL AuFPWwn=
HIT KICK BUTTON TO EXIT
Once you enter the CHANNEL TEST section of the Self-Test mode, the game automatically tests Channels 1 through 6 giving a tone for each one as it checks it. After the 6th Channel is tested, the game automatically repeats the test until the Shield button is hit. It then goes back to the Self-Test Mode Menue.
During the GRID DISPLAY section of the Self-Test mode, the game shows a white cross hatch pattern on the monitor screen. This is for alignment and/or test purposes. This pattern will remain on the monitor screen until the Shield button is hit. The game will then go back to the Self-Test Mode Menue.
To leave the Self-Test mode, simply slide the Self-Test switch to the "OFF" position at ANY time. The game will then run through the ROM/RAM test display after which normal game functions will then return to the monitor screen.
-M-
oc nC ,. oO SATANS HOLLOW
OPTION SWITCH SETTINGS
I/O P.C. BOARD//////////////11 TITITITTTLTLT ATLL SWITCH NO. 1 - AT B 3 - LOCATED ON SOUND
SW#2 = SWH3 SW#4 SWS
2 COIN METERS ON NOT NOT NOT NOT NOT NOT NOT
*** 7 COIN METER OFF USED USED USED USED USED USED USED
MINI / UPRIGHT ON COCKTAIL TABLE
FREEZE VIDEO
**% NORMAL OPERATION
FILTTTLTTTTTT ATT TSWLTCH NO. 3 - AT D 14 - LOCATED ON SOUND I/0 P.C. BOARD///////////////
**SWH2 **SWHS ** SWI #4 NORMAL OPERATION SOUND I/0 DIAGNOSTIC MODE ON
*#® NORMAL OPERATION OFF RAM/ROM TEST ON INDICATES TEST RESULTS VIA YELLOW LED ON SOUND I/0 BOARD: FAST FLASH = BAD ROM SLOW FLASH = BAD RAM
* NORMAL OPERATION OSCILLATOR TEST
*#® NORMAL OPERATION FILTER TEST
- THIS SWITCH NOT USED ON UPRIGHT MODELS. ** NO EFFECT IF SWi#1 OF SWITCH NO. 3 IS IN THE "OFF" POSITION. *** INDICATES FACTORY RECOMMENDED SETTINGS. PART NO. M051-00941-A011
THE REMAINDER OF SATANS HOLLOW'S MOST COMMON OPTION SETTINGS ARE CONDUCTED DURING THE MACHINE SETUP PORTION OF THE SELF-TEST MODE. SIMPLY FOLLOW THE ON-SCREEN INSTRUCTIONS TO MAKE ANY ADJUSTMENTS YOU FEEL ARE NECESSARY.
MCR Il SYSTEM
Pp. Cy BOARD JUMPER OPTIONS
THT TATA IN TD EO GENERATOR PLC. BOAR D/S//ISIIITIMIIIITTTL WH WH2 JW OWS «OWS = (OWE | WHT JWHB
IW OWH2 «OWH3 SWS «OWES «= OWHE | NOTE: JUMPER OP- NUMEROUR MFR'S 2532 AGA RaES * | TION FOR PROGRAM NUMEROUS MFR'S ROMs ONLY.
JWwiH1 | WH2
* " CUT JUMPER WIRES WHERE THIS SYMBOL "*" APPEARS.
" LEAVE JUMPER WIRES IN WHERE THIS SYMBOL "#" APPEARS.
The above table illustrates the fact that the Video Generator P.C. Board used in the MCR II System has 8 jumper wires, the C.P.U. P.C. Board used in the MCR II System has 6 jumper wires, and the Sound 1/0 P.C. Board used in the MCR II System has 2 jumper wires.
All of the above Boards can be used with a variety of different SETS of EPROM chips. However, these EPROMS are not all made by the same manufacturer and do have some internal differences. So, in order to make them function properly in their respective P.C. Boards, certain jumper wires on these Boards have to be cut.
The above table tells you which jumpers to cut (depending on which EPROM set you're going to use) by showing a "*" under that jumper wires number. If there is NO "*" under a jumper wires number, THAT PARTICULAR: JUMPER WIRE IS NOT TO BE CUT.
V Technical Troubleshooting
Harness Component Troubleshooting
Introduction
The most common problems occur in harness components such as the coin acceptor, player controls, interconnecting wiring, etc. The TV monitor and PCB computer cause their share of problems _ too, but not as much as the harness and its component parts. TV monitor troubleshooting will not be covered here because it is covered in that section of this manual. As you already know, the PCB computer is a complex device with a number of different circuits. Some circuits remain basically the same among games, but overall there are a great many differences between them. PCB troubleshooting procedures, therefore, can be lengthy and will differ greatly among games. However, some basic Z-80 CPU information is involved in this section.
General Suggestions
The first step iN any troubleshooting procedure is correctly identifying the malfunction’s symptoms. This includes not only the circuits or features malfunctioning, but also those still operational. A carefully trained eye will pick up other clues as well. For instance, a game in which the computer functions fail completely just after money was collected may have a quarter shorting the PCB traces. Often, an experienced troubleshooter will be able to spot the cause of the problem even before opening the cabinet. After all the clues are carefully considered, the possible malfunctioning areas can be narrowed down to one or two good suspects. Those areas can be examined by a process of elimination until the cause of the malfunction is discovered.
Typical problems falling in this category are coin and credit problems, power problems and failure of individual features.
5-1 NO GAME CREDIT For example, your prospective player inserts his quarter and is not awarded a game. The first item to check is if the quarter is returned. If the quarter is returned, the malfunction most certainly lies in the coin acceptor itself. First, use a set of test coins (both old and new) to ascertain that the player's coin is not undersize or underweight. If your test coins are also returned, coin acceptor servicing is indicated. Generally, the cause of this particular problem is a maladjusted magnet gate. Normally, this will mean slightly closing the magnet gate alittle by turning the adjusting screw out a bit (see section.on coin acceptor for more details). lf the quarter is not returned and there is no game credit, the cause of the malfunction may be in one of several areas. First try operating the coin return button; if the coin is returned, the problem is most likely in the magnet gate. Enlarge the gap according to the coin acceptor service procedures. If this does not cure the problem, remove the coin acceptor, clean it and perform the major adjustment procedure. lf the trapped coin is not returned when the wiper lever is actuated, you may have an acceptor jammed by a slug, gummed up with beer, a jammed coin chute, or mechanical failure of the acceptor mechanism. In this case, first check for the slug that will generally be trapped against the magnet. If so, simply remove the slug and test the acceptor. If the chute is blocked, remove the acceptor and remove the jammed coins. If there is actual failure of the acceptor, remove the unit and repair as indicated in the coin acceptor service procedures. Hf the coin is making its way through the acceptor (that is, falling into the coin box), yet there is still no game credit, you either have a mechanical failure of the coin switch or electrical failure of the coin and credit circuits. The first place to begin is by checking the coin switch. Most of these switches are the make/break variety of micro switch, which is checked by testing for continuity between the NO, NC, and C terminals. When not actuated, the NC and C terminals should be continuous and the NO terminal open. When operated, the NO and C terminals should close and the NC should be open. If the coin switch checks out, examine the connections to the terminals to make sure there is good contact. If necessary, use the continuity tester and check from the terminal lug on the switch to the associated PCB trace. This will tell you if there is a continuous line all the way to the credit circuit.
If the coin switch wires do not check out, the problem is in the computer — most likely in the coin and credit circuitry. |f you do get game credit when a coin is deposited, but the game will not start when the start switch is pressed, you may have a problem in the start switch, the interconnecting wiring or in the computer. First check the switch. If the switch is OK, proceed to check the wiring. Again, make sure you go from the terminal lug on the switch to the PCB trace. This way, you will check the terminal contact as well as PCB edge connector contact. If the wiring is continuous, proceed to check the PCB credit circuit. If not, check each section of the wiring, until the discontinuity is located. If the wiring is OK, the problem must lie in the computer.
Transformer and Line Voltage Problems
Your machine must have the correct line voltage to operate properly. If the line voltage drops too low, a circuit in the computer will disable game credit. The point at which the computer will fail to work will vary some from game to game, but no game will work on line voltage that drops below 105 VAC. Low line voltage may have many causes. Line voltage normally fluctuates a certain amount during the day as the total usage varies. Peak usage times occur mainly at dawn or dusk, so if your machine's malfunction seems to be related to the time of day, this may be a factor. A large load connected to the same line as the game (such as a large air conditioner or other device with an exceptionally large motor) may drop the line voltage significantly when starting up. This drop can result in an intermittent credit problem. In addition, poor connections in the location wiring, plug, or line cord may also cause a significant drop in power. Cold solder joints in the game's harness, especially in areas like the transformer connections, interlock switch, or fuse block, may also produce the same results, although probably on a more permanent basis. Sometimes location owners (especially in bars) replace light switches with dimmer rheostats, and the game is sometimes on the same line. Obviously, the voltage available to the game is going to drop dramatically when the dimmer is turned. In any case, the way to check for correct line voltage is with your VOM. Set the VOM to 250 VAC and stick the probes in the wall receptacle. If it's OK here, check the transformer primary connections. If you do not get 117 VAC, examine the solder joints on the transformer, fuse block, and interlock switch. If you do get 117 VAC, the problem must be either in the transformer, harness connections, or in the PCB power supply.
5-2 If you suspect the transformer, check its secondaries with the VOM set to 50 VAC and correlate the readings with the legend on the side of the transformer. The transformer must also be correctly grounded, so check the ground potential as well, especially if there is a hum bar rolling up or down the TV screen
HARNESS PROBLEMS Other harness problems include blowing fuses and malfunctioning controls. The repeating blown-fuse problem can sometimes be quite exasperating to solve, for short circuits have the tendency to occurin areas almost impossible to find. First, try inserting a new fuse, as old fuses age and blow without cause. If the new one also blows, you definitely have a short. The best way to approach this problem is by turning the power off and disconnecting devices that may be causing the problem, such as the TV, transformer, and PCB. Disconnect the devices by pulling off their connectors, but do not allow them to touch. If necessary, insulate them with small pieces of electrical tape. Then, connect your VOM across the terminals of the fuse block (all electrical power shut off), and set it to one of the resistance scales. This will save blowing a fuse each time you want to check the circuit.
If the VOM reveals that disconnecting the devices removed the short, reconnect the devices one by one until the short returns. The last device connected is the one that is at fault. If the VOM reads a short even after the devices are disconnected, the fault must lie in the harness itself, and only patient exploration will reveal its location. First, carefully examine all the wiring, looking for terminals that may be touching, metal objects such as coins shorting connections or burned insulation. If necessary, use the VOM to check each suspected wire. MALFUNCTIONING CONTROLS One of the most common problems here is a bad potentiometer. Typically, a bad pot will cause the image to jump as it reaches a certain point. The only cure for this one is to install a new pot. If a feature that is operated by a switch (for example, joysticks, foot pedals, control panel buttons) does not operate at all, check the switch with a VOM or continuity tester to verify its operation. If the switch does not check out, replace it. If the switch is OK, you should suspect the input to the switch from the PCB. In this case, get out the harness and logic schematics and check to see what kind of input it is. In many cases, the input will be +5 VDC. If so, use the VOM to check its presence. Normally, the switch is used to pull a +5 VDC line LOW to GND or to pulla LOW line HIGH. If the PCB output is missing, check the wire length from the PCB. If you find the signal at the PCB trace, the wire length or connection is at fault. If not, begin exploring the PCB using the logic schematics
A Glossary of Microprocessor Terms
MICROPROCESSOR — one or several microcircuits that perform the function of a computer's CPU. Sections of the circuit have arithmetic and comparative functions that perform computations and executive instructions
CPU — central-processing unit. A computing system’s “brain”, whose arithmetic, control and logic elements direct functions and perform computations. The microprocessor section of a microcomputer is on one chip or several chips. PROM — programmable read-only memory. User permanently sets binary on-off bits in each cell by selectively fusing or not fusing electrical links. Nonerasable. Used for low-volume applications
EPROM — erasable, programmable, read-only memory. Can be erased by ultraviolet light bath, then reprogrammed. Frequently used during design and development to get programs debugged, then replaced by ROM for mass production.
ROM — read-only memory. The program, or binary on-off bit pattern, is set into ROM during manufacture, usually as part of the last metal layer put onto the chip. Nonerasable. Typical ROM's contain up to 16,000 bits of data to serve as the microprocessor’s basic instructions.
RAM — random-access memory. Stores binary bits
as electrical charges in transistor memory cells. Can be read or modified through the CPU. Stores input instructions and results. Erased when power is turned off. LSI — large scale integration. Formation of hundreds or thousands of so-called gate circuits on semiconductor chips. Very large scale integration (VLS) involves microcircuits with the greatest component density. MOS — metal-oxide semiconductor. A layered construction technique for integrated circuits that achieves high component densities. Variations in MOS chip structures create circuits with speed and low-power requirements, or other advantages (static will damage a MOS chip).
Introduction to the
Z-80 CPU
The term “microcomputer” has been used to describe virtually every type of small computing device designed within the last few years. This term has been applied to everything from simple “microprogrammed” controllers constructed out of TTL MSI up to low end minicomputers with a portion of the CPU constructed out of TTL LSI “bit slices.” However, the major impact of the LSI technology within the last few years has been with MOS LSI. With this technology, it is possible to fabricate complete and very powerful computer systems with only a few MOS LSI components. The Zilog Z-80 family of components can be configured with any type of standard semiconductor memory to generate computer systems with an extremely wide range of capabilities. For example, as few as two LSI circuits and three standard TTL MSI packages can be combined to form a simple controller. With additional memory and |/O devices a computer can be constructed with capabilities that only a minicomputer could previously deliver. New products using the MOS LSI microcomputer are being developed at an extraordinary rate. The Zilog Z-80 component set has been designed to fit into this market through the following factors:
5-3
- ‘The 2-80 is fully software compatible with the popular 8080A CPU. Existing designs can be easily converted to include the 2-80. 2.
- The Z-80 component set is at present superior in both software and hardware capabilities to any other microcomputer system on the market today. For increased throughput the Z80A operating ata 4 MHZ clock rate offers the user significant speed advantages. Microcomputer systems are extremely simple to construct using Z-80 components. Any such system consists of three parts:
- CPU (Central Processing Unit)
- Memory
- Interface Circuits to peripheral devices The CPU is the heart of the system. Its function is to obtain instructions from the memory and perform the desired operations. The memory is used to contain instructions and in most cases data that is to be processed. For example, a typical instruction sequence may be to read data from a specific peripheral device, store it in a location in memory, check the parity and write it out to another peripheral device. Note that the Zilog component set includes the CPU and various general purpose |/O device controllers, while a wide range of memory devices may be used from any source. Thus, all required components can be connected together in a very simple manner with virtually no other external logic.
General Purpose Registers
There are two matched sets of general purpose registers, each set containing six 8-bit registers that may be used individually as 8-bit registers or as 16bit register pairs by the programmer. One set is called BC, DE and HL while the complementary set is called BC’, DE’ and HL’. At any one time the Programmer can select either set of registers to work with through a single exchange command for the entire set. In systems where fast interrupt response is required, one set of general purpose registers and an accumulator/flag register may be reserved for handling this very fast routine. Only a simple exchange command need be executed to go between the routines. This greatly reduces interrupt service time by eliminating the requirement for saving and retrieving register contents in the external stack during interrupt or subroutine processing. These general purpose registers are used for a wide range of applications by the programmer. They also simplify programming, especially in ROM based systems where little external read/write memory is available. Arithmetic & Logic Unit (ALU) The 8-bit arithmetic and logical instructions of the CPU are executed in the ALU. Internally the ALU communicates with the registers and the external data bus on the internal data bus. The type of functions performed by the ALU include: Add Left or right shifts or rotates (arithmetic and logical)
Subtract Increment
Logical AND Decrement Logical OR Set bit Logical Exlusive OR Reset bit Compare Test bit Instruction Register and CPU Control As each instruction is fetched from memory, it is placed in the instruction register and decoded. The control sections performs this function and then generates and supplies all of the control signals necessary to read or write data from or to the registers, control the ALU and provide all required external contro! signals.
Z-80 CPU Pin Description
The Z-80 CPU is packaged in an industry standard 40 pin Dual In-Line Package. The I/O pins are shown in the below figure and the function of each is described.
My
MREQ
ioRa RO SYSTEM CONTROL
FSH
HALT
WAIT CPU CONTROL
GND
L— 2-80 CPU
Z-80 PIN CONFIGURATION ADDRESS. BUS
DATA BUS
5-4
Ao-Ais (Address Bus) Tri-state output, active high. Ap-A;s constitute a 16bit address bus. The address bus provides the address for memory (up to 64K bytes) data exchanges and for I/O device data exchanges. 1/O addressing uses the 8 lower address bits to allow the user to directly select up to 256 input or 256 output Ports. Ap is the least significant address bit. During refresh time, the lower 7 bits contain a valid refresh address
D,-D, (Data Bus) Tri-state input/output, active high. Dy-D, constitute an 8-bit bidirectional data bus. The data bus is used for data exchanges with memory and I/O devices.
M, (Machine Cycle one) __ Output, active low. M, indicates that the current machine cycle is the OP code fetch cycle of an instruction execution. Note that during execution of 2-byte op-codes, M1 is generated as each op code byte is fetched. These two byte op-codes always begin with CBH, DDH, EDH or FDH. M1 also occurs with IORQ to indicate an interrupt acknowledge cycle.
MREQ (Memory Request) Tri-state output, active low. The memory request signal indicates that the address bus holds a valid address for a memory read or memory write operation. 1ORQ (Input/Output Request) Tri-state output, active low. The IORQ signal indicates that the lower half of the address bus holds a valid I/O address fora I/O read or write operation. An 1ORQ signal is also generated with an M1 signal when an interrupt is being acknowledged to indicate that an interrupt response vector can be placed on the data bus. Interrupt Acknowledge operations occur during M, time while I/O operations never occur during M, time. RD (Memory Read) _ Tri-state output, active low. RD indicates that the CPU wants to read data from memory or an I/O device. The addressed I/O device or memory should use this signal to gate data onto the CPU data bus. WR (Memory Write) _ Tri-state output, active low. WR indicates that the CPU data bus holds valid data to be stored in the addressed memory or I/O device. RFSH (Refresh) Output, active low. RFSH indicates that the lower 7 bits of the address bus contain a refresh address for dynamic memories and the current MREQ signal should be used to do a refresh read to all dynamic memories.
HALT (Halt state) Output, active low. HALT indicates that the CPU has executed a HALT software instruction and is awaiting either a non maskable or a maskable interrupt (with the mask enabled) before operation can resume. While halted, the CPU executes NOP’s to maintain memory refresh activity. WAIT (Wait) Input, active low. WAIT indicates to the Z-80 CPU that the addressed memory or I/O devices are not ready for a data transfer. The CPU continues to enter wait states for as long as this signal is active. This signal allows memory or I/O devices of any speed to be synchronized to the CPU.
INT (Interrupt Request) Input, active low. The Interrupt Request signal is generated by I/O devices. A request will be honored at the end of the current instruction if the internal software controlled interrupt enable flip-flop (IFF) is enabled and if the BUSRQ signal is not active. When the CPU_accepts the interrupt, an acknowledge signal (IORQ during M, time) is sent out at the beginning of the next instruction cycle. The CPU can respond to an interrupt in three different modes that are described in detail in section 5.4 (CPU Control Instructions). NMI (Non-Maskable Interrupt) input, negative edge triggered. The non maskable interrupt request line has a higher priority than INT and is always recognized at the end of the current instruction, independent of the status of the interrupt enable flip-flop. NMI automatically forces the Z-80 CPU to restart to location 00664. The program counter is automatically saved in the external stack so that the user can return to the program that was interrupted. Note that continuous WAT
cycles can prevent the current instruction from
ending, and that a BUSRQ will override a NMI. RESET Input, active low. RESET forces the program counter to zero and initializes the CPU. The CPU initialization includes:
- Disable the interrupt enable flip-flop
- Set Register {= 00u
- Set Register R =00n
- Set Interrupt Mode 0 During reset time, the address bus and data bus go to a high impedance state and all control ouput signals go to the inactive state.
BUSRQ (Bus Request) Input, active low. The bus request signal is used to request the CPU address bus, data bus and tri-state output contro! signals to go to a high impedance state so that other devices can control these buses. When BUSRQ is activated, the CPU will set these buses to a high impedance state as soon as the current CPU machine cycle is terminated.
BUSAK (Bus Acknowledge) Output, active low. Bus acknowledge is used to indicate to the requesting device that the CPU address bus, data bus and tri-state control bus signals have been set to their high impedance state and the external device can now contro! these signals.
CLK (Clock) Single phase TTL level clock which requires only a 330 ohm pull-up resistor to +5 volts to meet all clock requirements.
PLEASE NOTE:
THE INFORMATION CONTAINED IN THIS SECTION 1S TOLD IN AN EASY TO UNDERSTAND MANNER AND IS INTENDED TO AID THOSE WITHOUT AN ELECTRONICS DEGREE IN TROUBLESHOOTING AND REPAIRING THEIR GAMES T.V. MONITOR.
IF YOU READ THROUGH THIS SECTION AND STILL HAVE QUESTIONS, PLEASE CONTACT YOUR DISTRIBUTOR OR MIDWAY MANUFACTURING COMPANY AT THE TOLL FREE NUMBER PROVIDED WITH YOUR GAMES PAPERS.
OUR STAFF AND OUR DISTRIBUTORS STAND READY TO HELP YOU!
THANK YOU
VI T.V. Monitor
Color T.V.
Color T.V Monitor
Introduction: (How to
use this section of your manual.)
This section has been designed to simply familiarize you with one of the more mystical components in your game — the T.V. monitor. If you are an electronics technician who is quite knowledgeable on the subject, you may decide to just go to the schematics and start troubleshooting the defective monitor. But if you are like most people, a monitor is a T.V. set, and that means a complex doo-dad that means big buck repairs. This isn’t necessarily so. This section of the manual will acquaint you with the monitor and could just help you repair it if you feel adventurous enough to give it a try. If you have any knowledge of electronics, especially the use of a voltmeter, the repairs you can make are astonishing. Just keep in mind that ELECTRICITY CAN BE VERY DANGEROUS, SO BE CAREFUL!
If you want to understand how a monitor works, just read the “THEORY OF OPERATION” subsection. If you wish, you can follow along with the schematics. The information is presented in a very basic manner but more complete treatment of the subject can be found in the technical sections of bookstores.
lf you want to attempt to repair your monitor, it would be a good idea to read this whole section beginning to end before starting. Pay attention to all warnings
6-1 and take them seriously. The more equipment you have the better, but a low cost Volt-Ohm-Milliameter can often do the trick. Here are the steps to take:
- Find the symptom that matches the problems your monitor has in the “SYSTEM — DIAG- NOSIS” subsection. The diagnosis tells the circuit or area the problem may be in and possibly even the actual component causing it.
- Once you have the circuit that is causing the trouble, read the “TROUBLESHOOTING” subsection to learn the procedure for finding the bad part.
- Next, go to the schematic section and find the schematic that matches your monitor. It may be helpful to read the “DIFFERENCES BETWEEN MONITORS” subsection if you are unsure of which monitor you have. Use the schematic to see what parts are in the offending circuit.
That really is all there is to it. Just remember that there are some bizarre or rare symptoms not covered, or that a monitor may have two or more different problems that only a genius, the experienced, or an experienced genius can figure out. But be patient, follow safety precautions, and remember that there is also literature available from the monitor companies through your distributor or from Midway Manufacturing Company on request. (There is a toll free number on the back side of the front cover of this manual.)
Symptom Diagnosis
. Insufficient width or heighth: A. Horizontal line (due to VERTICAL CIR- CUIT DEFECT). e Bad yoke. e Bad vertical output section. © Open fusible resistor in vertical section. Bad height control. e Bad flyback. B. Vertical line (due to HORIZONTAL CIR- CUIT DEFECT). e Bad yoke. e Open width coil. e Open part in horizontal output section. . Picture spread out too far or crushed in certain areas: A. Horizontal or vertical output transistor. B. Bad component in output circuitry. . Line too close with black spacing: A. Problem in vertical section causing poor linearity. . Poor focus and convergence: A. Bad high voltage transformer (“flyback”) or control. B. Focus voltage wire not connected to neckboard terminal.
. Colors missing; check: Interface color transistors. Color output transistors. Cracked printed circuit board. Color circuits. . Video input jack. . Picture not bright enough: A. Weak emission from picture tube. (Turn horizontal sync off frequency and put brightness all the way up for about 15 minutes. Occasionally this cures the problem.) moOm>
. Silvery effect in white areas; check: A. Beam current transistors. B. Weak picture tube emission. . Too much brightness with retrace lines; check: A. Beam limiter transistors. B. Brightness and/or color blanking control set too high. . Increasing brightness causes an increase in size and poor focus. A. Weak high voltage rectifier or regulation (high voltage unit).
6-2 10.
11.
12.
13.
14.
15.
16.
17.
18.
19.
20. Small picture and/or poor focus: A. Low B+ voltage (power supply trouble).
Vertical rolling: A. Vertical oscillator transistor, IC, or circuit. B. No sync from logic board.
Horizontal line across center: A. Vertical output circuit is dead (see symptom No. 1. A.). B. Vertical oscillator is not putting out the right wave form. Picture bends: A. Horizontal sync needs adjusting. B. Magnetic or electromagnetic interference.
Flashing picture, visable retrace lines: A. Broken neck board. B. Internal short circuit in the picture tube (arcing). Unsymmetrical picture or sides of picture: A. Defective yoke.
No brightness, power supply operating — No high voltage for the picture tube; check: A. Horizontal oscillator. B. Horizontal amplifier and output. C. Flyback transformer (high voltage unit).
No brightness, high voltage present; check: A. Heater voltage to the tube at the neck board. B. Screen-grid voltage for the tube. C. Focus voltage. D. Grid to cathode picture tube bias.
No high voltage; check: For AC input to the “flyback”. Horizontal deflection stages. Flyback transformer. Yoke. Power supply. MmOOD>
No horizontal and vertical hold; check: A. Sync transistors and circuit. B. Wires and jack from logic board to the monitor. Wavey picture — (power supply defect); check: A. Transistors, diodes, electrolytic capacitors in the power supply.
- Moving bars in picture: A. Ground connector off between monitor and logic boards. B. Defect in the power supply (see wavy picture symptom).
- Washed out picture (see picture not bright enough): A. Check video signal at the cathode pins with an oscilloscope. If there is about 80 volts peak to peak, the picture tube has weak emission.
- Monitor won’t turn on: A. Problem in the power supply: Check fuse, transistors, open fusible resistor. B. Shorted horizontal output transistor c. 0. Defective high voltage disabling circuit. Crack(s) somewhere on main chassis board.
24, Can't adjust purity or convergence:
A. Use a degausser to demagnetize the picture tube carefully following your degausser’s instructions. Picture tube defective. Metal foreign material is in picture tube shield. Nearby equipment is electromagnetically interferring. The poles of the earth are pulling off the purity. Poor focus or width of picture.
Guide To Schematic Symbols
THERMISTOR (POLARITY DOESN'T MATTER)
SYN
INDUCTOR, COIL, CHOKE (POLARITY DOESN'T MATTER)
(-) CATHODE
(+) ANODE
ZENER DIODE
6-3 UI II
IRON CORE TRANSFORMER (SUCH AS A FLYBACK)
aan an FUSE (POLARITY DOESN'T MATTER)
CATHODE (-)
ANODE (+)
DIODE
COLLECTOR Ae COLLECTOR 4a
BASE ———- BASE————> EMITTER me EMITTER nes
NPN TRANSISTOR PNP TRANSISTOR
IW—
VARIABLE RESISTOR, POT, CONTROL RESISTOR (POLARITY DOESN'T MATTER) (POLARITY DOESN'T MATTER)
+ +
LINES ARE CONNECTED ELECTROLYTIC CAPACITOR
LINES ARE NOT CONNECTED CAPACITOR (POLARITY DOESN'T MATTER)
hg = GROUND
6-4
Troubleshooting
Troubleshooting monitors requires experience, patience, and luck. The first step is to match the symptom the monitor displays to the diagnosis next to it in the “SYMPTOM-DIAGNOSIS"” subsection. This will pinpoint the circuit the problem is probably in, and often the parts to check. Next, the circuit should be visually inspected to see if there are any parts broken, burned, or if something is there that shouldn't be, like a loose screw, etc. Some parts go bad before others and should be checked first. In fact, following is the general order in which parts usually go bad:
- Semiconductors (like transistors, diodes, and integrated circuits). Fusible resistors. Electrolytic capacitors. Resistors. Capacitors and coils. Always remember that a monitor can bite like a snake. Even when it is turned off, capacitors hold voltage and will discharge it to you should you be touching chassis ground. The picture tube or CRT, itself, is a giant capacitor, so avoid the flyback anode plug hole. With the monitor on, the power supply circuit and/or the flyback, which puts out at least 18,000 volts, CAN BE KILLERS!! Avoid handling power transistors (usually output transistors), yoke terminals, and other high power components when the monitor is on.
6-5 healthy charge for at least a week if not longer. Even after you've discharged it once, it may still carry a residual charge. It’s better to be too careful than dead, which is why electronic equipment always carries stickers referring servicing to qualified personnel. Handle the side with the viewing screen against your chest when changing it. ALWAYS wear safety goggles when handling the picture tube.
To maintain the safety and performance of the monitor, always use exact replacement parts. For instance, the wrong components in the power supply can cause a fire, or the wrong color transistor may give a funny color to the picture. Service your monitor on a nonconductive firm table like wood, NOT METAL, and take off all of your jewelry just in case. With all this in mind, you are ready to begin troubleshooting.
Observe the picture carefully. Try to vary the appropriate control that would most likely affect your particular symptom. For example, if there is poor brightness or no picture, try turning up the brightness or contrast control. If the controls have no effect at all, chances are there is trouble with the control itself, the circuit it controls, or a nearby circuit that may be upsetting voltages. Go to the list of symptoms and determine with the schematic where the bad circuit is.
Keep in mind that capacitors hold a charge as can the picture tube (for at least a week and usually longer), and could shock you.
First, check for obvious visual defects such as broken or frayed wires, solder where it is not supposed to be, missing components, burned components, or cracked printed circuit boards. If everything looks good up to this point, make sure that diodes, electrolytic capacitors, and transistors have their leads connected in the right polarity as shown on the schematic and the circuit board. Turn on the power and measure the voltages at the leads of the active devices such as tubes, transistors, or integrated circuits. Any voltage that does not come within at least 10% to 15% of the voltage specified on the schematic indicates either a problem with that device or a component connected with it in the circuit. The next step is to use the ohmmeter to narrow down the field of possible offenders.
To test a transistor, one lead of the ohmmeter is placed on the base; and the other lead placed just on the emitter, then on the collector. A normal transistor will read either high resistance (infinite), or little resistance (400 to 900 ohms), depending on the polarity of this type transistor. Then the leads should be switched, one remaining on the base, and the other switched from the emitter to the collector. Now the opposite condition should result: the resistance should be infinite if it was lower when the other lead was on the base. Consistantly infinite readings indicate an open, and ashort is demonstrated by 0-30 ohms on most of these test readings. Finally, place one lead on the collector, then the other on the emitter. No matter which lead is used, there should be infinite resistance. Any lower reading, such as 50 ohms (which is typical on a bad transistor), indicates a short. This all sounds pretty confusing, but a little experience on a good transistor will make you an expert in no time. Usually, the lowest ohmmeter setting is used for testing transistors. Once in a great while a transistor may check out good on this test, but may actually be “leaky” or break down only on higher voltages. If in doubt, change it. It is also wise to check the transistor out of the circuit just in case some component in the circuit is affecting the ohmmeter reading. A diode is tested like a transistor except it only has two leads. Again, there should be high resistance one way and little resistance the other. if it tests bad, take one lead out of the circuit in case some component is messing up the ohmmeter reading.
Without special equipment, integrated circuits are checked by verifying the proper DC voltage on the pins and the correct AC wave form using an oscilliscope. BE CAREFUL: Shorting their pins can easily destroy them. Resistors are checked with an ohmeter and should usually be within ten percent of the value stated on them and on the schematic. You may have to desolder one lead from the printed circuit board. If you wreck the foil on the board, carefully solder a small wire over the break to reconnect the conductive foil. Capacitors are tricky. Their resistance goes up when checked with an ohmmeter which shows a charging action. As they suck up current from the meter, the voltage goes up and so does the resistance. If you are sure a particular circuit is giving you a problem and everything else checks out O.K., Electrolytic capacitors are prime suspects. Substitute a new one and keep your fingers crossed.
Theory of Operation
To understand what goes on inside the monitor, large general groups of circuits will be examined instead of laboriously analyzing the branches and small circuits that make up these groups. This will help avoid confusion and aid in a basic, concrete, knowledge of what makes up a monitor.
THE POWER SUPPLY — The AC going to the monitor from the game transformer is just like the voltage and current from your wall outlet. It jumps up and down going positive and negative sixty times a second. But a monitor needs nice, smooth DC; direct current, not alternating. So diodes chop up the AC and a big electrolytic capacitor filters it out to make it even smoother. Since the monitor is a big piece of electronic
equipment, with many circuits demanding a lot of
power from the power supply, there are also zener diodes and transistors to help maintain a nice, constant, smooth voltage so that the monitor circuits don’t jump around. And this is what happens when you see a wavy picture. There is AC creeping
6-6 through the power supply, so it must be malfunctioning. {If the voltage from the power supply is too low, the other circuits will be starved for power and you may see a small, wavy picture, or none atall. Some circuits receive voltages that are higher than what the power supply should put out. But they come from the flyback transformer which will be discussed later. THE INTERFACE SECTION OF THE CHASSIS — The interface section of the chassis is fairly easy to identify. It is right by the place where the video jack(s) from the logic board(s) plug into. There are sets of transistors that receive the separate red, green, blue, and sync information from the cables that come from the logic boards. The circuits jack up the voltage and match impedances, or in other words, prepare the logic board outputs for the circuits that will really amplify them for the output devices such as the yoke in the case of the sync, or the picture tube that shows the colors.
An interesting aside is that our sync is composite negative sync. That means two things:
- The sync is a negative going wave form.
- There are two pulses going at different speeds over the same wire: a. Vertical wave forms at 60 times per second (or Hertz) and b. Horizontal wave forms at about 15,750 times per second (Hz).
The sync is amplified by a sync amplifier transistor and sent on its way to the oscillators. The sync or timing information wil! be explained along with the oscillator shortly. The color informatior is sent via wires to the neck board where the main amplification occurs. This will also be discussed later.
VERTICAL AND HORIZONTAL DEFLECTION — After the sync signal is amplified by the sync amp, it goes to two different sections, the vertical and horizontal circuits. Basically, the sync signals are for timing so the picture doesn’t mess up since it is assmebled like an orderly jigsaw puzzle, but so fast that you can't see the electron beams for each color painting the picture on the screen. This will all become clear soon. For now, we will follow the 60 cycle component of the sync as it goes on its journey to the deflection yoke. The 60 cycle pulse goes to the vertical oscillator to make sure this circuit goes back and forth (or oscillates) at 60 times a second. Without this pulse keeping the circuit at the correct speed, it may get lazy and oscillate at 58 cycles or lower, or get ambitious and oscillate at 62 cycles or higher. At the wrong speed, the picture will start to roll up or down. A Wells Gardner 13” or 19” color monitor uses transistors for its sync section. An Electrohome 13” or 19” color monitor uses an integrated circuit 1C501 for its sync section. The idea is all the same. The output to the vertical amplifying transistors for all monitors must be a sawtooth wave form, sort of like a bunch of pyramids, racing to the yoke’s vertical coils at 60 times a second. Along the way to the output transistors, the 60 cycle pulse is shaped and amplified to do the job: the yoke magnetically pushes the electron beam to fill the screen out sideways looking at the screen with the greatest length going up and down. Or viewing the screen sitting like a home television set. The amplified vertical output fills the screen up and down. Watching a monitor like this, seeing only a horizontal line means a problem with the vertical coils of the yoke or anything from the vertical output section on back to the oscillator.
6-7 The horizontal section is very similar with a few exceptions. The horizontal wave shape is more like a square and has a frequency of 15,750 cycles a second. Again, Wells Gardner uses transistors for the horizontal oscillator, and Electrohome uses the other side of 1C501. Still, the effect is the same. If the oscillator isn't going at the correct speed, the picture may move sideways, start to slant, or tear up with slanted thin figures. With both the vertical and horizontal of all monitors, there are variable resistors that change the speed of the oscillators up and down. This way you have controls that can make the correct frequencies to keep the electronic jigsaw puzzle nicely locked in place. If you're driving in a car and next to you someone else is driving their car at exactly the same speed, it will appear that they are not moving. And this is why the sync frequency and the oscillators frequencies must match, so the picture doesn't appear to move. The correct wave form is shaped and amplified in the circuitry just like in the vertical section. But the horizontal output transistor is a large power transistor and not only serves to give current to the horizontal yoke windings, it also feeds the flyback transformer.
THE FLYBACK TRANSFORMER (OR HIGH VOLTAGE UNIT)
HIGH VOLTAGE UNIT) — The picture tube needs high voltage to light up, and the power supply can't meet this demand. The flyback transformer receives current alternating at about 15,750 times per second from the horizontal output transistor. The “flyback” jacks up its input voltage and puts out a higher voltage alternating at the same speed. But, in your “flyback” there are diodes that chop up the alternating voltage to make it a smooth DC output just like in the power supply. This is what goes through that thick red wire to your picture tube. THIS AREA HAS ABOUT 18,000 VOLTS ON IT AND IT CAN KILL YOU!
The “flyback” may be dangerous, but it is also generous. It has extra output windings which give voltage to the heater pins of the picture tube, voltage for the vertical deflection circuits, and picture tube screen-grid voltage. So in a way, the high voltage “flyback” is like a second power supply.
COLOR CIRCUITS The color circuits are pretty straight forward. The signals go into the interface section where some amplification and impedance matching occurs. These circuits are pretty sparse and simple. Each color just has two transistors and a diode with some resistors and capacitors. From here, the AC color signal is sent by wires to the neck board. The color output circuits are on the neck board. The color signals going to the transistors are controlled by two variable resistors called drive controls. There only two, one for the red and one for the green. The
blue doesn’t have one. In the emitter part of each transistor is another variable resistor that is the cut off control. These controls vary the amount of amplified AC signal that goes to the cathodes of the picture tube. The more signal, the more color. The bases of each of these transistors are connected together and are all connected to the blanking and beam limiting transistors which are in the interface section. The beam limiter helps control the brightness level, and the blanking transistor rapidly turns the picture tube on and off so that retrace lines don’t show up on the screen. By turning up the brightness on a good monitor, these four to six retrace lines can be seen slanting diagonally across the picture.
PROTECTION CIRCUIT — To protect the high voltage section against voltages that are too high coming from the power supply which could cause X-rays to be emitted from the “flyback”, a circuit senses the higher power supply voltage, and using a transistor, turns off the horizontal oscillator. Since the horizontal oscillator doesn't work, the horizontal output transistor has nothing to feed the “flyback” which in turn has nothing to feed the picture tube. The monitor will be silent, have no picture, and will appear to be off. But don’t be fooled. There is still that excessive amount of voltage coming from the power supply. To find out, check the emitter on TR502 of the Wells Gardner monitors; or the emitter of X04 for the Electrohome monitor. Here are the voltages you should receive: Wells Gardner = 127VDC Electrohome = 120VDC
The best place to measure this voltage on an Electrohome monitor is at a pin marked B1 on the chassis. This is because a 13 inch color Electrohome monitor, the GO7-FBO or GO7-902, has an integrated circuit and very little else in the power supply. Still, there should be 120VDC at B1
THE PICTURE TUBE (OR CRT) — The picture tube or CRT is an output device. In other words, the end result of the circuits work is displayed by this part. Actually, the output of other circuits is in the neck of the picture tube. First, there is the heater. The heater boils off electrons from the cathodes so that they (the electrons) shoot up to the screen to excite the phosphors so that the three phosphors emit three colors of light. The cathodes are next, and again they emit electrons to turn on the tube phosphors, making it glow. The cathode can arc or short to the heater resulting in no picture and a defective picture tube. Next come the grids. The first grid is grounded. The following grid is the screen grid which receives about 300VDC depending on the brightness setting. The next grid closest to the picture tube screen is the focus grid which gets about one fifth the amount of voltage that is applied to the picture tube anode. After jetting from the cathode through all these grids, the electrons speed through a mask, a sheet of material with tiny holes, and then excite the tiny dots of phosphor in the inside surface of the picture tube screen. The green electron gun (or cathode and circuitry) spits out electrons which head for the green phosphors only. The same goes for the red and blue guns. The way the phosphor light blends determines the color seen. Should these electron beams become too intense, they may burn the phosphor. With the monitor off, this can be seen as a dark permanent image of the video information on the tube screen.
Differences Between Monitors
The easiest way to identify the brand of monitor you are working with, assuming you can't find the brand name written on it anywhere, is to see if there are two circuit boards rising up from the chassis toward the picture tube neck. In other words, they stand up, or are perpendicular to the chassis, with a black plastic bracket holding them in place. This is adescription of a Wells Gardner monitor. They use separate boards for main chunks of circuitry. Therefore, you have a “power board” (the power supply), an “interface board” (the interface section), and a “horizontal/ vertical board” (for the deflection circuitry). Still, there are a few parts on the chassis, but most can be found on the board. An Electrohome monitor has no separate boards, except for the neck board, and just has a flat chassis.
Another good way to determine which monitor you have is to check the transistor call out numbers that are printed on the chassis next to the part. For instance, on the neck board, one of the color output transistors is TR401. If you look through the schematics or the parts lists, you will find TR401 in the Wells Gardner literature. On the other hand, the neck board transistor may say X101. X101 can be found in the Electrohome literature. So, all Wells Gardner transistor call outs begin with TR, and Electrohome transistor call outs start with an “X".
Parts Interchangeability Some parts can be interchanged on all of the monitors. Here are the rules:
1.
4. You CAN swap the voltage regulator TR502 or X01 on any Wells Gardner or Electrohome 19 inch monitor. You CAN NOT swap the voltage regulator on the 13 inch Wells Gardner or Electrohome (G07-902) since the Electrohome uses an integrated circuit for the power supply.
You CAN swap any resistor between monitors that has the same resistance, wattage rating, and tolerance.
You CAN swap any capacitor between monitors that has the same capacitance, and voltage rating.
PICTURE TUBES: Due to the fact that “ELECTROHOME” is now (October, 1981) using a picture tube with an internal shield, these picture tubes can be used in EITHER “WELLS GARDNER” or “ELECTRO- HOME” monitors. However, a “WELLS GARDNER” picture tube can ONLY be used in a “WELLS GARDNER” monitor. It will not function properly if installed in an “ELECTROHOME” monitor. The picture purity will be off.
- You CAN NOT change any part that is a safety part, one that is shaded in gray on the schematic; it MUST be IDENTICAL to the original. To do otherwise IS DANGEROUS. For instance, the 13 inch Electrohome (G07-904) monitor “flyback”. looks identical to the 19 inch Electrohome (G07-904) monitor “flyback”. In fact, there is even a 19 inch Electrohome (G07-905) monitor (which is an obsolete model) with a similar looking “flyback”. NONE OF THESE ARE INTERCHANGEABLE!
- You CAN change any of the parts between the G07-904 and G07-907. They're essentially the same monitor except that the G07-907 has a vertically mounted picture tube. If there is any doubt about what parts can be swapped between each manufacturer's 19 inch and 13 inch models, compare the manufacturer's part number between each one. If they match up, they are the same part.
—ooooeeeeeeeeeeeeaeaeaeananauauauqaqauaaaaaaEaEaEEaEeEeEeEe——eeeee
6-9
Ma-29) SERVICE TIP SV ORIVE__v.OUT V.AMP. WELLS-GARDNER
VERTICAL RASTER POSITION ADJUSTMENT
CENTER ue
Pos.
EFL vOKE Ot, 19” COLOR
- wosi-o0087-
wr
2SC1740/ 25185 _2SAN0I5 / 250826 soe ETD rm305 zs4aso Tasor 2561740 vance
v.OUT a iy z Troe ee
PROTECTOR raasy fngoe 254023
HOR OSC TR38) bey 25A854/25a562 HOR, DRIVE TR352 28CI722, TREO! 28¢1894/25C1942/25C11708. HOR ouT Vso
Leeaser
195607 ®
reso) 250 (74% ‘AUDIO? POWER ce 7 2b BOARD ERROR AMP a
Taare S078
2s.
a 1200
sour
Decauesing con.
28¢:1708 28C1 106 28Ciase 25ci693 esa6re 25426 2saasa escirdo. 2sciass 25a825 escirze | bscire 28e 1625, atl psaas0 ole 28c2zaz = ]Te ascisa
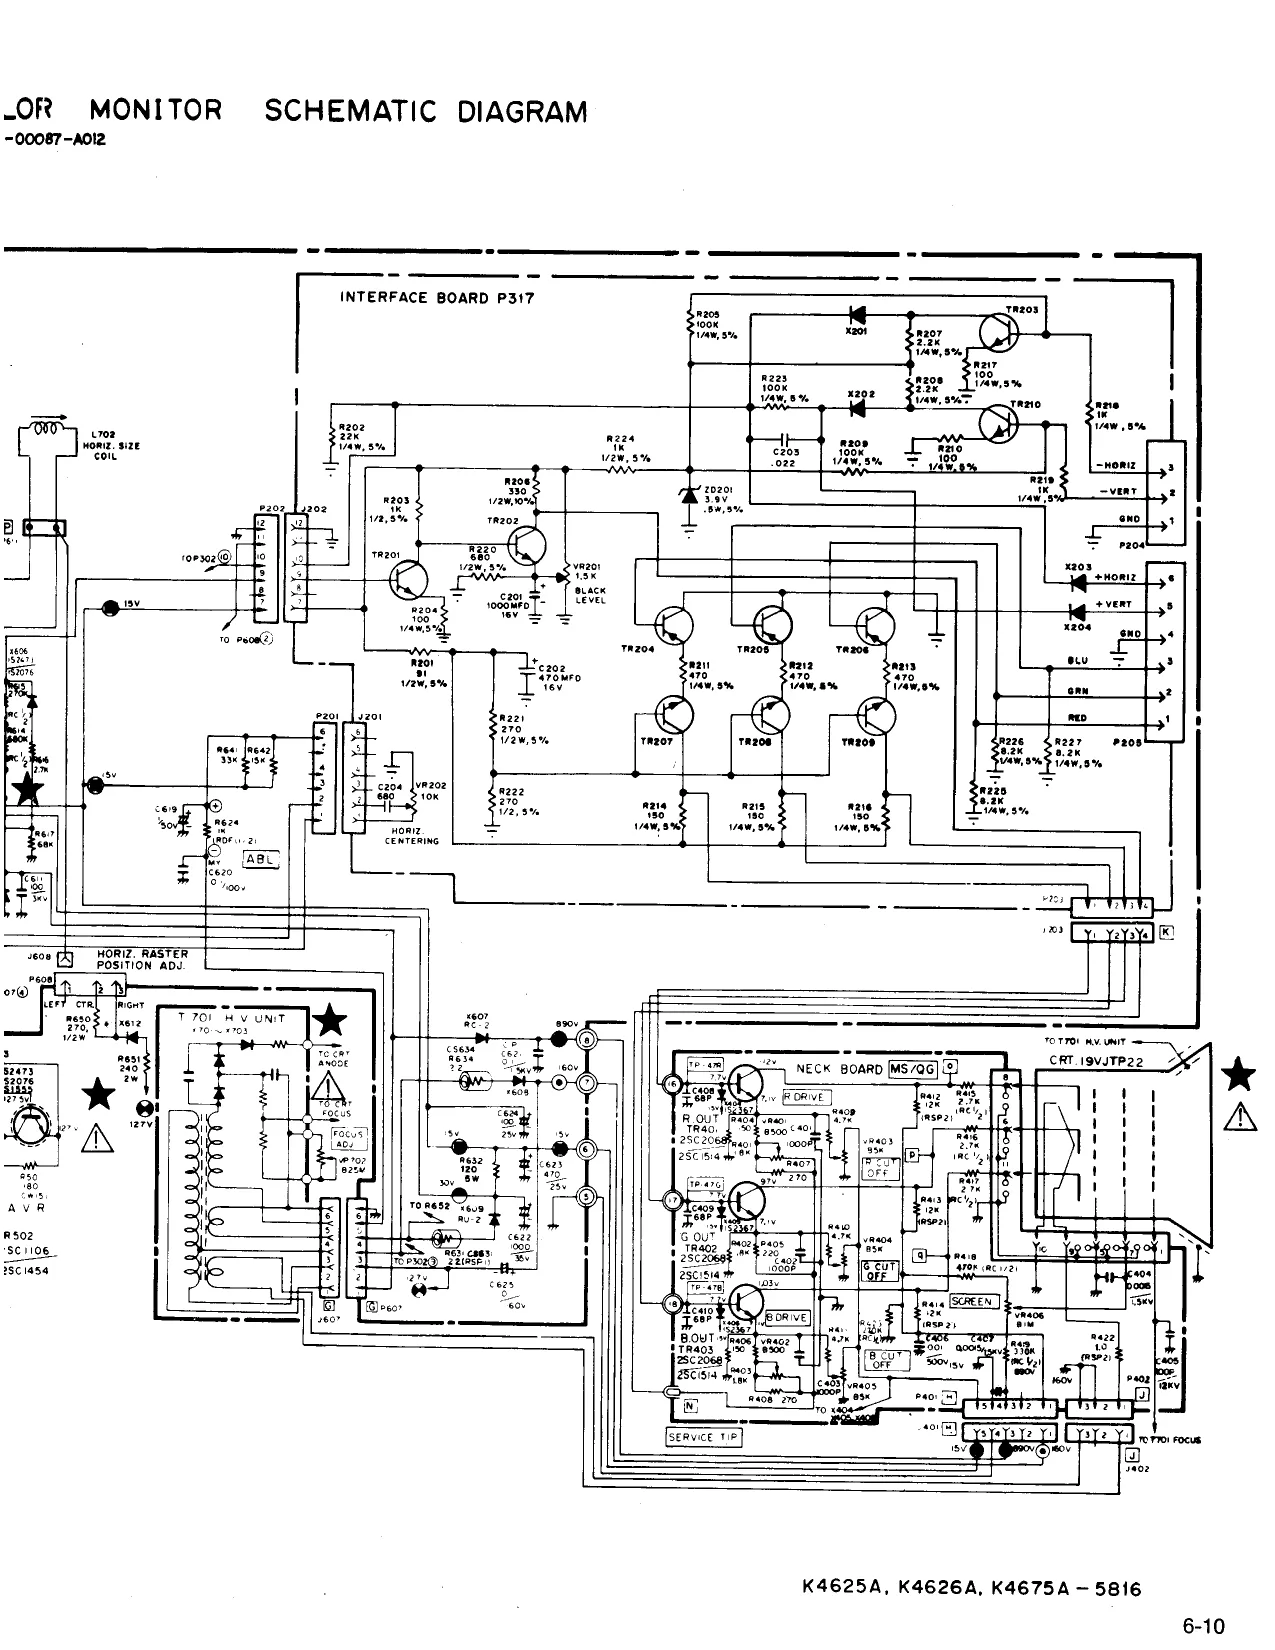
This page is a drawing, shown as the original scan.
NECK BOARD (MS/QG)
| Ret. No. | Part No. | Description | Ret. No. | Part No. | Description |
RESISTORS
| bce | Basxesce 8 | as Coens 5 Een | C403 | 202x7000-247 | 1000 pF, SOV, 10% Ceramic | ||
| Raoz | 203X6500-709 | 118k Ohm & 5% 1/8W Carbon | oe | ||||
| 04 | 202X7110-019 | 1500 pF, 2kV' + 10% Ceramic | |||||
| Ra03 | 203%6500-709 | 18k Ohm = 5% 1/8W Carbon | |||||
| Ra04 | 203%6500-447 | 150 Ohm = 5% 1/8W Carbon | oe | ae | Pepi | bat | ear neling |
| R405 | 13X6500-481 | 220 Ohi | ue | uF. | /, # | 10% | Ceramic |
| paca | any | 220. Onin & Sie tow carpon | C407 | 202X7110-019 | 1500 pF, 2kV + 10% Ceramic | ||
| R407 | 203X6500-508 | 270 Ohm + 5% 1/8W Carbon | C408 | 202X8000-550 | 88 pF, SOV, + 10% Ceramic | ||
| R408 | 203X6500-508 | 270 Ohm + 5% 1/8W Carbon | C409 | 2028000-550 | 68 pF, SOV, + 10% Ceramic | ||
| aoe | 203X6500800 | 47k Ohm # 5% SW Carbon | caro | 202X8000-550 | 68 pF, 50V, = 10% Ceramic | ||
| rato | 203X6500-800 | 4.7k Ohm & 5% BW Carbon | |||||
| Rant | 203X6500-800 | 4.7k Ohm | 5% 1/8W Carbon | ||||
| Rai2 | 203X9104-809 | 12k Ohm = 5% 2.0W Metal Oxide | |||||
| R413 | 203X9104-809 | 12k Ohm = 5% 2.0W Metal Oxide | SEMICONDUCTORS | ||||
| Rais | 203X9104-809 | 12k Ohm | 5% 2.0W Metal Oxide | ||||
| RAIS | 203X5601-313 | 2.7k Ohm | 10% 1/2W Comp. | TRA01 | 200X3206-800 | Transistor, 2862068, 25C1514 | |
| Rate | 203X5601-313 | 2.7k Ohm | 10% 1/2W Comp. | (R output) | |||
| R417 | 203X5601-313 | 2.7k Ohm + 10% 1/2W Comp. | TRA02 | 200X3206-800 | Transistor, 25C2068, 2SC1514 | ||
| Ra1B | 203X5602-254 | 470k Ohm * 10% 1/2W Comp. | (G output) | . | |||
| aio | 203X5602-185 | 330k Ohm + 10% 1/2W Comp. | |||||
| Razz | 203X9105-117 | 1.0 Ohm + 10% 2W Metal Oxide | "F408 | 2nis206 200 | way 282068, 28C1514 | ||
| R423 | 203X5102-155 | 270k Ohm + 5% 1/4W Carbon | |||||
| R401 | 204Xx2115-014 | 500 Ohm Varistor R Drive | bees | Peete | Brece eaaey pratecten | ||
| vraoz | 204X2115-014 | 500 Ohm Varistor B Drive | xa08 | Pdterttired | Diode, 182367 (protecton | ||
| vR403 | 204X2115-006 | 5k Ohm Varistor R Cutoff | HAZ 100-128 | lode, | (protector) | ||
| vR404 | 204X2115-006 | 5k Ohm Varistor G Cutoff | |||||
| R405 | 204X2115-008 | 5k Ohm Varistor B Cutoff | |||||
| R406 | 204X2000-025 | 1M Ohm Varistor Screen |
MISCELLANEOUS
| CAPACITORS | 3401 | 206X5003-729 | Socket, 5 Pin | ||
| J402 | 206X5003-983 | Socket, 3 Pin | |||
| e401 | 202x7000-247 | 1000 pF, 50V, 10% Ceramic | P401 | 204X9600.329 | Plug, § Pin |
| C402 | 202X7000-247 | 1000 pF, 50V, 10% Ceramic | Paoz | 204X9600-254 | Plug, 3 Pin |
4* 297X2000-072 HIGH VOLTAGE ASSEMBLY (1701) R701 an VR702 x701 X702 X703 FINAL ASSEMBLY PARTS
| 204X 1625-058 | 3.3 Ohm, + 10% 10W WW Resistor | 4. 88X.0129-506 | 19VJTP22 Pix Tube |
| 204X3901-125 | Focus Control | 38A5554-000 | Assy. Purity Shid/Degaussing |
| Diode (SI HV) | 205X9800-256 | Lateral/Purity Assembly |
Diode (SI HV) > Part of 1701 Ak 202X1110-810 Yoke, Deflection
| Diode (S! HV) | 208X2000-946 | CRT Socket |
297X2000-072 HV Unit (1701)
6A0397 Plug, Line Cord
9A2753-003 Degaussing Coll (L701)
INTERFACE BOARD (P305)
(MODEL 19K 4606) RESISTORS SEMICONDUCTORS
| 340X3910-934 | 91 Ohm, 5%, 1/2W Carbon | TR201 | 86X0121-001 | Transistor (NPN) | |
| 340X3102-934 | 1k Ohm, 5%, | 1/2W Carbon | TR202 | 86X0121-001 | Transistor (NPN) |
| 340X2101-934 | 100 Ohm, 5%, 1/4W Carbon | TR203 | 86X0121-001 | ‘Transistor (NPN) | |
| 340X3331-944 | 330 Ohm, 10%, 1/2W Carbon | TR204 | 86X0066-001 | ‘Transistor (PNP) | |
| 340X3102-934 | 1k Ohm, 5%, 1/2W Carbon | TR205 | 86X0066-001 | Transistor (PNP) | |
| 340X2152-934 | 1.5k Ohm, 5%, 1/4W Carbon | TR206 | 86X0066-001 | Transistor (PNP) | |
| 340X2101.934 | 100 Ohm, 5%, 1/4W Carbon | TR207 | 86X0121-001 | Transistor (NNP) | |
| 340X3102-934 | 1k Ohm, 5%, 1/2W Carbon | TR208 | 86X0121.001 | ‘Transistor (NPN) | |
| 340X2331.934 | 330 Ohm, | 5%, 1/4W Carbon | TR209 | 86X0121-001 | Transistor (NPN) |
| 340X2331-934 | 330 Ohm, 5%. 1/4W Carbon | zp201 | 66X0040-018 | Diode, Zener, 6.8v, 5%, 0.5W | |
| 340X2331-934 | 330 Ohm, 5%, 1/4W Carbon | 20202 | 66X0040-019 | Diode, Zener, 3.9v, 5%, 0.5W |
340X2201.934 200 Ohm, 5%, 1/4W Carbon 340X2201-934 200 Ohm, 5%, 1/4W Carbon 340X2201.934 200 Ohm, 5%, 1/4W Carbon MISCELLANEOUS 40X0590-017 1.5k Ohm, Black Level Contro! J201 204X9300-958 1202 204X9300-958 CAPACITORS 3203 2065019207 201 204X9601-195
| 45X0524-038 | 1000 uF, 16V Electrolytic | P202 | 204X9601-195 |
203 204X9600-845
| 205 | 6A0393-006 | Plug, 6 Pin |
6-12
VERT/HOR BOARD (MT/QJ)
| Ret. No. | Part No. | Description | Ref. No. | Part No. | Description |
RESISTORS CAPACITORS (CONT.)
| R301 | 203X6500-628 | 820 Ohm, + 5%, 1/8W Carbon | 313 | 203X0025.087 | 47 uF, 50V Electrolytic | ||
| R302 | 203X6500-902 | 12k Ohm, + 5%, 1/8W Carbon | C315 | 203X0015-082 | 10 uF, 25V Electrolytic | ||
| F303 | 203X6500-927 | 15k Ohm, * 5%, 1/8W Carbon | C316 | 203X1100-220 | 3300 UF, S0V, = 10% Mylar | ||
| R304 | 203X6500-886 | 10k Ohm, + 5%, 1/8W Carbon | 317 | 202X8000-616 | 100 pF, 50V, + 10% Ceramic | ||
| R305 | 203X6501-241 | 330k Ohm, = 5%, 1/8W Carbon | C351 | 202X7000-281 | 1500 pF, 50V, + 10% Ceramic | ||
| R306 | 203X6500-645 | 1k Ohm, * 5%, 1/8W Carbon | 352 | 202X7000-247 | 1000 pF, 50V, + 10% Ceramic | ||
| R307 | 203X6500-689 | 1.5k Ohm, = 5%, | 1/8W Carbon | C353 | 203X1100-573 | 0.022 uF, SOV, + 10% Mylar | |
| R309 | 203X6500-724 | 2.2k Ohm, # 5%, 1/8W Carbon | 355 | 203X1100-858 | 0.1 uF, 50V, + 10% Mylar | ||
| R310 | 203X6501-285 | 470k Ohm, + 5%, 1/8W Carbon | C356 | 203X0015-105 | 47 uF, 25V Electrolytic | ||
| R311 | 203X6501-065 | 56k Ohm, * 5%, | 1/8W Carbon | 6357 | 203X1201-013 | 0.015uF, 200V + 10% PP | |
| R312 | 203X6501-126 | 100k Ohm, | 5%, 1/8W Carbon | C358 | 203X1201-034 | 0.018 uF, 200V, + 10% | PP |
| R313 | 203X6001-326 | 10k Ohm, * 5%, 1/8W Carbon | C359 | 203X0040-013 | 47 UF, 160V Electrolytic | ||
| R314 | 203X6501.044 | 47k Ohm, * 5%, | 1/8W Carbon | C360 | 202X7000-482 | 0.01 uF, SOV, + 10% | Ceramic |
| F315, | 203X6500628 | 820 Ohm, + 5%, 1/8W Carbon | C361 | 203X1100-509 | 0.015 uF,S0V, + 10% | Mylar | |
| R316 | 203X6500-420 | 120 Ohm, = 5%, 1/8W Carbon | C362 | 203X0025-058 | 10 uF, 50V Electrolytic | ||
| R317 | 203X6206-441 | 2.2 Ohm, = 5%, 12W Carbon | C363 | 203X1205-487 | 0.01 uF, 630V, + 10% PP | ||
| R319 | 203X6500-169 | 100 Ohm, + 5%, 1/8W Carbon | C364 | 202X7000-482 | 0.01 uF, 50V, * 10% Ceramic | ||
| R320 | 203X6500-927 | 15k Ohm, = 5%, 1/8W Carbon | |||||
| R321 | 203X6700-508 | 560 Ohm, * 5%, 1/2W Carbon | |||||
| R322 | 203X9100-121 | 22 Ohm, + 5%, 2W MO. | SEMICONDUCTORS | ||||
| F323, | 203X6500-689 | 1.5K Ohm, *5%, 1/8W Carbon | |||||
| R324 | 203X6500-988 | 27k Ohm, = 5%, 1/8W Carbon | TR301 | 200X4082-614 | Transistor, 258260 | ||
| R325 | 203X6500-326 | 47 Ohm, * 5%, 1/8W Carbon | TR302 | 200X3174-006 | Transistor, 28C1740Q | ||
| 328 | 203X6500-628 | 820 Ohm, * 5%, | 1/8W Carbon | TR303 | 200X3174-006 | Transistor, 2541740 | |
| R330 | 203X6500-886 | 10k Ohm, + 5%, 1/8W Carbon | TR304 | 200X3174-006 | Transistor, 28617400 | ||
| R331 | 203X6501-209 | 220k Ohm, + 5%, 1/8W Carbon | TR305 | 200x4049-081 | Transistor, 2SA490YLBGLI | ||
| R351 | 203X6500-724 | 2.2k Ohm, * 5%, 1/8W Carbon | TR306 | 200X3162-538 | Transistor, 2SC1625YLBGLI | ||
| R352 | 203X6500-927 | 15k Ohm, + 5%, | 1/8W Carbon | R307 | 200X3174.014 | Transistor, 28C1740R | |
| R353 | 203X6500-944 | 18k Ohm, + 5%, | 1/8W Carbon | TR308 | 200X3174-006 | Transistor, 25617400 | |
| R354 | 203X6500-763 | 3.9k Ohm, = 5%, | 1/BW Carbon | TR351 | 200X4085-415 | Transistor, 2SA854Q | |
| A355 | 203X6500-902 | 12k Ohm, = 5%, 1/8W Carbon | TR352 | 200X3172-208 | Transistor, 2SC1722BKS | ||
| F356 | 203x659 561 | 470 Ohm, | 5%, 1/8W Carbon | TR353 | 200X3174-006 | Transistor, 25617400 | |
| R357 | 203X6£000-724 | 2.2k Ohm, + 5%, 1/8W Carbon | TR354 | 2004082614 | Transistor, 2SA826Q | ||
| R358 | 203X6300-666 | 1.2k Ohm, * 5%, | 1/8W Carbon | x301 | 201X2010-144 | Diode, (Si) 1S2473-T72 | |
| R359 | 202X6501-088 | 68k Ohm, * 5%, | 1/8W Carbon | x302 | 201X2010-144 | Diode, (S!) '82473-T72 | |
| R360 | 203X5500-471 | 27 Ohm, * 5%, 1/4W Comp. | 303 | 200X8000-026 | Diode, (GE), INGOTVGL | ||
| R361 | 203X6000-998, | 1.2k Ohm, + 5%, 1/8W Carbon | x304 | 200X8010-165 | Diode (SI) ISS81 | ||
| R363 | 203X6500.666 | 1.2k Ohm, + 5%, 1/8W Carbon | X305 | 201X2010-165 | Diode (SI) ISS81 | ||
| R364 | 203x9014-988, | 47k Ohm, = 5%, 1W MO. | X306 | 201X2010-185 | Diode (S!) ISS81 | ||
| R365, | 203X6700-989 | x307 | 200X8010-102 | Diode (Sl) MA26W | |||
| F366 | 203X6001-148 | x308 | 200X8010-094 | Diode (S!) $2473 | |||
| R367 | 340X2222-734 | 2.2k Ohm, * 5%, 1/2W Carbon | x351 | 201X2010-144 | Diode (St) 182473-T72 | ||
| R368 | 203X6500-785 | 3.9k Ohm, # 5%, 1/8W Carbon | x352 | 201X2010-144 | Diode (S!) 182473-T72 | ||
| R369 | 203X6500-762 | 3.3k Ohm, * 5%, 1/4W Carbon | X383 | 201X2010-144 | Diode (Si) 1S2473-172 | ||
| F370 | 302X6100-961 | 1k Ohm, * 5%, 1/4W Carbon | X354 | 201X2010-144 | Diode (S!) 182473-T72 | ||
| R371 | 203X6104-751 | 2.7k Ohm, * 5%, 1/4W Carbon | X355 | 200X8220-851 | Diode (Zener) RD10EB! | ||
| vR301 | 204x2122-093 | Varistor, 250K Ohm, Vert. Hold | 366 | 200X8100-130 | Diode (HS) RU-1 0.3 US | ||
| vR302 | 204X2134-065 | Varistor, 20K ‘Ohm, Vert. Size | |||||
| R351 | 2cex2t+4 059 | Varistor, | 50K Ohm, Hor. Hold |
MISCELLANEOUS
| CAPACITORS | 1301 | 204X9300.958 | Socket, 6 Pin | ||
| 5 | 5302 | 204X9300.958 | Socket, 6 Pin | ||
| C301 | 203X1100-928 | 0.15 uF, SOV, + 10% Mylar | 2e | Pserctriered | Peo. 6 Pin |
| 302 | 203X1100-573 | 0.022 uF, 50V, + 10% | Mylar | ||
| C304 | 203X1100-858 | 0.1 uF, 50V, = 10% Mylar | P302 | 204X9601-195 | Plug, 6 Pin |
| C308 | 203X0025-026 | 22 uF, 50V’ Electrolytic | TH301 | 201X0000-534 | Thermistor |
| C307 | 203X1100-928 | 0.15 uF, 50V, + 10% Mylar | |||
| 308 | 203X1100-858 | 0.1 uF, 50V, + 10% Mylar | |||
| C310 | 203X0010-011 | 22 uF, 16V Electrolytic | TRANSFORMERS & COILS | ||
| C311 | 203x0020-080 | 1000 uF, 35V Electrolytic | |||
| C312 | 202X7000-469 | 0.0082 UF, 50V, = 10% Ceramic | 1351 | 201X5200-091 | Coll, Horiz. Osc. |
POWER BOARD (MV)
| 503 | 203X0010011 | 22 uF, 16V Electrolytic | |||
| RESISTORS | C551 | 203X0005-046 | 220 uF, 10V Electrolytic | ||
| A501 | 204X1725-052 | 180 Ohm, + 10%, 15W WW | |||
| R502 | 203X6000-608 | 100 Ohm, * 5%, 1/8W Carbon | SEMICONDUCTORS | ||
| R503 | 203X6000-960 | 1k Ohm, * 5%, | 1/8W Carbon | ||
| R504 | 203X6000-879 | 560 Ohm, * 5%, 1/8W Carbon | TR5O1 | 200X3174-006 | Transistor, 28617400 |
| S05 | 203x9014-965 | 39k Ohm, = 5%, 1W M.O. | Ax TRSOZ | 200X3145-404 | Transistor, 2801454 |
| R506 | 203X6500-842 | 6.8k Ohm, + 5%, 1/8W Carbon | TR5S1 | 200X3172-305 | Transistor, 261723 |
| R551 | 203x6500-420 | 120 Ohm, * 5%, 1/8W Carbon | x501 | 201X2230-042 | Diode, (S!) Zener EQBO1-06V |
| R501 | 204X2050.001 | Varistor Vert. Adj. | x502 | 201X2010-144 | Diode, (SI) 1$2473-T72 |
CAPACITORS MISCELLANEOUS
| 501 | +203x0040-020 | 10 uF, 160V Electrolytic | 3501 | 204X9300-958 | Socket, 6 Pin |
| 502 | 202x7000-281 | 1500 pF, SOV, + 10% Ceramic | 501 | 204X9601-195 | Plug, 6 Pin |
| THSO1 | 201X0000618 | ‘Thermistor |
6-11
X90 POWER DRIVE 25C 2688 X 902 ERROR AMP. 28C1890
POWER REGULAT Blug vnEex RED X101.XI03 ond X10 : x102.X104 ond Xi
meen rename x306
X303 BEAM LIMITER 2SA673 fascesac or eeciees:
sean rive vse Paty %304 BLANKING 25C4S4C or 2hcKces
(eo) . ACIZOV 6OH:/SOHE 210% By
Ca] eesa x80! ae pe Eee Ces
SU -1133A MAIN PCB ASSY
- +4
eed X70! X-RAY PROTECTOR 28C454C or 25C1685 our 501 4.DRIVE xor 28c1807 BO, 28¢2371V 280898 or 250869 « 250820, 28¢26II or 28C26108K
6-13,
1.X103 end XIOS VIDEO AMP, 28C454C Mio xi0 Res VIDEO OUTPUT 28cz6il or Bscisiav
00-4147-04 G07-CBO Schematic Notes Unless otherwise specified Resistance: (2) (K--KQ, MM), 1/4 (W) carbon resistor Capacitance: 1 or higher-+ (pF), less than 1-> (yF) working voltage > 50 (V) ceramic capacitor Inductance: ( H) Electrolytic Cap: Capacitance Value (y F)/working voltage (V), NP -= non-polar (or bipolar) electrolytic cap. Refer to the parts list for additional component information. ® indicates test point connection oh indicates chassis ground unless otherwise specified Hz _ indicates cycles per second For safety purposes (and continuing reliability) a replace all components marked with safety syrnbol with identical type. NOJTE: FR - fusible resistor —¢23~
Parts identification on circuit boards: e.g. SU1126A (R107 = R1107) SU3030A (R113 = R3113)
Outside of the P.C.B. Ass’y Symbol Description Picture Tube 19” a A\Deflection Yoke PC Magnet A AFlyback Transf. A AHVR ROS UNF Resistor 2202,25W K C04 C Capacitor 150pF, AC1.5KV X01 Si. Transistor x02 Si. Transistor sc Screw #8-% sc Screw % x % Pix Tube Mtg. (4) WA Pyramidal Lock Washer (4) Nut Retainer, Pix Tube Mtg. (4) Clip — P.C.B. Support Standoff Wire Terminal (Gnd. Strap) Terminal Lug (Gnd.) Groundstrap Assy. Grounding Spring Wire Hook (Gnd. Strap) Purity Shield Holddown Clamp Support Brkt. RH Support Brkt. LH Chassis Base Yoke Wedge (3)
Purity Shield Ass'y. Parts List
Symbol Description Degaussing Coil D911, D912 Rectifier 1 Amp 600V (2) Pin Terminal (2) Pin Terminal Housing Purity Shield (2 pes.) Purity Shield (2 pcs.) C911 Capacitor 100nF 10% 400V R921 Resistor, Wirewound 339, 4W Fire Retardent Term. Strip 4 Lug
CRT Socket P.C.B. Ass’y (SU-3032A) Parts List
Resistors Symbol Description
| 3105 | v | R |
| R3106 | Vv | R 200 |
| R3113 | v | R 5K |
| R3114 | Vv | R 5K |
| R3115 | v | R 5K |
| R3116 | OM | R 10KQ2W J |
| R3117 | OM | R 10KQ2W J |
| R3118 | OM | R 10KQ2W J |
R3119 Comp. R 3.3KQ2*%W K R3120 Comp. R 3.3KQ%W K 3121 Comp. R 3.3KQ“WK
Capacitors Symbol Description C3107 E Cap. 10uF 250V A C3108 C Cap. 1000pF DC1400v P
Coils Symbol Description L3101 Peaking Coil Part Number 17-7198-03 A29779-D = 21-141-01 A75034-B = 29-32-01 A29951-B A46600-A QRF258K-221 QCZ0101-005 2SD870 2S8C1106A 31-610818-06 31-601418-12 33-255-01 33-494-01 33-629-02 33-670-010R-02 34-228-03 34-33-04 34-574-02 35-212-03 35-3053-02 35-2348-01 35-3890-01 35-3890-02 38-449-02 39-1233-01
Part Number 21-1007-30 28-22-27 34-708-01 34-709-01 35-3847-01 35-3847-02 48-171544-62 42-113301-03 34-492-09
Part-Number QVZ3234-022 QVZ3234-022 QVZ3234-053 QVZ3234-053 QVZ3234-053 QRG029J-103 QRG029J-103 QRG029J-103 QRZ0039-332 QRZ0039-332 QRZ0039-332
Part Number QEWS53EA-106 QCZ9001-102M
Part Number QQL043K-101
REPLACEMENT PARTS LIST - ELECTROHOME 19”’ MONITOR
Components identified by the A symbol in the PARTS LIST and on the Schematic have special characteristics important to safety. DO NOT degrade the safety of the set through improper servicing.
Abbreviations for Resistors and Capacitors
Resistor Capacitor
| CR | : Carbon Resistor | C Cap. |
| Comp. R | : Composition Resistor | M Cap |
| OMR | : Oxide Metal Film Resistor | E Cap. |
| VR | : Variable Resistor | BP E Cap. |
MFR : Metal Film Resistor
| CMF R | : Coating Metal Film Resistor | MM Cap. |
| UNF R | : Nonflammable Resistor | PP Cap. |
| FR | : Fusible Resistor | MPP Cap. |
PS Cap Tan. Cap. Ceramic Capacitor : Mylar Capacitor Electrolytic Capacitor Bi-Polar (or Non-Polar) Electrolytic Capacitor : Metalized Mylar Capacitor Polypropylene Capacitor : Metalized PP Capacitor Polystyrol Capacitor : Tantal Capacitor
SERVICE REPLACEMENT PARTS LIST
Symbol Description
Main P.C.B. Ass'y CRT Socket P.C.B. Ass'y Purity Shield Ass'y
6-14 Part Number SU-1133A SU-3032A 07-220083-03
Outside of the P.C.B. Ass'y Symbol Description Picture Tube 19” a& AdDeflection Yoke PC Magnet A AsFlyback Transf. A AHVR ROS UNF Resistor 2200,25W K co4 C Capacitor 150pF, AC1.5KV X01 Si. Transistor x02 Si. Transistor sc Screw #8-% sc Screw % x % Pix Tube Mtg. (4) WA Pyramidal Lock Washer (4) Nut Retainer, Pix Tube Mtg. (4) Clip — P.C.B. Support Standoff Wire Terminal (Gnd. Strap) Terminal Lug (Gnd.) Groundstrap Assy. Grounding Spring Wire Hook (Gnd. Strap) Purity Shield Holddown Clamp Support Brkt. RH Support Brkt. LH Chassis Base Yoke Wedge (3)
Purity Shield Ass’y. Parts List
Symbol Description Degaussing Coil D911, D912 Rectifier 1 Amp 600V (2) Pin Terminal (2) Pin Terminal Housing Purity Shield (2 pcs.) Purity Shield (2 pes.) C911 Capacitor 100nF 10% 400V R921 Resistor, Wirewound 332, 4W Fire Retardent Term. Strip 4 Lug
CRT Socket P.C.B. Ass’y (SU-3032A) Parts List
Resistors Symbol Description
| R3105 | v | R 200 | |
| R3106 | Vv | R 200 | |
| R3113 | v | R 5K | |
| R3114 | v | R 5K | |
| R3115 | v | R 5K | |
| R3116 | OM | R | 10KQ2W J |
| R3117 | OM | R 10KQ2W J | |
| R3118 | OM | R 10KQ2W J |
R3119 Comp. R 3.3KQ%W K R3120 Comp. R 3.3KQ”2W K 3121 Comp. R 3.3KQ”%WK
Capacitors Symbol Description
| C3107 | E | Cap. | 10uF 250V A |
| C3108 | C | Cap. | 1000pF DC1400v P |
Coils Symbol Description L3101 Peaking Coil
6-15 Part Number 17-7198-03 A29779-D = 21-141-01 A75034-B = 29-32-01 A29951-B A46600-A QRF258K-221 QCZ0101-005 2SD870 2SC1106A 31-610818-06 31-601418-12 33-255-01 33-494-01 33-629-02 33-670-010R-02 34-228-03 34-33-04 34-574-02 35-212-03 35-3053-02 35-2348-01 35-3890-01 35-3890-02 38-449-02 39-1233-01
Part Number 21-1007-30 28-22-27 34-708-01 34-709-01 35-3847-01 35-3847-02 48-171544-62 42-113301-03 34-492-09
Part.Number QVZ3234-022 QVZ3234-022 QVZ3234-053 QVZ3234-053 QVZ3234-053 QRG029J-103 QRGO029J-103 QRG029J-103 QRZ0039-332 QRZ0039-332 QRZ0039-332
Part Number QEWS53EA-106 QCZ9001-102M
Part Number QQL043K-101
Semiconductors Symbol X3101 X3102 X3103
Miscellaneous symbol Description Si. Transistor Si. Transistor Si. Transistor
Description ASCRT Socket
Main PCB Ass’y (SU-1133A) Parts List
Resistors Symbol R1406 R1408 R1410 R1414 R1415, R1421 R1422 AFR1401 4AR1503 R1504 R1509 R1512 R1514 R1515, R1522 R1523, R1528 R1534 VR1501 4R1703 ASR1704 4R1901 R1902 R1903 R1904 R1905 AQ1908 4R1909 R1910 A\FR1901
Capacitors Symbol 1301 1402 C1407 C1411 C1412 C1508 Ac1512 401513 4C1514 C1515 C1520 1823 1824 4C1531 ASC1532 C1904 C1905 Description v Vv CMF OM OM OM v AF
AXCMF AsPosistor UNF fe] = DVVVDVVVDD DVDVVDUVVVDVDDVVVDVVDDVDVUVD
BPE Cap. Tan. Cap. IE Cap. 2002 2002 68 2Q1W J 3.3K Q1W J 27K QIW J 12KQ2W J 10KQ. 6822W K 11.8KQ UW +1% 5KQ 10K Q2W J 8.2KQ2W J 82022W J 8.2Q1W J 4.7021W J 68N22W J 39021W J
39Q%W +1% 7.68KQ. UW +1%
2Q7W K 4.723W J 1OKQ2W J 18K QIW J ATQYW +1% 2KQ 2.74K QYW +1% 2202%W K
3.3uF 50V A 2.2uF 16V K 4.7UF 6.3V A . 10QUF 160V A . 3.3uF 160V A . 5600uF 50V J . 2000pF DC1500V J . 2000pF DC1500V J . 2000pF DC1500V J . 0.53uF DC1200V J . 3.3uF 50V A . JUF 160V A . O.1UF 200V K . 2000pF DC1500V J . 1500pF DC1500V J
. 10UF 250V A
6-16 Part Number 2SC1514VC 2SC1514VC 28C1514VC
Part Number A76068
Part Number QVZ3230-002 QVZ3230-002 QRX019J-6R8 QRG019J-332 QRGO019J-272 QRG026J-123Z QVZ3230-014 QRH024K-680M QRV142F-1182 QVZ3230-053 QRGO26J-103Z QRG026J-822Z QRG026J-821Z QRX019J-8R2 QRX019J-4R7 QRG026J-680Z QRG019J-391 ERZ-C05ZK471 ERZ-COSDK271 QRV122F-3902 QRV142F-7681 A75414 QRFO76K-2RO QRX039J-4R7 QRG026J-103Z QRG019J-183 QRV122F-470Z QVP5A0B-023E QRV142F-2741 QRH124K-221M
Part Number QEN61HA-335Z QEES1CK-2258 QEWS1JA-475 QEWS2CA-107 QEWS52CA-335 QFP31HJ-562 QFZ0082-202 QFZ0082-202 QFZ0082-202 QFZ0067-534 QEN61HA-335Z QEW62CA-105Z QFM720K-104M QFZ0082-202 QFZ0082-152 QEY0034-001 QEWS52EA-106
Coils
Symbol Description Part Number
| L1502 | Linarity Coil | A39835, |
| L1503 | Width Coil | C30380-A |
| 11504 | Heater Choke | C30445-A |
Transformers
| ‘Symbol | Description | Part Number |
| T1501 | Hor. Drive Transf. | A46022-BM |
| T1503 | Side Pin Transf. | C39050-A |
Semiconductors
| 1C1501 | ile} | HA11244 |
| X1101 | Si. Transistor | 2SC1685(R) |
| X1102 | Si. Transistor | 2SA673(C) |
| X1103 | Si. Transistor | 2SC1685(R) |
| X1104 | Si. Transistor | 2SA673(C) |
| X1105 | Si. Transistor | 2SC1685(R) |
| X1106 | Si. Transistor | 2SA673(C) |
| X1301 | Si. Transistor | 2SC1685(R) |
| X1302 | Si. Transistor | 2SC1685(R) |
| X1303 | Si. Transistor | 2SA673(C) |
| X1304 | Si. Transistor | 2SC1685(R) |
| X1305 | Si. Transistor | 2SC1685(R) |
| X1401 | Si. Transistor | 28D478 |
| X1402 | Si. Transistor | 28D478 |
| X1501 | Si. Transistor | 2SC2610BK |
| X1901 | Si. Transistor | 2SC2688 (K.L.M.) |
| X1902 | Si. Transistor | 2SC1890A (E.F.) |
| D1101 | Si. Diode | ‘WO6A |
| D1102 | Si. Diode | WO6A, |
| D1103 | Si. Diode | ‘WO6A |
| 01301 | Si. Diode | 1$Z473H |
| 01401 | Si. Diode | 18Z473H |
D1402 Zener Diode RD10F(C)
| D1503 | Si. Diode | HF-1 |
| 01504 | Si. Diode | VO9E |
D1505 Zener Diode RD11E(B)
| D1506 | Si. Diode | WO6A |
| D1507 | Si. Diode | 18S81 |
| D1508 | Si. Diode | 18Z473H |
| 4p1701 | AdZener Diode | RD20EV2 |
| 4\D1901 | ASi. Diode | 181887A |
| Ax01902 | ASi. Diode | 1S1887A |
| 4\D1903 | ASi. Diode | 181887A |
| A\D1904 | ASi. Diode | 181887A |
| A\D1905 | Zener Diode | RD6.8EV3 |
Miscellaneous
| A\F1901 | AsFuse 1.254 | QMF53U1-1R25S. |
| A\F1902 | AXUL Fuse 3A | QMF66U1-3R0S, |
6-17
ICO! POWER REGULATOR ‘sTA383, Su- MAI roe —____._____] O34 N PCB ASSY sync ame inn e — x306
X303 BEAM LIMITER 2SA673 X304 BLANKING 28casac
1303, jo 8.
< ACI2OV 6oHE/S0H: 10% X70|_X-RAY PROTECTOR 2SCA3MC or 25¢ 1685
6-18 Tool oR Yo novT 28eisa" RE, asceariv $8b898 ‘or B5cz0i er E8Ges en 230809 301,302, X305, X306 lescasac or 2scises
He Bue XIOI XIO3 and XI0S VIDEO AMP, 2SC454C or 25¢1605 X102.x104 ond X06 VIDEO AMP_2SA673C Xio= x13 RGB Video OUTPUT 2sczei or 28cisiaV
%|SU-3016 A | CRT SockKET
BEE Soe we
x40), x4o2 2soa7e
fig Dyor DEFLECTION YOKE
G07-FBO
00-4147-03 Schematic Notes Unless otherwise specified Resistance: (2) (K->KQ., M--MQ), 1/4 (W) carbon resistor Capacitance: 1 or higher-» (pF), less than 1-~ (yF) working voltage -» 50 (V) ceramic capacitor Inductance: (H) Electrolytic Cap: Capacitance Value ( F)/working voltage (V), NP -> non-polar (or bipolar) electrolytic cap. Refer to the parts list for additional component information. Q indicates test point connection ah indicates chassis ground unless otherwise specified Hz indicates cycles per second For safety purposes (and continuing reliability) a replace all components marked with safety symbol with identical type.
Parts identification on circuit boards: e.g. SU1126A (R107 = R1107) SU3030A (R113 = R3113)
REPLACEMENT PARTS LIST - ELECTROHOME 13”’ MONITOR
Components identified by the 4, symbol in the PARTS LIST and on the Schematic have special characteristics important to safety. DO NOT degrade the safety of the set through improper servicing.
Abbreviations for Resistors and Capacitors
Resistor Capacitor
| CR | : | Carbon Resistor | C Cap. |
| Comp. R | : | Composition Resistor | M Cap |
| OM R | : | Oxide Metal Film Resistor | E Cap. |
| VR | : Variable Resistor | BP E Cap. | |
| MFR | : | Metal Film Resistor | |
| CMF R | : | Coating Metal Film Resistor | MM Cap. |
| UNF R | Nonflammable Resistor | PP Cap. | |
| FR | : | Fusible Resistor | MPP Cap. |
PS Cap Tan. Cap. : Ceramic Capacitor : Mylar Capacitor : Electrolytic Capacitor : Bi-Polar (or Non-Polar) Electrolytic Capacitor : Metalized Mylar Capacitor : Polypropylene Capacitor : Metalized PP Capacitor : Polystyrol Capacitor : Tantal Capacitor
Symbol
Outside of the P.C.B. Ass'y Symbol Avot AxDY91
ARN AROS Axco4 x01 1Co1 Lo1
BR BR sc WA
CH Description Main P.C.B. Ass'y CRT Socket P.C.B. Ass'y
Description , APicture Tube A\Deflection Yoke PC Magnet Wedge AsFlyback Transf. AFocus V R UNF Resistor 2202, 25W. K ASC Capacitor 150 pF, AC1.5KV Si. Transistor iC Regulator Degausing Coil Degausing Coil Pin Terminal (2) Degausing Coil Pin Terminal Housing Groundstrap Ass'y. Groundstrap Wire Terminal Groundstrap Spring (2) Support Bracket RH Support Bracket LH SCREW 10-' Pix Tube Mtg. (4) Pyramidal Lockwasher (4) Clip P.C.B. Support (2) Ground Lug Chassis Base Part Number SU-1103A SU-3016A
Part Number 370ESB22(E) C29123-V A76366-A 30006 A19183-A A46606-A QRF258K-221 QCZ0101-005 2SD869 STR383 21-1007-31 34-708-01 34-709-01 34-697-04 34-228-03 35-3560-01 35-3919-01 35-3919-02 31-631018-08 33-255-01 33-629-02 34-33-04 38-452-01
Main P.C.B. Ass’y (SU-1103A) Parts List
Resistors Symbol R1406 R1408 R1410 Ri414 R1415, R1421 R1422 ASFR1401 A\R1503 R1504 R1509 R1511 R1514 R1515, R1522 R1523, R1528, R1534 VR1501 A\R1703 AXR1704 A\R1901 R1902 R1903 R1904 ASFR1901 Capacitors Symbol c1402 C1411 C1412 C1508 C1511 Aci512 AC1513 AC1514 C1515 1520 C1524 1904 C1905 A\C1907
Colls Symbol 11501 L1502 11503 L1504 1901
Transformers Symbol 71501 T1503 Description VR 2002 VR 2002 CMF R 6821WJ R 33KQ1WJ R 27KQ1WJ OM R 12KQ2WJ R 10KQ AF — R 6822WK ASCMF R 11.8KQ’UW +1% VR 5KQ OM R 10KQ2W J OM R 5.6KN2W J OM R 68022WU CMF R 8.201WJ CMF R 4.701WJ OM R 5622WJ OM R 39021WJ ZN R ZN R ACMF R 39K Q4W +1% ASCMF R 7.68KQ“W +1% AsPosistor UNF R 2Q7WK CMF R 5.623W J OM R 10KQ2W J AF = R 2202%W K
Description Tan.Cap. 2.2uF 16V K E Cap. 100uF 160V A E Cap. 3.3uF 160V A PP Cap. S600pF 50V J E Cap. 47uF 160V A AXPP Cap. 2000pF DC1500V J A\PP Cap. 2000pF DC1500VJ # AXPP Cap. 2500pF DC1500V J PP Cap. 0.53uF DC1200V K BPE Cap. 1uF 50VA M = Cap. 0.1uF 200V K E Cap. E Cap. 10uF 250V A A\MM Cap. 0.1uF AC150V Z
Description Peaking Coil Liniarty Coil Width Coil Heater Choke Line Filter
Description Hor. Drive Transf, Side Pin Transf.
6-20 Part Number QVZ3230-022 QVZ3230-022 QRX019J-6R8 QRG019J-332 QRG019J-272 QRG029J-123 QVZ3224-014H QRHO024K-680M QRV142F-1182 QVZ3230-053 QRG029J-103 QRG029J-562 QRG029J-681 QRX019J-8R2 QRX019J-4R7 ORG029J-560 ORGO19J-391 ERZ-C05ZK471 ERZ-COSDK271 QRV122F-3902 QRV142F-7681 A75414 QRFO76K-2RO QRX039J5-5RE QRG026J-103Z QRH124K-221M
Part Number
QEES1CK-225B QEW52CA-107 QEW52CA-335 QFP31HJ-562 QEW52CA-476S QFZ0082-202 QFZ0082-202 QFZ0082-252 QFZ0067-534 QEN61HA-105Z QFM72DK-682M QEY0034-001 QEWS52EA-106 QFZ9008-104
Part Number A75360-6 A39934 C30380-A C30333-A A39475-J
Part Number A46022-BM C39050-A
Semiconductors Symbol 101501
x1101 x1102 X1103 X1104 X1105 X1106 X1301 X1302 X1303 X1304 X1305 x1401 x1402 x1501 X1701 01101 D1102 01103 01301 01401 D1402 D1503 01504 01505, D1506 01507 01508 401701 401901 401902 A\D1903 4801904
Miscellaneous Symbol ANF 1901 AXF1902 Description Le.
Si. Si. Si. Si. Si. Si. Si. Si. Si. Si. Si. Si. Si. Si. Si. Si. Si. Si. Si. Si. Transistor Transistor Transistor Transistor Transistor Transistor Transistor Transistor Transistor Transistor Transistor Transistor Transistor Transistor Transistor Diode Diode Diode Diode Diode Zener Diode Si. Si. . Diode |. Diode Zener Diode Si Si. Si. . Diode |. Diode . Diode AdZener Diode ASI. ASI ASi ASI . Diode . Diode . Diode |. Diode
Description AsFuse 1A AUL Fuse 3A
6-21 Part Number HA11244
2801685(R) 2SA673(C) 28C1685(R) 2SA673(C) 28C1685(R) 2SA673(C) 28C1685(R) 2SC1685(R) 2SA673(C) 28C1685(R) 2SC1685(R) 2SD478 2SD478 2SC2610BK 25C1685(P-S) WO6A Wo6A, Wo6A 1S2473H 182473H RD10F(C) HF-1 VOoE RD11E(B) WO6A 18S81 182473H RD20EV2 181887A 1S1887A 181887A 181887A
Part Number QMF53U1-1R0S QMF66U1-3ROS
CRT Socket P.C.B. Ass'y (SU-3016A) Parts List
Resistors Symbol R3105 R3106 R3113 R3114 R3115, R3116 R3117 R3118 R3119 R3120 R3121
Capacitors Symbol C3107 C3108
Colis Symbol 13101
Semiconductors Symbol X3101 X3102 3103,
Miscellaneous Symbol A Description v R 2002 v R 2002 Vv R 5KQ v R 5KQ v R 5KQ OM R 10K22W J OM R 10KN2W J OM R 10K22W J Comp. R 3.3KQ%W K Comp. R 3.3K2%W K Comp. R 3.3KQ*%WK
Description E Cap. 10uF 250V A C Cap. 1000pF DC1400V P
Description Peaking coil
Description Si. Transistor Si. Transistor Si. Transistor
Description AXCRT Socket
6-22 Part Number QVZ3234-022 QVZ3234-022 QVZ3234-053 QVZ3234-053 QVZ3234-053 QRGO29J-103 QRG029J-103 QRG029J-103 QRZ0039-332 QRZ0039-332 QRZ0039-332
Part Number QEWS52EA-106 QCZ9001-102M
Part Number QQL043K-101
Part Number 2802611 28C2611 28C2611
Part Number A75522
VII. Coin Door Maintenance
SPECIAL NOTE: if you have any questions about the coin acceptors in your game(s), please feel free to contact their manufacturers. Each manufacturer's name is PROMINENTLY imprinted on every acceptor mechanism. Metal mechanisms only: COIN MECHANISMS, INC. 817 Industrial Drive Elmhurst, IL 60126 Phone (312) 279-9150
COIN DOOR MAINTENANCE
METAL COIN ACCEPTOR MECHANISMS
Periodically, the metal coin acceptor mechanism(s) must be removed from the coin door and cleaned.
- Make sure the power to the game is off.
- Unlock and open the coin door.
TO REMOVE PUSH LATCHES. DOWN
PLACE PEGS IN SLOTS TO REPLACE PULL MECHANISM OUT Metal and Plastic mechanisms: COINCO COIN ACCEPTORS, INC. 860 Eagle Drive Bensenville, IL 60106 Phone (312) 766-6781
. Remove the coin acceptor mechanism as shown in Figure 7-1. O Push down on the two spring loaded latches. O While holding the latches down, pull the top of the coin acceptor mechanism toward you. O Release the latches and lift out the coin acceptor mechanism.
PUSH MECHANISM IN
Figure 7-1 Removing and replacing coin acceptor
- Clean the magnet of all foreign particles. See Figure 7-2. O This may be accomplished by swinging the gate open as shown in the above figure.
- Remove the cradles and undersize levers and clean the bushings. (A pipe cleaner makes a good bushing cleaner.) O Also clean the pivot pin.
- Whenever needed, the coin acceptor should be cleaned with hot water and cleanser in the following manner: O Place the coin acceptor in boiling water for about ten minutes.
O Next, use a brush and kitchen cleaner to remove all remaining foreign matter from the unit. Q Rinse the coin acceptor in clean boiling water. QO Dry the coin acceptor thoroughly by using filtered compressed air to blow it dry.
GATE OPEN AS SHOWN CLEAN MAGNET BY DRAGGING A SCREWDRIVER BLADE ACROSS SURFACE
Figure 7-2 Cleaning the metal coin acceptor
- To lubricate the coin acceptor: O Use ONLY powdered graphite and put it ONLY on the moving parts of the coin acceptor. These parts are called out in Figure 7-3. O Be extremely careful to keep the powdered graphite away from paths that are traveled by the coins.
- WARNING — DO NOT USE OIL TO LUBRICATE THE COIN ACCEPTOR.
- Check the coin chute for obstructions such as: paper, gum, etc.
- Reinstall the coin acceptor to the coin door. See Figure 7-1. O Place the two pegs at the coin acceptor’s base into their retaining slots. O Now push the top of the coin acceptor toward the coin door until it snaps in place and is held there by the two spring loaded latches
- Close and lock the coin door
APPLY POWDERED GRAPHITE HERE
UNDERSIZE LEVER
CRADLE
Figure 7-3 Lubricating the metal coin acceptor
SQUEEZE PINS TOGETHER TO UNLOCK SWING BOTH GATES OPEN
HOLDING BOTH GATES TOGETHER, PUSH UP AND PULL OUT
Figure 7-4 Opening the plastic coin acceptor
PLASTIC COIN ACCEPTOR MECHANISMS
The plastic coin acceptor mechanism(s) must be removed periodically from the coin door and cleaned
- Make sure the power to the game is off. 0 Reassemble the mechanism (it never needs lubrication)
- Check the coin chute for obstructions such as: paper, gum, etc.
- Reinstall the coin acceptor to the coin door. See Figure 7-5.
- Unlock and open the coin door. . . | C Place the two pegs at the coin acceptor’s base
- Remove the coin acceptor mechanism(s) as into their retaining slots. shown in Figure 7-1. ; C Now push the top of the coin acceptor toward O Push down on the two spring loaded latches. the coin door until it snaps in place and is held O While holding the latches down, pull the top of there by the two spring loaded latches. the acceptor mechanism toward you. 7. Close and lock the coin door. O Release the latches and lift out the mechanism.
- Squeeze the two pins indicated in Figure 7-4 together to open the mechanism and break it down into its three basic parts. O Clean the mechanism in hot soapy water. It never rusts. D Rinse the mechanism in clean hot water and allow it to dry.
7-3
ACCEPTOR CAN BE SET TO ACCEPT U.S. QUARTERS ONLY OR BOTH U.S. AND CANADIAN QUARTERS.
MAGNET
saan
SLIDE MAGNET TO EXTREME RIGHT (AS SHOWN) TO ACCEPT BOTH U.S. AND CANADIAN QUARTERS.
=
TO ACCEPT U.S. QUARTERS ONLY, SLIDE MAGNET TO EXTREME LEFT.
Figure 7-5 Changing the plastic coin acceptor to accept American or Canadian quarters.
7-4
DESIGNATION LIST
DESIGNATION * DESCRIPTION
ct,ce 47 mf 2Sv rd tant c3,c4 22mf 6v i C5,C6é 470mf 6v axelect C7-C10 Amf 50v ax.cr cP) 220mf 25v ax elect. CP2,CP3 dmf SOv ax.er
RILR2 2.7KN Vaw 5% CRBN: R3R4 2mm " R5-R8 In Vew'' .
U1,u2 MB3730
Jl Pay STRT. KKI56 J2 30" " " 26H "
HSA1,2 HEATSINK ASSY. MHI-MH4 HEYCO BUSHING
DIM. TOLERANCES Fast TRON UNLESS OTHERWISE SPEC CONCENTRICITY TI R 002 FRACTIONAL + 64 DECIMAL + 005 HOLE DIA + 002— 000 ANGLE 212° DO NOT SCALE DWG
CROSS REFERENCE LIST
DESCRIPTION QTY DESIGNATION PART NO
| mf 50vaxer | 6 | C?CIO, | 0986-008003100 |
CP2CP3
| 4.7 mf 25vrdtant 2 | CIC2 | 6986-008003100 | ||
| 2amf 6" | 2) | C34 | 0986-00800:1600 | |
| 220m€ 25vaxSlec 1 | CPA | 0986-00800-3200 | ||
| 470m 6v * | 2 | ¢5c6 | 0986-00800-1700 | |
| INV 2w 5% | 4 | RS-RB | 0062-02603 -1Xxx | |
| 2721/4w | 2 | R3R4 | 0062 -068B3-1Xxx | |
| 27K © | 2 | RLR2 | 0062-199B3-1XXX | |
| MB3730 | 2 | ulu2 | 0066 -188X x -Xx4x | |
| 2PINSTRTKKI56 1 | J2 | 3000 - 16367 - 0200 | ||
| Bu | oh | 2 | Sty2 | 3000-16367 -0300 |
| a | Jl | 3000-16367 -0400 | ||
| HEATSINK ASSY | 2 | HSAI, | A986 - 00010-£000 |
HSA2 HEYCO BUSHING 4 MHI-MH4 0017-00042-0014
| PC BOARD | ' | A080 - 90910-E000 |
MH4 +
THIS DWG IS CONFIDENTIAL & PROPERTY OF MIDWAY MFG CO.
MIDWAY MFG. CO. FRANKLIN PK., IL. 60131 ABALLYCO DUAL PWR AMP. AOSY bao A080-90910-E000 |[MO51-00986- EOIO
MT 89 DOMESTIC
MT90 EXPORT [ 2NS772 FERRITE BEAD Fel Riot O18
ssogowe | be
| mniigo | 7] c1os | vavoi | ||
| 1 | H | wer | 100) | |
| ' | ! | Por | ||
| i | 1 | R108 | ||
| 1 | 1 | oy | ||
| ‘ | ' | ies | SENSE | 4 |
| 1 | 1 | ' | COMMON | |
| ‘ | 7 | 0.220H | R2i6 | 6208 iNaOOL |
H ww bh
| j | 1 | c20s & | oaoa | peiz ot | ||
| ' | ; | ' | seorr T | rT | a |
‘ A
| : | i | Fey. | tH | |
| : | H | 1 | 2ns7e FERRITE BEAD | R10 |
1 ' ' ‘ toa loam 1 1
| 1 | 1 | os |
| tos | wre | (on |
ate
an
SENSE, tt
COMMON
EARTH GND ~ = OPTIONAL GND.
VOLTAGE. @” FUSE VALUE VARIES WITH APPLICATION
FROM X-Y MONITOR XFMR (OR ISOLATION XFUR
R201 us ane
Fei aot ERRITE BEAD oe +1vs dame
33-0 -Sengeczv) ne
ve
| ; | 100 | wA-4 Lowe ano |
bi 4:7 Loole ORD : sie
wi Jo! ree 0208 in9001 wet Waar e2 Toae | pair ino | So
- sev J8-1_ COUNTER ORIVERS ire 0 ai _GtSW/7.5AMP 14-3 Late ono Logie eno Laete ono ws TAK. BRD aK
sue ean. irow us 7 + ioe +1 cor vaio co arowr
3 Se v4-2 - SENSE (SV)
45-10 COUNTER RTH
UNREG. AUX. V 95-14 CONTR, LAMPS. D108 UNREG. FILTERED V s8-13_ AUOIO CHT. --+
wus 80.72" +1 cio 101-DIOS: bonne! aT00Me s8-11_CONTR.LAMPS RTN.AUK.V. AUDIO cxrT. ~Ra08 == 10M +8
‘noe 2h cron oe SYNCHRONIZATION. —
| TK cam, | gon | Bo | AC SYNCHRONI | 1 |
| L | 1 | OOIMF wien | 3900 | ‘ |
- "ONE SHOT ~*~ ‘2naaor PROVECT_ENG: L. DEKKER [SATANS HOLLOW To 1 PER, MIDWAY MFG. CO.
TF
= i 5/3/82 POWER SUPPLY [25VA ‘W/CKT SUPORT A082-90412-D000 M05 1-00945-0007 i
[°*|
al 4 oa ere sro Tal T + 3 [" cr
F ai Ale
19P80 ko} eps! ee2z sera
coer |
‘
\ yeree | Lr
cPéS -
| oTyY, | DESIGNATION. | PART NOS. | ||
| fermcoun | wea | 0986 -0804~ 4200 | ||
| {@FINCONN. | 1 | v2 | 0986 | - 00804-4300 |
| "geincont, | 1 | aa | 0986-00804-4400 | |
| WePINCONN | 1 | a | 0986-00804 -4500 | |
| 2arnconn | 8 | 83,J4,J5,96N7 | (0986 — 00804-4700 | |
| rors | 19 | swi-owis | 0986~-00804-4000 | |
| inns | \ | sw | 0986. | 00804-3100 |
| rAL | \ | xTAL | 0986-00804-4900 |
2 0986--00804-4100
| 5. | I3.04, 1867 | 0986-00804-4800 |
| ain] yuo satans' Hallow | MIDWAY MFG. CO. Pom PER Tannen ee SUPER CPU BOARD ASSEMBLY ORWNO. IMO51-00941 - A015 A084-90010-A9. LIST DESCRIPTION. isa “DESIGNATION. 33PF SOV AK.CER ‘ cio! SQOPF SOVAX.CER. 2 ¢104,C200 O.OIUF BOV AX. CER. 7 CP2-CP7, CP8-CP14,CPI6-CP20,
O.1MF 1OOV MYLAR O.IMF SOV AX, CER. IOMF 25VAX. TANT.
470UF 16V AX. ELECT 4 HCIOS—Cil4 SEE NOTE
- OHM I/4w CREN. °
220HM" . 100 OHM” 220 0HM" 3300HM" 470 0HM 510 OHM 560 OHM" 8200HM" 1K OHM. * . Nuun ==
| 12k OHM" | ia | ' |
| 2k OHM * | * | 3 |
4.7 OHM .
4.7K 6PINS.LE 2 4.7K iUPIN SLE. 2
Insel? 1 rrr y '
2NA403 ' 2Nai23 MPSA7O. o-
Taso4 7aLs04 7aLso8 TAL S20 7aLs27 7aLs32 74s74 7aLs7@, Taisee 74LS133 74LS138 7aLsi53 TaLsis7 ee en
Tacsiel 7aL sire 7as244 7aLs248 74LSZ73 TAL S307 MK3360 MK3382 4017
4083 cmos RAM ene 9349 HOT GEN. V-T GEN VEHGEN wisc CUSTOM NVR CONTROLLER EPROM EPROM EPROM EPROM EPROM EPROM EPROM EPROM === ee
SEE NOTE 5 toun ww 8 1OUH MOLOED e
SPIN 1c SOCKET 2 16 PIN 2
| 20PIN" | " | 3 |
| 24PIN" | * | 2 |
| 28 PIN” | 7 | 10 |
40PIN” 1 Spez-ce ze. caso cosy. 30, CPS2-CPBT, Epbe-crea cis-cige _ clos cide -cP 6s CP8,CP2I.CP29,CP3B cPsi CPICPIS,cPSB,CPES
RI26,RI27,RIS3 °134, RI4G,RI4 R06 RIS IOS: R108, RI) RI21,RI28, R123, RISO, RU7,RIE RI20 R102,RIO7,RIO,RIIG, Ri24,RIZBRIS7;RZ01, R203-R207
Rio RIZS WSR RiO1,RINZ,R208,R209
RMIRM4 RM2,RM3,
dio!
alot at02 a103-a108
eu.ci2 e8 80,811,£4,E5 A9,A10 B10,c9 €7,67 a7
61.66 010, D1, 12, F8, F9, 69,610 AL F7.68 BI.Be ABES F4F5,62,65 az es Bs F2
FL Bz Fe Flo ar Gia Biz ou e3 oz
oa os
G3 oa ROM EPROM OPTIONS KIT
LIOI-L 108 UIO6-L 110 un=Lne
ICSAI2, ICSGI2 ICSAIZA, ICSGIZA, IcsBl2, ICSES, tcsout iese2, 1cSFe IcsB3, 1csD2, Ieso3,1¢s04, ies05,ICS06. 1€S07, ICSFIO, 1CS63,ICSG4, tesa 0988-00800-2200
(0986-00800-0100 ‘0R88-00800- 0200 (0986-00800- 340.
00800-3300
0062-O5IB3-IXXX (0062- 063B3-1KxXx (0062 - lOBS- 1xxx 0062- 13383-1XXxx 0062-144B3-1Xxx (0062-1S6B3-IXxx (0062- 1S9B3-IXxx 0062-162 63-1Kxx 0062-174B3-1XXX 0062-17983-IXXx
0062 - 18383- IXxx (0062 - 193B3- 1xxx (0062-21183 - 1xxx
0986-00804-2400
0986- 00804-4€00
0986- 00801-0300 0986- 00801-0100
0986 - 00802-0200 0986- 00802-0100 9986- 00802-0300
0986- 00803-0400 0986- 00803-1007 0986~- 00803-1006 (0986-00803-1004 0986 - 00803-9500 0986- 00803-0600 0986- 00803-1500 0986 -00803-1008 (0986 - 00803-9900 098¢—00803-1002 0986—00803-1900 0986-00803-1000 0986-00803-9700
0986 -00803-1003 0986 - 00803-9800 (0986~ 00803-0800 0986-00803-0900 (0986 -00803-L001 0986 - 00803- 220+ 0986- 0080?- 7800 0986-00803-7700 0986~-00803-8700
0986- 00803-2000 0986-00803-8100 0986-00803-1008 0986- 00803-9600 0986 --00803- 8800 0986-00803-9000 (0986 -00803-9100 0986-00803-9200 0986~00804-3200
0628 - 00803 - 0100
0986-00804-0200 0986-00804-3309
0986-00804-3600 0986-° 0804-3700 0986-00804-3800
0936-00804-3400 0986-00804-3900
0986--00804-3500
DESIGNATION LIST
DESIGNATION DESCRIPTION.
cl, C101
CPI-3, 5-10 CPI2-20,22-27, CP29-33, 35,36, CP38-41, 43-47, .Olpt AX. CER. cP 49-54,56-61, 63-67, 69-71,
P4,11,21,28,34, CP 37,42, 48,55, 1Opt 25V AX, TANT CP 62,68
RIOI-119,201,202, 1K 1/4W 5%
RMI,2
RMS
1c 1c 1c Ic ic ic 1c
Ic 1c
1c 1c 1c 1c 1c
ic 1c 1c 1c 1c 1c 1c
1c 1c
tc 1c 1c Ic 1c
1c 1c sic 1c
1c
Ic 1c 1c ie 1¢
Ic rd 1c 1c 1c ee NoOoeun—
eaaeooo aoeeun-
aanan0o0 VOesun—
aaa ommmam eov0000 eerun Noanun-
arsun
©0000 enun- 100 pf AX. ELECT 100 PLAX. CER.
@PIN IK SIP
1OPIN IK SIP
EPROM 74 S157 74.8157 74.SI57 74 LSI57 74 SiS7 74 LSIS7
EPROM TaLSiee 74.8194 TALS 32
74.832
EPROM TALSI94 74 LS194 TALS 32
TALS 32
EPROM TALS 194 TALSI94 748273 TA LSIST TALS IST 748273
74LS194 T4LSI94 TALS 374 74 LSIST
T4LSIST
7400 74504 TALS 374 74 LS 187 74 LS IST
74S 86 T4LS20 74.5283 74.8283 74.5283 DESIGNATION
rxrxxrzrr oonun—
Ic Ic
ic 1c 1c arnun
Ic 1c ic 1c 1c 1c KAKA aanun—
tc 1c 1c ic 1c ic Ic eereree Vowsun-
ic Ic 1c 1c 1c 1c gerrrre AO RUD
1c 1c tc
Ic 1c zzzzzzz Nour en-
1c
ICS Ai,B1,C1,01.
ICS B5,6,C5,6, J5,K5,L5,M5.
ICSK6,L6.
13,445
Jwi-8
8B1,2 DESCRIPTION
74.886 Taira TAS 74 T4175 T4174 T4LSI87
74.830 7430
TALS273
TALSIST
74161 7430 7474 74161
214-2
T4LS20 7408 T4a74 T4LS263
24-2 TALS 157
7430 7432 Tas 74 T4161
TA LSIST
“430 7427 74.8273 74.8203 74S 248 7404 74 LSIST
28PIN IC SOCKET
22PIN IC SOCKET
IBPIN IC SOCKET
24PIN SOCKET
JUMPER WIRE
BUSS BAR
| K ics | € Sics | ne | |
| ve | 8 | us | va |
ie. set}
| ne | a | us” | na |
D
| £8 fs Lr .
| o7 | |] | Los] | 02 || | Ds |
| «> | £B | $i | ||
| ct | €* «| | cs | ‘cs | [e+] |
| ni | "es | *° cs | [es] | |
| aD | ern | TED, | ||
| Ka) | Kaa) | Ge | CD |
PROJ. ENG.
co morse
STL SSE RIO ax. cer,
| =D | 60 | .O1 pt SOV AX. CER | CPI-3, | CPS-10, |
cPI2-20,CP22-27, CP29-33,cP35,36, CP38-41,CP43-47,
| 3 | we | [wr | CP49-54,CPS6-6i, | ||
| . | Cera | CP63-67,CP69-7I. | |||
| . | rw | Se | " | 10 pt 25V Ax. TANT. | CP4,11,21,28,34,37, |
, CP42,48,55,62,68.
| . | . | ) | i | if | M | T. | Lf |
| ms | we | ™ | 2 | 100 wt 25V AX. ELEC | C12 | ||
| GID | Gy | GD | 21 | 1K 1/4 CRBN, FLM. | RIOI-119, 201,202, | ||
| Chae) | 2 | 1K 8 PIN SIP | RMI, 2. | ||||
| a} | [ | ? | ' | 1K 10 PIN SIP | RMS | ||
| ‘3 | as | it | 2 | 2u4-2 | K6,L6 | ||
| i) | 7400 | Fe | |||||
| Gwe | 78 | @ia> | |||||
| Cia) | ' | 7404 | NG | ||||
| ' | 74804 | Fs | |||||
| «3 | «a | x | | \ | 7408 | v2 | ||
| “ | 2 | 74.820 | 62,u1 | ||||
| SD _ | rie. | — | , | 7427 | N2 | ||
| a arr | 4 | 7430 | J3,K2, MINT | ||||
| | | ou | v2 | bod | 74LS30 | v2 | ||
| yo | 7432 | m2 | |||||
| Gre) | 4 | 74LS32 | 84,7,C4,7, | ||||
| Crna | 2 | 7474 | K3.L3 | ||||
| 7 | 2 | 74874 | 43, M3 | ||||
| ne | [ee | J | Le | | | 2 | T4LS86 | Gi, Ht |
| 8 | T4LSiS7 | A2,3,4,5,6,7, 05.6, |
£5,6,F5,6,66,H6, J6,LTM7,.NT. ~ fp a) @
| ins | 3 | 7a161 | KI RAM, | |||
| as | [ a | |] | = | 2 | 74174 | 42,5 |
| 1 | 74175 | 44 | ||||
| GD | Geb | en | ww | 6 | TaLsi94 | 82,3,C2,3,02,3,2,3. |
| TK) | 1 | 74L8245 | NS | |||
| aw | a) | TaLS273 | 04,7,04,N3 | |||
| [rs] | Lee] | me | 8 | 74.$203 | 63,4,5 L4,N4, | |
| CD | Gd | 2 | T4LS374 | care | ||
| . | on | Mes | 8 | 93422 | 85,6,C5,6, 15, |
oa KS,L5, M5
| == | ce? | ' | EPROM | Al | (VGA) | |
| : | er) | 1 | EPROM | 8! | (vee) | |
| ED | ep | 3 | ' | EPROM | ci | (vec) |
| 1 | EPROM | Dt | (veo) | |||
| ps” | o@ | 1cS | 8 | JUMPER WIRE | Jwi-8 | |
| ce | 2 | euUSs BAR | BBI.2 | |||
| . | ep | es | 1 | P.C. BOARD | ||
| cs | C2 | Gap | 3 | 24 PIN SOCKET | 5 3,4,5 | |
| eel | 4 | 28 PIN SOCKET | ICSAI,BI,C1,Dt | |||
| > | es | eD | an | 8 | 22 PIN SOCKET | 15 85,6,C5,6, |
495,K5,L5,MS
| [es =] | cz | L____] | 2 | 18 PIN SOCKET | ICS K6,L6 |
esp en Gee . 16S ; a as a2
| ee | a | | |
iG. ATISH GHOSH
vst 0 On SATANS’ HOLLOW, womene | PER ASS'Y DRAWING VIDEO GENERATOR P.C A084 -91399-A941 MIDWAY MFG. CO.
M051-00941-A007 SARE Bt500- 1000 0986 - 00800-2800
(0986 -00800- 2400
0906-00800 -1800 0062-17983 - xxx 0986 -00804-1100 0986 - 00804-1000 0986 -00803 - 2300 0986 -00803-2800 0986 -00803 - 8300 0986 -00803-3100 0966 -00803-3200 0986 -00803- 3400 9986 -00803-3500 0986 -00803-3600 0986 -00803- 4300 0986 -00803-4400 0986 -00803- 3700 0986 - 00803-4500 0986 -00603-4100 0986 -00803-4200 0986 -00803-2400
0986 -00803- 2500 0996 -00803-2600 0986 -00803-2700 0986 -00803- 2900 0986 -00803 - 3000 0986 -00803-3800 0986-00803- 3900 0986 -00803-4000 0986 -00804-0800
ROM/t PROM OPTIONS KIT 0626-00803-3026
(0986 - 00805-0200 0986 -00804-0900 4080 -91399-£000
0986 -00804- 4700 0986-00804-0300 0986 -00804-0700
0986 -00804-0600
PIN
eevee
PIN Vv AUDIO
Jt AL 1 TAC, 2.7K 2 L. AuDIE L tL. SHIELO KEY ¥ AUDIO RETURN R. AUDIO R. SHIELD v auois b
SHIELO
¥ AUDIO
J2 R2
Re 2.7K R- R KEY l+ N.C. L- Ounwn AR, SHIELD
Vv AUDIO
i CPL cP2 aL cP3 220ut . buf . Lut 2sv
vauoie = >— RETURN
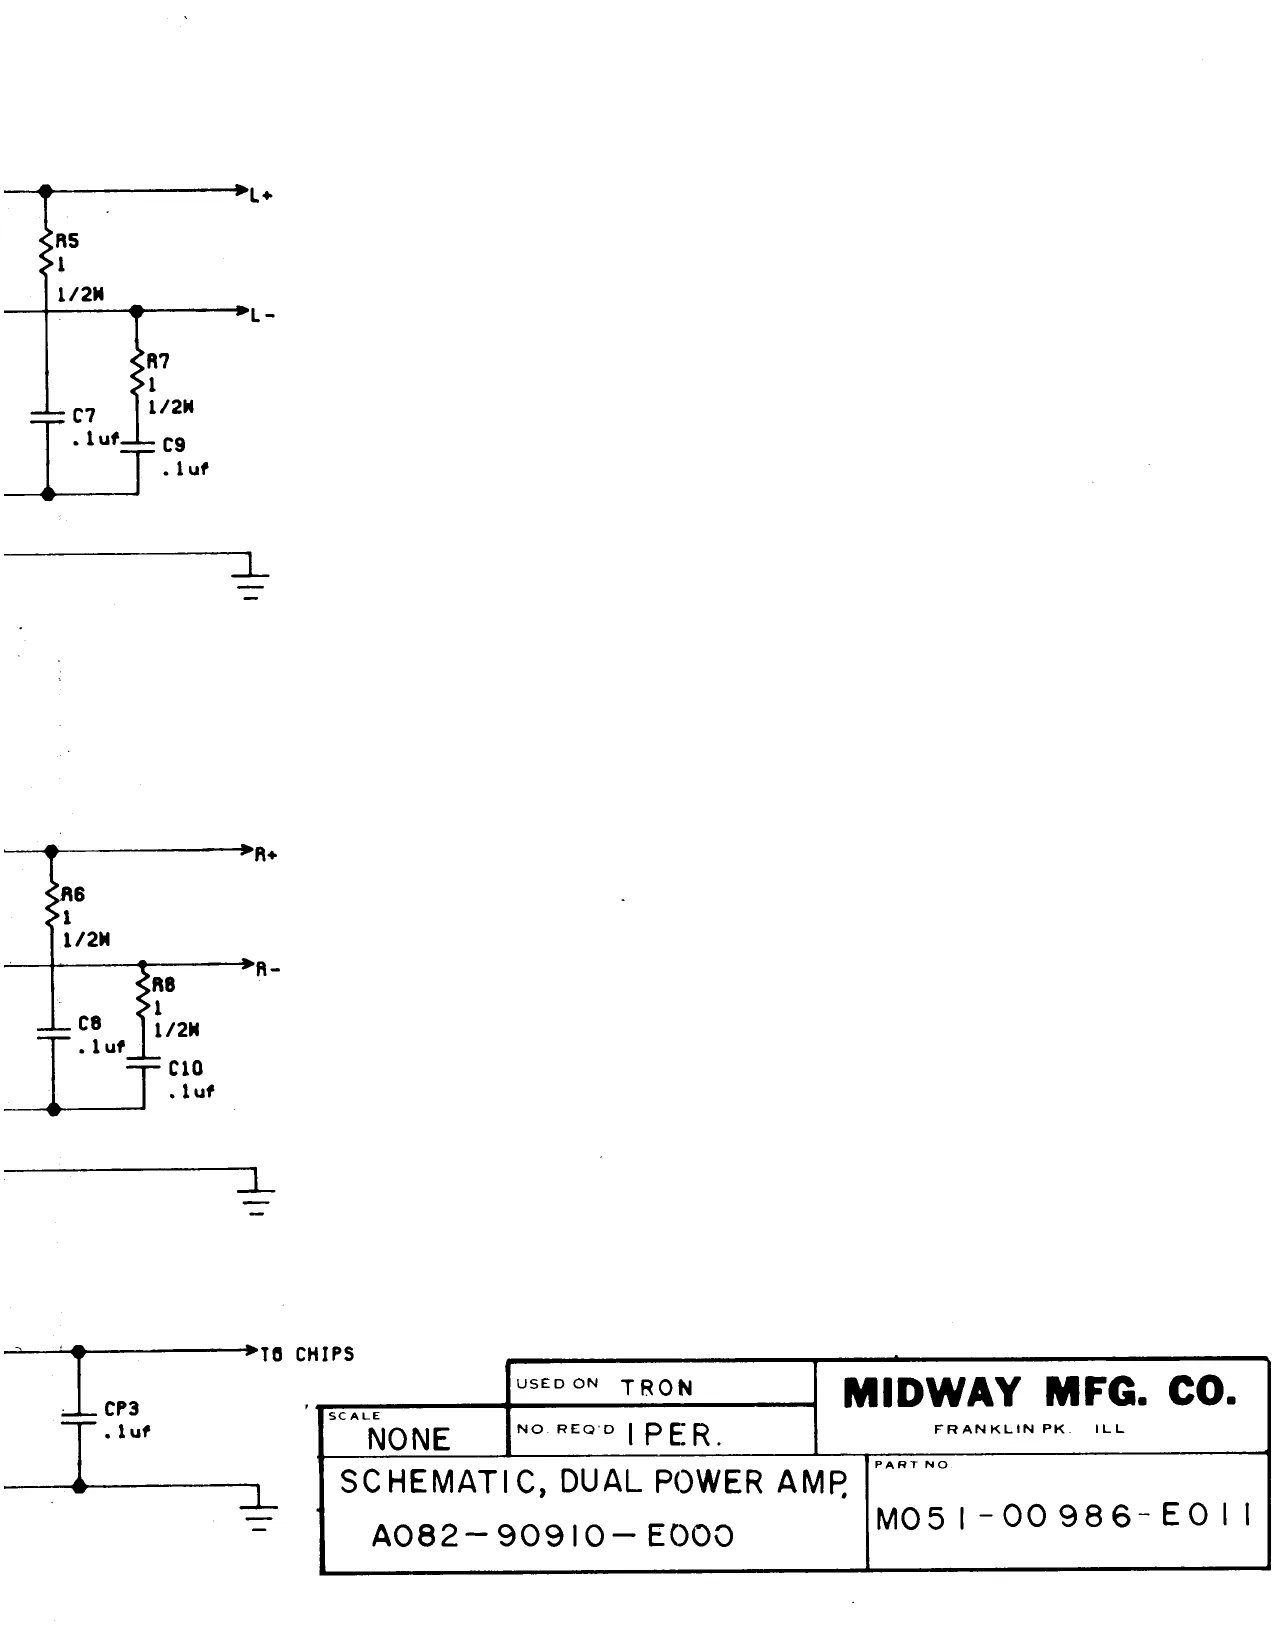
This page is a drawing, shown as the original scan.
od MHHSAZE
Sod MHHSAZD
Ho 1018
' MO 1046 et ! MHO103E, MHO 1010 ‘ MHHBATE oe ma1030 ma 1040 Ne wiki sia Q103
MHa103¢
wnoro48 rens-o0 Oe Ha s018 . Mnnsazc Mnoro4n i MMNSANC
Ho 1038
MHO1O1A HO 1034 !
a we lee | MAHA 1B MHHSA28
ke MHHSAYA P.C. BOARD. we MHHSAZA
MHHSAIC
103 aie
MHHSASA
DESIGNATION #
Q101 Q103
MH HSAIC
MH HSA2C
MH HSA3A,3B. MHQ101A
MHQ101¢ MHQ 1010 MHQ101E
MHQ 103A, MHQ 1038 MHQ 103 MHQ 1030 MHQ103E
MHQ 104A MHQ 1048, MH 1046 MHQ 1040 MHQ104E,
DESCRIPTION
2N3772 XSTR TIPS1 HEAT SINK
4-40X8 SLT PAN
WSH 4-120-.250-018
WSH 4-120-.250-018
SHOULDER WSH
INSL TO-3
INSL TO-220
4-40 HEX NUT
3 NOTE DESIGNATION LIST
DESCRIPTION
2N3772 XSTR 2N3772 XSTR TIPat HEAT SINK
SHOULOER WSH
SHOULDER WSH
SHOULDER WSH 4-40X8 SLT PAN SHOULDER WSH INSL TO-3 WSH 4-40-.250-018 4-40 HEX NUT
4-40X8 SLT PAN SHOULDER WSH INSL TO-3 WSH 4-120-.250-018 4-40 HEX NUT
4-40X8 SLT PAN SHOULDER WSH INSL TO-220 WSH 4-120-.250-018 4-40 HEX NUT
CROSS REFFERENCE LIST
DESIGNATION #
101,103
HS1
MHQ101A MHQ 103A MHQ1044
MHQ101D MHQ103D MHQ1040 MH HSA1C,2C MH HSA3A,38 MHQ1018 MHQ103B MHQ1048 MHG 1016 ‘MHQ103C MHQ104¢
MHQ101E MHQ103E MHQ104E
4% THIS ASSOCIATED HARDWARE 1S ON POWER SUPPLY BOM
PROJ. ENG, L. DEKKER
BO NOT SCALE OWS, ANO SHOWN HERE ONLY FOR REFFERENCE .
KICK
1 PER PART #
0945-00808-0100 0945-00808-0200 0945-00806-0000
0017-00101-0810
0017-00104-0071
0945-00807-0000
0945-00809-0300
0945-00809-0600
0017-00103-0002
MIDWAY MFG. CO.
MOS! — 00945 - A008
POWER SUPPLY 80,
SARIS HOUOW tm |
FENN RC eo __
This page carries no recoverable text. It is a drawing or a photograph. See the original scan.
DESIGNATION LIST
| DESIGNATION. | DESCRIPTION | DESIGNATION. | DESCRIPTION. | |
| cio1-c1o3 | lOME 28v AXTANT | nar | 4.7m 1OPINSLP, | |
| cioa-cier | MF SOV AX. CER | aM RMS | 27K IOPIN SIP. | |
| 6128-C129 | 47PF SOV AK. CER | RM? | 47 8 PIN SLE. | |
| os | TOME 25V AX. TANT | bind | pris | " |
| cusaveis7 | IWF 20V AK TANT | rue | oe | |
| cise | (OMe 25 aX. TANT. | Ln | wee |
cise {O47 WF OOVMYL AR ar To) <OIMF SOV AK, CER.
| cia | 1OOPF 50V AX. CER | DIOI-DIOS- | IN«I48 |
| C143 | sIMF SOVAX. CER. | DIOS-DIO7 | Inala |
cise S3PF Sov ax CER
| cias-cise | {0022 I0OV [O% MYLAR | aici aos | mp0 |
| cvs7-ci89 | IME 20V ax. TANT | 4 | ene |
zie! 380 PF Sov ax CER C162-C164 IMF 20V AX TANT cies SROFF S0V AK. CER ci6e,c167 IOWF 25V ax TANT
| 32 | (OMF as ax TANT | 7408 |
| crs | VOIMF SOV AX. CER | 7aLse73 |
| c501-c509 | SIME 80V AX.CER. | 7418374 |
kx RAM
| cri | 470MF I8V AX.ELECT. | fomsemoue | |
| cre. m2 | ‘MF S0V ax CER | : | nh |
| cris | 470MF I6V AX. ELECT. | : | 2 |
cria_cpve ‘IMF SOV AX CER
| ce20 | TMF 25v AX. TANT | reuseae |
| cpat-ce27 | OIF 50V AX. CER | fieen |
| cPe9-cP33 | “oumr Bov ax. cer | Satsae |
| crse | IOMF 25VAX TaNT | bin |
| cras-cras | OIMF SOV AX CER | seals |
| par | ‘STOMP lev AX ELECT | rausere |
| cpae-cPst | IMF SOV AK.CER | TaLs32, |
| cPs2.cP5s | IOMF 25V AX TANT | Teuse7d |
| cra | 47OMF I6V AX. ELECT | dusise |
ce2oe choo OME 25V AX TANT
ices 7407
| RIOI-RIO? | (4.7% OHM 1/4 W 5% CARBON | “CIO | MC3403 | ||||
| R10B-RIZt | (220 0M" | “cH | T4LS04 | ||||
| RI35 | 33K | ‘ | "ez | MCI4024 | |||
| RI3ZB, RIA) | igok | ” | “Cs | 7427 | |||
| wae | look" | " | cia | 7418367 | |||
| 8.44, RIS | 620K” | . | “D3 | LM3200, | Q | ; | ic) |
| aise | ‘on™ | “ | “06. | racsoz | fone | ||
| Riae | 100K | * | "07-09 | ciao | arn | ||
| RI49,R150 | 620K | % | "t | 74190 | > | ‘ear ca | |
| asl | 1K | " | “ie | PROMSBzA | |||
| mise | wes | 74166 | L | ||||
| iss | a | " | rauseaa | ||||
| R64 | IMEG" | ” | "E10 | MC3403, | |||
| RI5S,RIS6. | 10K | “ | " | "EN | T4161 | ||
| i857, R158 | eK | : | “ele | 7ai26 | CROSS REFEF | ||
| mecaie! | 330 onm | see | ras2 44 | ||||
| R62 | (2 200HM | " | “F3-F5 | TALsiol | |||
| fies | tee | » | “FoF? | AY-3-8910 | “DESCRIPTION. | wir | |
| R64 | 220Hm “ | a | “FB-FIO | T4LSi9l | — | 7 | |
| 165,166 | one | . | fr | vara | |||
| Rirs-n'78 | See" | » | “Fi | 74504 | |||
| M173, RI96 | 2m” | . | 33°F SOV 5% ax.ceR | \ |
47°F SOV AK.CER 2 IOOPF SOV 5% AX CER ji
| 'CSAB-ICSAIO | 24PINIC SOCKET | ‘330PF 5OV AX. CER. | 2 | |||||
| RI97-R202 | sex vaw | “Ale | 40PIN" | . | 10022 MF 100V 10% MYLAR | 12 | ||
| R203-R208 | 3K | CO | “pie | 16 PIN" | " | :O47MF 100V MYLAR | 1 | |
| Laepnlt | an | . | * F6E7 | 40PIN' | " | SOIMF SOV AX. CER | ar | |
| R2t3 | 27K | “ | “ | |||||
| 82 °4-R2I9 | 33K | * | “ | JNs2 | 24 PIN KKIOO RT. ANGLE CONN | |||
| %220-R222 | 13K | . | i | J3 | 5 PIN KKIOO" | - | «IMF SOV AX. CER. | 34 |
| R224 | 2%" | " | 3 PIN KKIOO" | " | IMF 20V AX. TANT | 8 | ||
| 82.25.8226 | am | ° | . | a4 | 13PIN KKIOO" | * | 1OMF 25V AX. TANT. | 18 |
| R227 | 1K | ~ | i | 5 PIN KKIOO” | ||||
| noes | am" | we | ‘opin | “ | 470 WF V6v Ax ELECT | ‘ | ||
| k23i | 300 04M" | : | 4 PIN | . | ||||
| 2232 | a | s | We | TPN | " | 22 oWM 1/W5% CARBON | \ | |
| ness | 3x | 2 PIN | tooomm | " | ' | |||
| R234,R235 | 47K" | . | 2200HM " | “ | 34 | |||
| R239 | 100 OHM” | “ | 300 OHM " | “ | 1 | |||
| R301- R306 | 2.7% | ” | : | (330 08M" | " | 2 | ||
| nso! | te | . | ee | 3 | ||||
| aoe | aK | " | awi,owe | JUMPER WIRE | a | ‘ | ||
| Ra03-R404 | ‘33K OHM" | " | am” | id | 7 | |||
| R408-R407 | 4.7K" | * | LEDS | YELLOW LED | 3K | ' | ||
| RSOI-R509 | 220 OHM" | i | aK" | . | 9 | |||
| 510 | aK” | “ | ||||||
| 5.6K | " | i | \2 |
tox *
| sw | Ad | P | ae | i | 2 |
| ewe | Push BUT TON Sw. | 2 | : | i | |
| XTAL | 16 MHZ CRYSTAL | 100K | 2 | ||
| 180K | . | 2 |
620K
| naio!-mnaios | swap | SaeK | : | 3 |
cog bore
$f] DESCRIPTION.
8200HM BPIN S.LP KOPIN S.L.P 2.7K OPINS.L.P. 4.7K 8 PINSIP, 4.7K JOPINSIP.
Inia
an44os TIP 110 2a
rarso2z ray so4 74s04 7406 7407 74.808 | rear 7aLsse 7474 74126 74.8138 7416:
74166 racsi7a 74190 7aLsio 7acs2aa 7a $245, 74.8273 74.8367 TaLs3re 74Ls670 AY-3-8910 M3800 Mc3a03 wci4016 mciaoza PROM SB2-A RAM IK X 8. ROM/EPROM 0
m2
2-80:3680)
DESIGNATION. PART NOS.
cia (0986-00800-0900 ci28,ci2e 0986-00800-2800 cia (0986 -00800-1000 c161,c16s (0986 -00800-1300 c145-ci56. (0986-00800-1200 c139 (0986-C0800-2600 P2-cP12,°PI4-CPI9, (0986-00800-2000 Gpai-ce27cp29-cP33, €P35-cP46,CP48-CPSt, ci40,ci73 c104-C127,c143,C80-C509
2P34,cP52-CP53,CPZ02-CP204, C10) COR.CI31,C138,C166, C167, C172 CPLCPIS,CPA7%,CPS8
Rise R239 R108 -R131,R162,R501-R509 R23) RIGO-RIB! FI53,R227,R401 RIS7,RISB, RIGS R3OI- R306,RS10 R233 RIOI-RIO?, PIGS.R166,R2 25,226, R228,R232,R234,R238,R402, R405 R407" RI73-R178, RI9T-R20Z P86, RIS!,RISS,RIS6 R209-R21!,822U-R222 R179, R196 R213,R224 RI36,8203- R208, R24" RZI9,R403 -RAOS Ri42,R148 R138, RL4E Ri44,R145,8149, R150 8152,R154 0986 -00800-1100 (0986-00800-1400 0986-00800-0700
'0986-00800-2700
(0062-06383~iXXx (0062-1 1083-1 xXx (0062~133B3-1XXx 0062~141B3-1XXx (0062 -144B3—1XXx. (0062~ 17983~ IXxx (0062~( 83B3~1XXX OG. “MABE 1X (0062 ~ 201 B3-1Xxx 0062-211 B3-IXAX
(0062-21583 ~ 1xxx 062-2278: o062-23383-) (0062—24583-ixxx 0062-24 783-1KxX (0062 ~ 25183-1XAX (0062- 27583-1Xxx (0062-28783-IXxx 0062- 31383-xx (0062~32383-IXXx 16 Pini SOCKET 24PIN” . ‘40 PIN"
ZPINKK 100 RT, ANGLE CON! 3PIN apn” SPIN" 7PIN I3PIN" WePIn 24PIN"
JUMPER WIRE
YELLOW LEO
8 POSITION DIF Sw IOPOSITION DIP SW. PB SWITCH
16 MHZ CRYSTAL W/3RD LEAD
SNAPS
PROJ.ENG.: C. MEONICK
DO ROTSCALE OME al
eee ee pune eee -- Lg ee woe DESIGNATION
Rue RMO RM2 ~RMS, RM? PM, RMI,
DIO’ 103,108 ~ D107
e104 2191 0°03
87,88, 812,813 eM
bis. aa on F 3-65, FB-F 0 87,84,85,€2.F2 ‘au aa cia aS 89,81 Fer?
10,610 07-09 cre
aS a? as) cPROM/ROM ag J opTiONS KIT aio! ai2
wespi2 C5AG - ISAO (CSAI2, ICSF6ICSE7
aT J us 43,94 ve va ry dhge
a swe
sw3 swi swa
TAL
MHQIO!- MHQI03 LARTNO:
0986-00808-0800 0986 -00805 0600 (0986-90805-0500 (0986-00805-0400 (0986 ~-00805-0300,
9986-00802-0500 9986-00802-0800
0986: 00803-7400 0986-00803-6909 0986-00803-6600 (0986-00803-7600 0986-00803-5900 (0986-00803-7300 9286-00803-7200 (0986 -00803-6100 0986-00803-6700 (0986-00803-6800 0986-00803-6500 (0986-00803-5100
(0986-00803-5300 0986-00803-7500 (0986-00803-9400 3986-00803-5600 (0286-00803-4800 0986-00803-6400 0986-00803-4700 0986 -00803-7000 0986-00803-4600 9986-00803-6300 0986-00803-8500 0986-00803-4900 (0986-00803-5000 0986-00803-620 (0986-00803 -7100 9986-00803-8200 (0986-00803-8000
0628 -00803-3000
(0988 -90803-5500
0986 -00804-1400 0988-00804-1600 986 -00804-1500
3000-16366-0200 3000 -16366-0300 3000-1 6366-0800 3000-1 6366-0800 3000-1 6366-0700
0986-00804-4700
(0986-00804-4000
0986 -00804-2000
(0986 -00805-0900 (0986-00808- 1000 (0986-00805-1700
(0986-00805-1100
(0017-00007-0134
[-s<><~samns'Hoow | MIDWAY MFG. CO.
fan 97 1/82 COMPONENT AYOUT DRAWING ‘SUPER SOUND 1/0 F.C. BRI A084-90913- A941 MO51- 00941 -A0I6
This page carries no recoverable text. It is a drawing or a photograph. See the original scan.
This page carries no recoverable text. It is a drawing or a photograph. See the original scan.
a
me
=H os oe ee ak #8 SE aes ae? ol FY
® {33 | <a reree Te
iBgvcc L, 88-10 “
E — ? IE sa) [ett le
fe Pras om A GHOSH NONE few 5 (ONE) SCHEMATIC ORWG SUPER CP ‘A082 -80010-£000 By MIOWAE MED.CO. {ids-cco8s-eove